33
KIT 12: THE HEAD AND SKULL
3
4
5
6-1
12-1
12-2
12-2
12-1
8-1
6-1
7-1
12-5
12-5
12-5
12-5
12-5
12-5
12-5
9-1
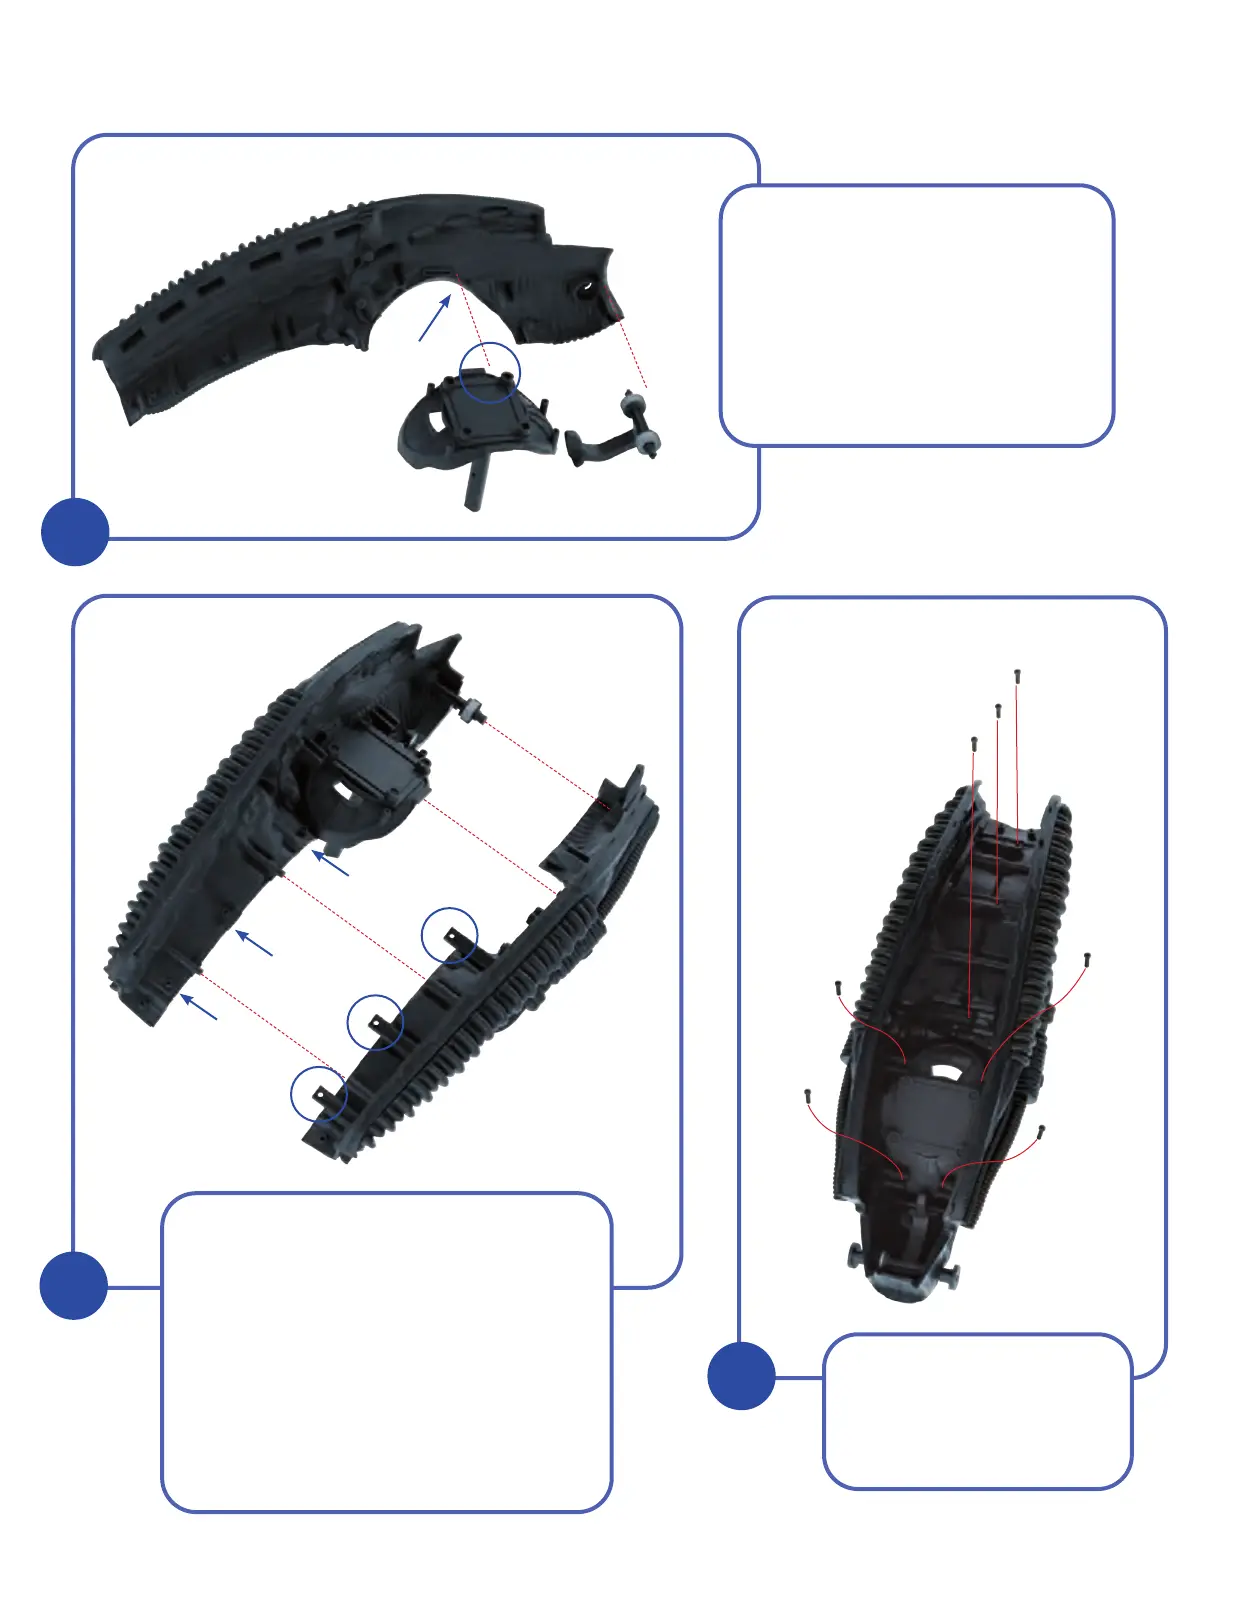
Take the left head assembly 6-1/7-
1 which was constructed in kit 7.
Insert the tab at the side of Head
12-1 (circled) into the slot in the
head section 6-1 (arrow). Orientate
the Lower Jaw 1 12-2 as shown
and fit the end into the hole at the
front of the head assembly 6-1/7-
1, as shown.
After making sure that the
left and right sections are
flush together, secure the
parts together with seven
2.3x6mm screws 12-5.
The right head assembly 8-1/9-1, which
was last worked upon in kit 10, is now
joined to the left head assembly 6-1/7-
1. Bring the two sections together, firstly
by inserting the free end of the Jaw 12-2
into the hole at the front of head part
8-1. Next, insert the tab at the side of
the Head 12-1 into the corresponding
slot in the right head assembly part 8-1.
Lastly, align the tabs on 9-1 (circled) with
the screw sockets on 7-1 (arrows). These
actions are completed at the same time.