2
3
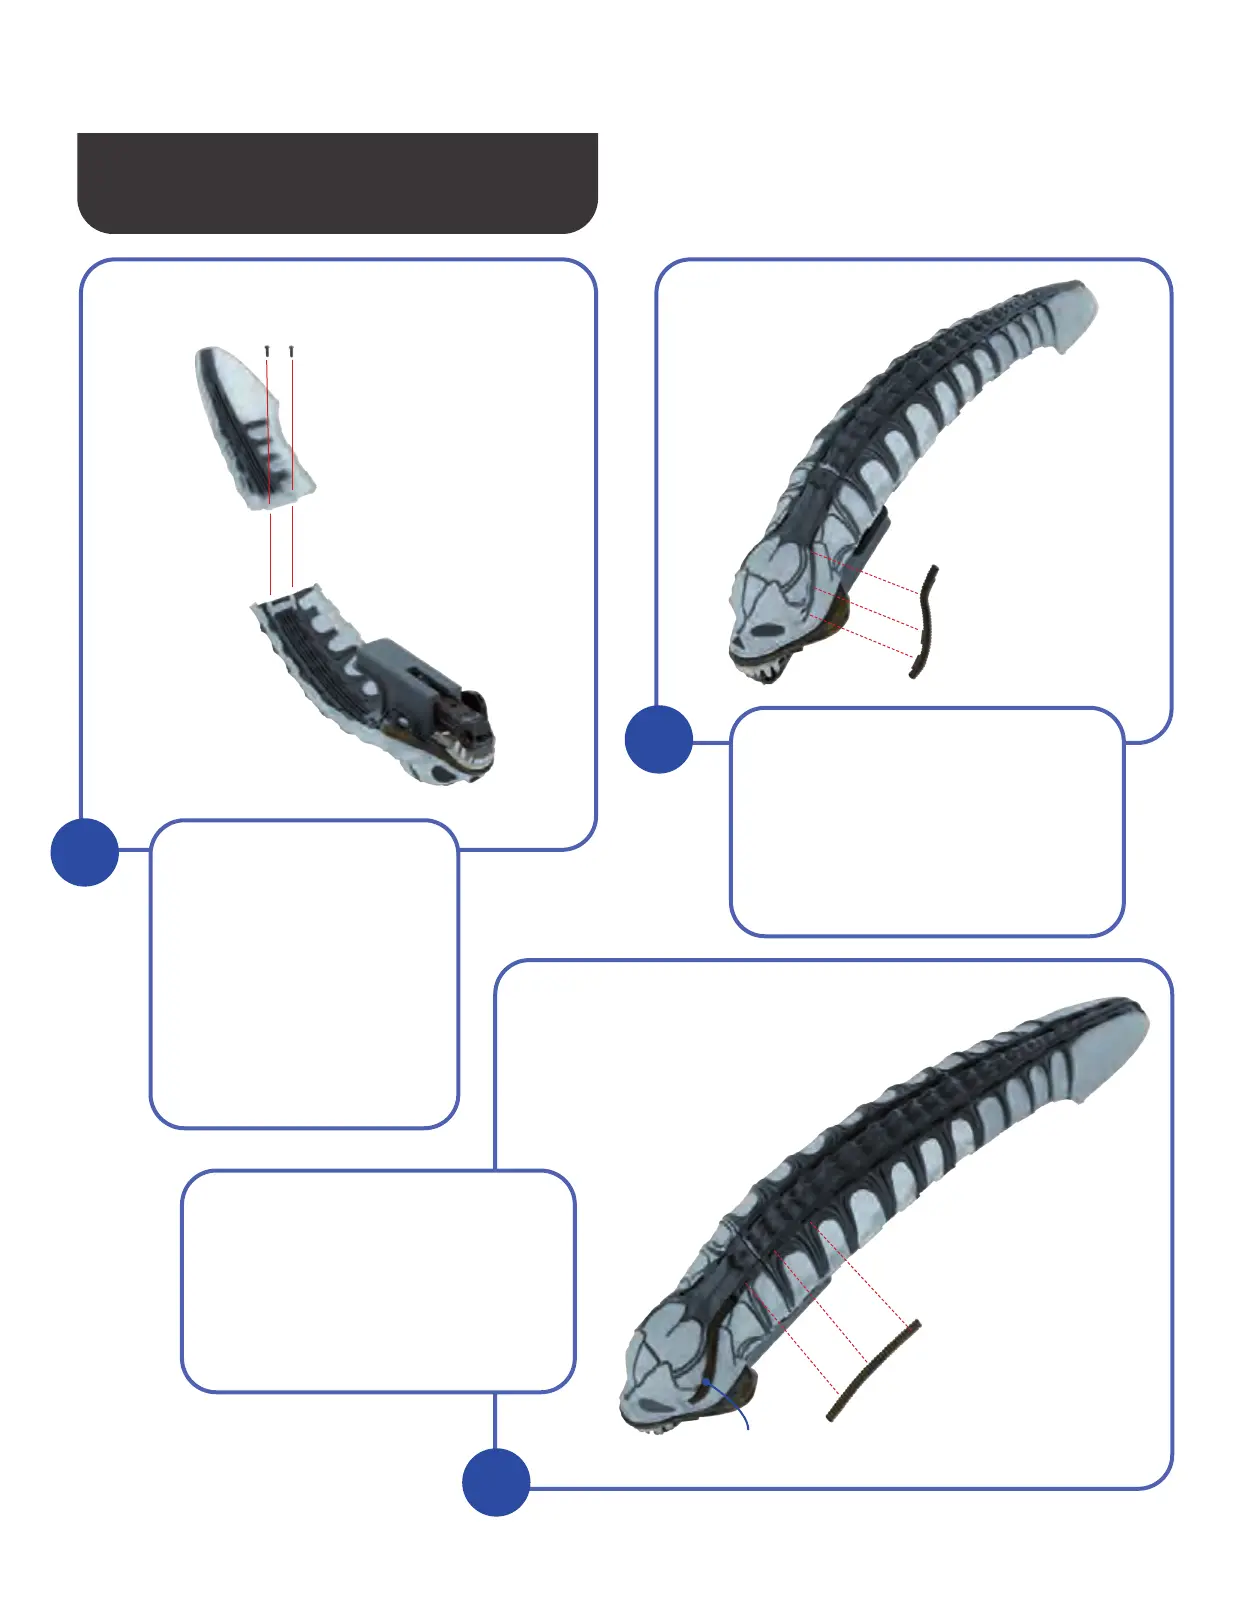
KIT 5: SKULL & APPENDAGES
3
2
3-1
5-2
1-1
5-3
1-1
5-2
1
5-9
5-1
3-1
Take the skull assembly
3-1 which was worked
on in a previous pack
and Skull C 5-1. Fit the
screw holes in the Skull
plate 5-1 over the raised
screw sockets in Skull
part 3-1, as shown. Join
the two parts together
using two 2.3x6mm
screws 5-9.
Identify Skull Pipe 5-2 and test-fit
the three tabs along its side into
the corresponding slots on the
upper left side of the Skull part
1-1. When sure of a good fit,
apply a little glue to the tabs to
secure the part firmly in place.
Next, identify Skull Pipes 5-3 and
5-4; Pipe 5-3 is slightly longer than
Pipe 5-4. Take Pipe 5-3 and test-fit
its three tabs into the corresponding
slots in Skull parts 1-1 and 3-1, as
shown. Apply a little glue to the tabs
and fit the part firmly in place.
EXPERT TIP: Before starting the construction,
study the parts photographed carefully to identify each of
the skull pipes and lay them out in order.