(Figure 4)
(Figure 6)
(Figure 5)
(Figure 2)
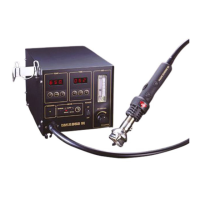
PREPARATION: ASSEMBLY AND ELECTRICAL CONNECTION
Preparation: Assembly and Electrical Connection
A. Station Assembly
●Attach the handpiece holder.
Remove the handpiece holder mounting
screw from the side of the station. Attach the
handpiece holder to the station. (Figure 1)
(The handpiece holder can be installed on
either the left or right side.)
B. Handpiece Assembly
●Using vacuum function
operative nozzle (see page 17.)
1. Attach the nozzle.
a. Extend the vacuum pipe using the
vacuum pipe control knob. (Figure 2)
b. Remove the inside screw (M3 × 5) of
the nozzle. (Figure 3)
c. Loosen the nozzle mounting screw.
Pass the vacuum pipe through the
nozzle hole and attach the nozzle.
(Figure 4)
d. Tighten the nozzle mounting screw.
(Figure 1)
CAUTION
● Vacuum Pipe
Do not use excessive force.
When not using a nozzle, retract the vacuum pipe to the
shortest length. (Figure 5)
2. Attach the pad.
a. Attach the pad. (Figure 6)
b. Adjust the pad to an appropriate
position.
Adjust the vacuum pipe so that the pipe
and pad protrude as little as possible.
CAUTION
The nozzle and pads reach high temperatures, get
very hot. Be sure they are cool before attempting
to replace them.
CAUTION
● Pad
The pads do not last indefinitely. When they become
deteriorated, replace them. Since exposure to high
temperatures causes them to deteriorate faster, Hakko
recommends they be cooled after use.
5
(Figure 3)
(M3 × 5)