Fig.25Fig.24
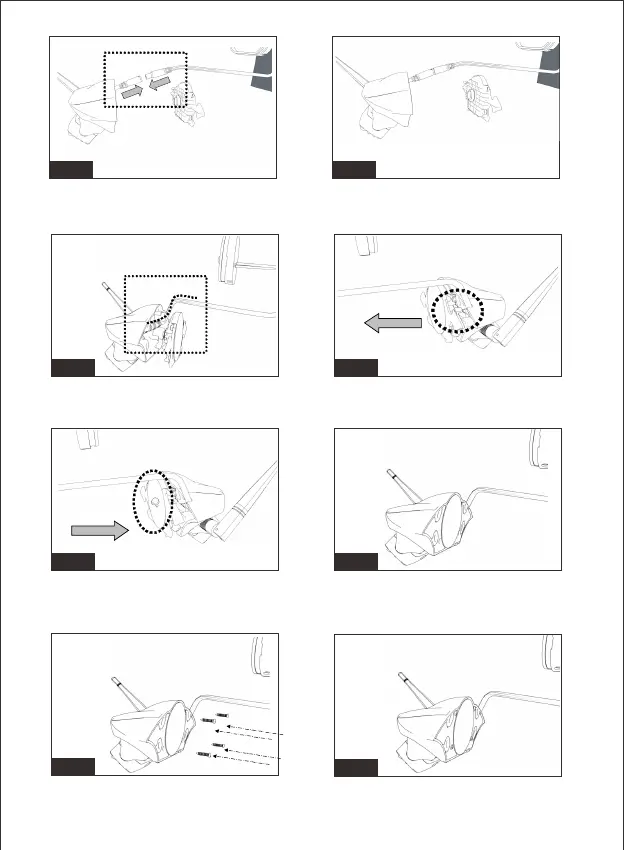
Figure19/Figure20/Figure21/Figure22: Lock the magnet with bracket
by torx screw.
Fig.27Fig.26
Fig.28
Fig.29
Figure25/Figure26: Remove the hole shield on the bracket base.
Pull cables through the hole.
Fig.23Fig.22
Figure23/Figure24: Connect the power cable to the camera cable.
Bend the cable and tuck it into bracket housing.
Figure27/Figure28: Secure the bracket housing and base with four
provided screws.
-14-