8
Wiring Options (continued)
4
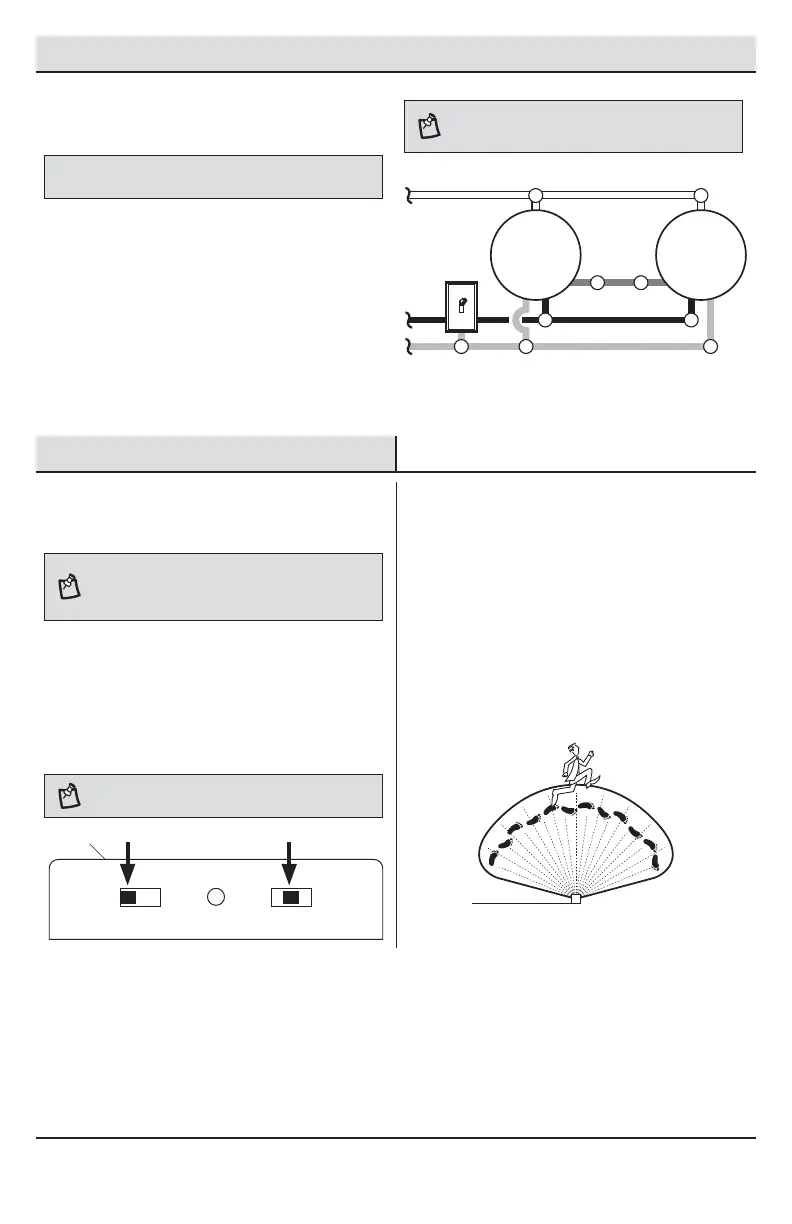
Wiring motion sensing lights to
control each other
IMPORTANT: Total xture ratings must not exceed 500 Watts (4.2 A).
When wiring so either motion sensor turns on both
motion lights (Master / Master):
Ƒ Strip the red wire in both light xtures.
Connect the red wire of one xture to the red
wire of the second xture.
Ƒ Connect all white wires together.
Ƒ Connect all black wires together.
Ƒ Connect all ground wires together.
NOTE: In most installations, an additional wire (same
gauge as existing house wire) will have to be installed in
the house to connect the two xtures as master / master.
Wiring multiple motion sensing lights
to control each other
Black to black
Master
Light
Master
Light
White to white
Ground to ground
Red
to red
Operation
1
Setting the sensor for testing
NOTE: When the “ON-TIME” switch is set to the “TEST”
position, the light xture will operate during the day or
night. The light will stay on for 5 seconds after all motion
is stopped.
Ƒ Turn the power on at the circuit breaker or fuse
and turn on the wall switch.
Ƒ Set the “ON-TIME” switch to the “TEST”
position.
Ƒ Slide the “SENSITIVITY” switch to the “M”
position.
NOTE: The motion sensor will need to completely warm
up (90 seconds) before beginning the setup process.
TEST 1 5 10 MIN
ON-TIME
LO - M - HI
SENSITIVITY
2
Determining the motion sensor
coverage area
Ƒ Perform a “walk test”: walk in an arc in front
of the motion sensor (B).
Ƒ Watch the light (A). The light (A) will come on
when motion has been detected.
Ƒ Stop, wait for the light (A) to turn off, and then
begin walking again.
Ƒ Continue this process until the detection zone
has been established.
A
B
 Loading...