LIMITED WARRANTY
The manufacturer warrants this lighting xture to be free from defects in materials and workmanship
for a period of ve (5) years from date of purchase. This warranty applies only to the original consumer
purchaser and only to products used in normal use and service. If this product is found to be defective, the
manufacturer’s only obligation, and your exclusive remedy, is the repair or replacement of the product at the
manufacturer’s discretion, provided that the product has not been damaged through misuse, abuse, accident,
modications, alterations, neglect or mishandling. This warranty shall not apply to any product that is
found to have been improperly installed, set-up, or used in any way not in accordance with the instructions
supplied with the product. This warranty shall not apply to a failure of the product as a result of an accident,
misuse, abuse, negligence, alteration, or faulty installation, or any other failure not relating to faulty material
or workmanship. This warranty shall not apply to the nish on any portion of the product, such as surface
and/or weathering, as this is considered normal wear and tear. The manufacturer does not warrant and
specially disclaims any warranty, whether express or implied, of tness for a particular purpose, other
than the warranty contained herein. The manufacturer specically disclaims any liability and shall
not be liable for any consequential or incidental loss or damage, including but not limited to any labor
expense costs involved in the replacement or repair of said product.
Page 8 Page 1
INSTRUCTION MANUAL
HOME DEPOT SKU 598-318 | S/O: 426-484 (UPC 773546217477)
RUSTIC FINISH
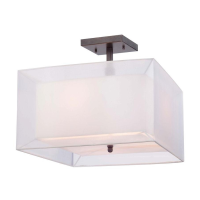
INTERIOR 3-LIGHT SEMI-FLUSHMOUNT
ANGELINA
TROUBLESHOOTING:
Possible Cause Corrective Action
Bulb will not light
1. Bulb is burned out 1. Replace light bulb
2. Switch is off 2. Make sure switch is on
3. Faulty wire connection 3. Check wiring
Fuse blows or circuit
breaker trips when light
is turned on
Crossed wires or power
wire is grounding out
Check wire connections
PRODUCT MAINTENANCE:
1. To clean the outside of the lamp, use a dry or slightly dampened clean cloth (use
clean water, never a solvent) to wipe the shade and surface of the lamp.
2. To clean the inside of the xture, rst disconnect power to the xture by turning
off the circuit breaker or by removing the fuse at the fuse box. Next, use a dry or
slightly dampened clean cloth (use clean water, never a solvent) to wipe the inside
shade and interior surface of the xture.
3. Do not use any cleaners with chemicals, solvents or harsh abrasives. Use only a dry
soft cloth to dust or wipe carefully.
