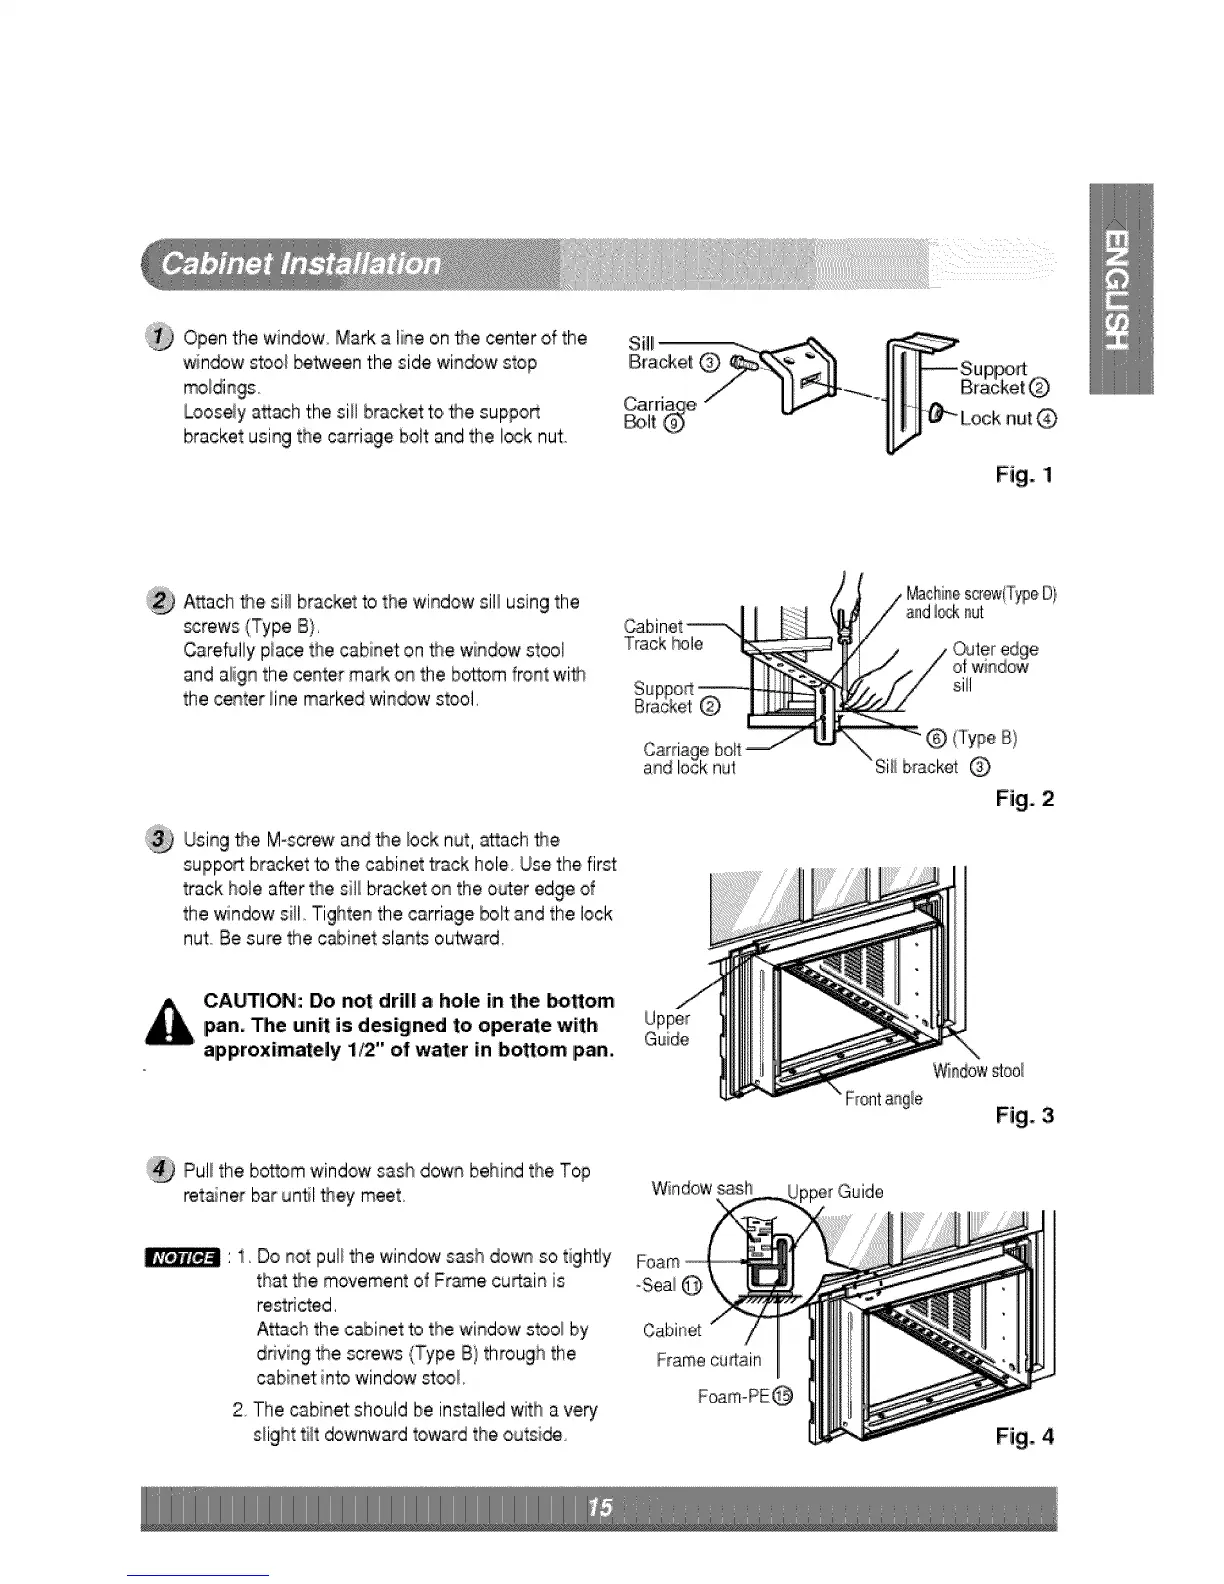
Openthe window Mark a line on _e center of the
window stool between thieside win®w stop
Looseiy a_ac:hthe sill bracket:to _e suppoR
bracket us ng the carriage bolt and the lock nut.
®
Fig. 1
A_ach the sill bracket to the 'windowsil_usingthe
_rews (Type B}.
Care_lly piace the cabinet on _e window stool
and a!ign the center maN, on the bosom front wi_
the center iine marked win_w stool,
Cabinet _.
Track _le
Machinescrew(TypeD}
l_*;knut
sill
Using rise M-screw and _.e lock nut, attach _e
suppo_ bracket'to the cabinet t-ack hole Use the first
track hole after the sill bracket on the o_er edge of
the window sill 'Tightenthe carriage bolt and the lock
nut Be sure the cabinet slants ou'_ard,
Si_ibracket
Fig. 2:
CA_ON: Do not drill a hole in the _ttom
pan. The unit is design_ to operate with Uppe_
Guide
approxim_ely 1/2" of water in bo,_om pan.
Pull the bottom windowsash down behind the Top
retainer bar until _ey meet
Window_sh
_ndow stool
Fig. 3,
' i. Do not pul_the window sash down so tightJy
that _.e movement of Fr&m.ecu_ain is
restricted,
Attach the cabinet to the window stool by
driving _e screws (Type B} through the
cab;net:into window st_i,
2 The ,cabinetshould be installed with a very
slight tilt downward toward the outsi_
Cabinet
F_ame curtain
Fig.4
 Loading...