Assembly and Installation (Continued)
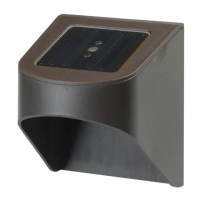
□ Place the wire connector (E) on opposite sides of the low
voltage cable (G) where the xture will be located.
□ Align and t the main low voltage cable (G) vertically to the
slot of wire connector (E) as shown.
□ Press the wire connector (E) together until fully seated and
locked around the cable (G). Pre-set prongs will pierce the
cable insulation and establish contact. Turn on the power unit.
If the light xture does not turn on, repeat previous steps.
□ Once the clip-on connector (E) is in place, wrap it with
electrical tape for additional protection.
□ After all xtures are installed, turn on the transformer.
E
CAUTION: BE CAREFUL! THE WIRE STABS ARE VERY SHARP!
□ This control box (H) is weatherproof and suitable for outdoor use.
□ Do not install behind shrubs. It will affect the dusk-to-dawn
photocell.
□ Photocell will not operate properly if installed too close to a
nighttime light source.
□ MOUNT AT LEAST 12 in. (30 cm) ABOVE GROUND.
□ Mount the controller with a screw (not included) on a wall within
1 ft. (30.5 cm) of the electrical outlet where the transformer will be
connected.
□ The control box (H) goes between the transformer (F) and the
lights. Plug them together and secure them with screw caps.
3
Installing the control box
4
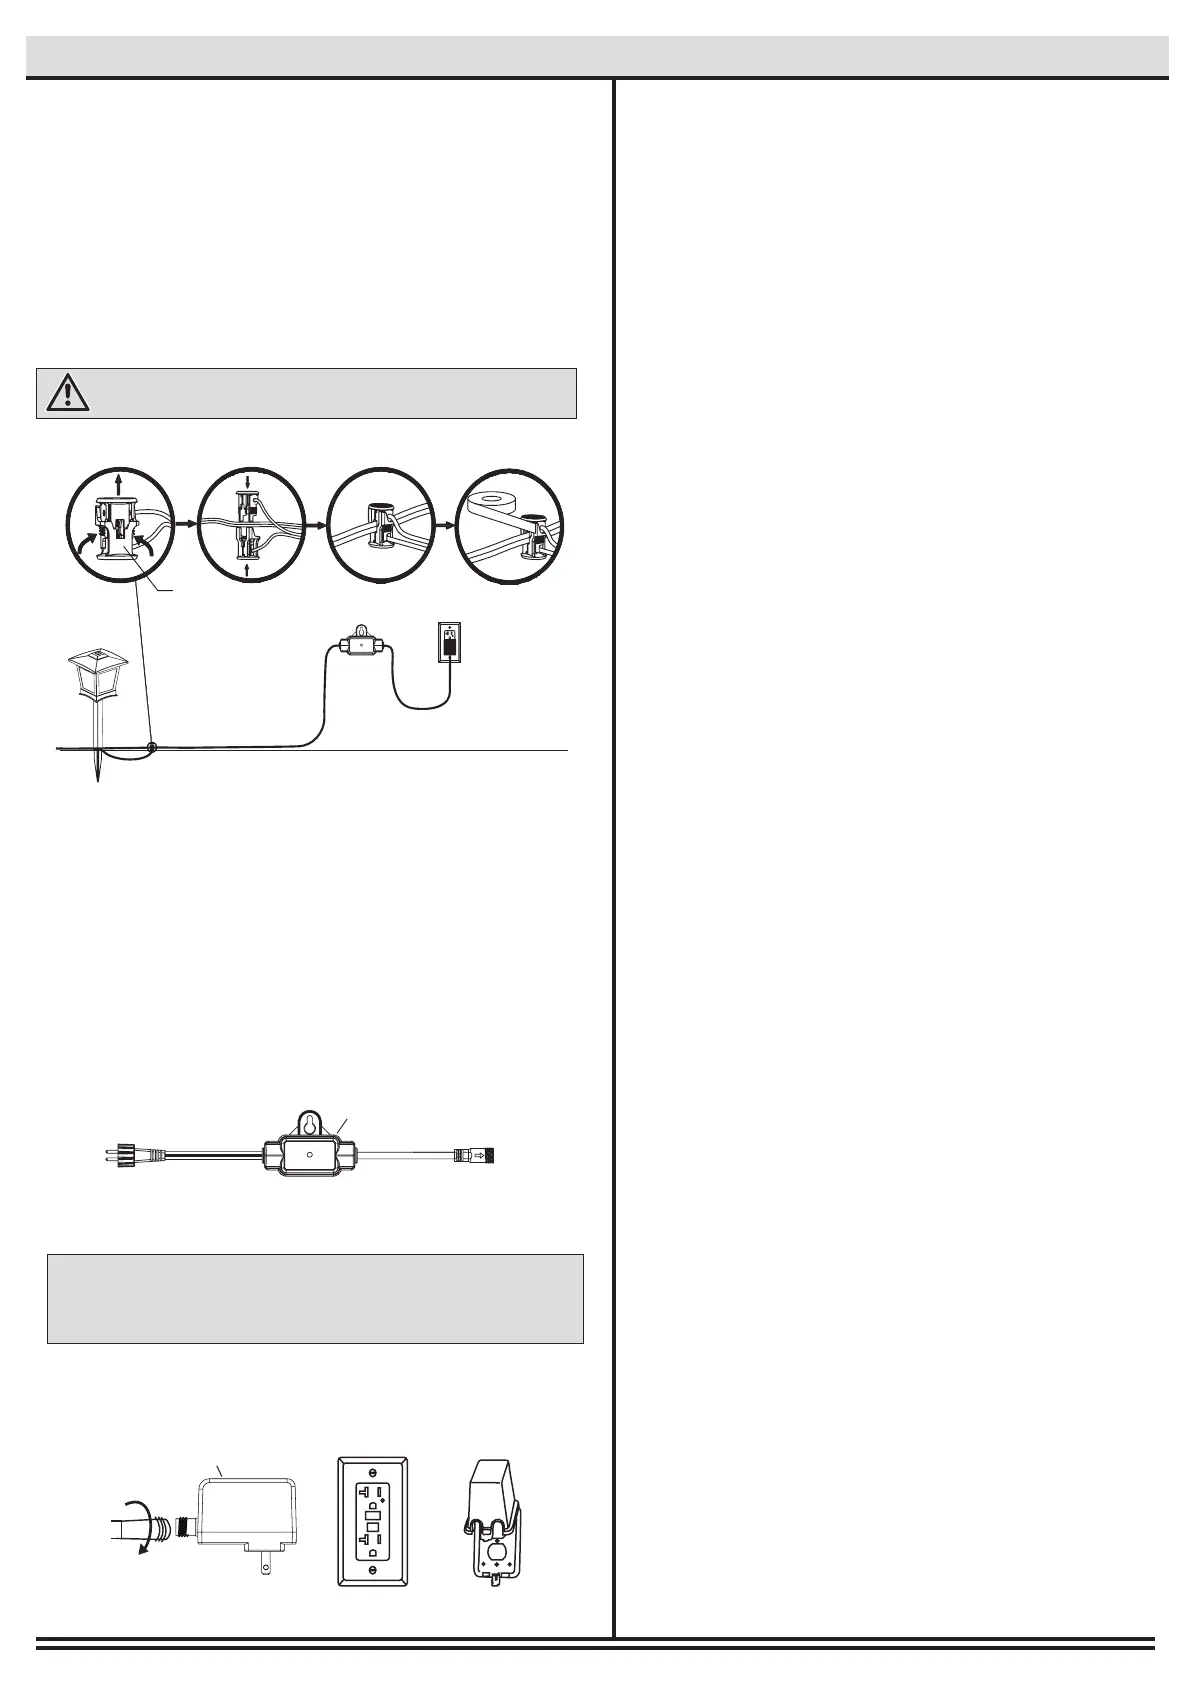
Connecting the cable to the transformer
□ Connect the wire to the transformer (F).
□ Screw the watertight connector by turning clockwise.
□ Plug the transformer (F) into the GFCI receptacle.
H
g. 1 g. 2
F
Note: Prior to installing and powering the transformer, a safety approved GFCI receptacle
(g. 1) and GFCI watertight protective cover (g. 2)– (not supplied) must be installed by
a qualied electrician. GFCI receptacle and cover must be mounted a minimum of 12 in.
(0.3 m) above ground level. The transformer must be mounted at least 1 ft. (0.3 m) above
ground level.