EasyManua.ls Logo

HAMPTON BAY SL18P-R5X-DB-2 User Manual

HAMPTON BAY SL18P-R5X-DB-2
20 pages
To Next Page IconTo Next Page
Page #1 background imageLoading...
Page #1 background image
Questions, problems, missing parts? Before returning to the store,
call Hampton Bay Customer Service
8 a.m. - 6 p.m., EST, Monday - Friday
1-855-HD-HAMPTON
HAMPTONBAY.COM
R
Model # SL18P-R5X-DB-2
1-855-HD-HAMPTON
1-855-HD-HAMPTON
HAMPTONBAY.COMHAMPTONBAY.COM
THANK YOU THANK YOU THANK YOU THANK YOU THANK YOU
USE AND CARE GUIDE
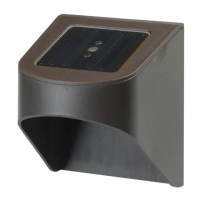
SOLAR FENCE LIGHT 2PK
Item # 1000000000
We appreciate the trust and condence you have placed in Hampton Bay through the purchase of this solar fence light.
We strive to continually create quality products designed to enhance your home. Visit us online to see our full line of
products available for your home improvement needs. Thank you for choosing Hampton Bay!
Questions and Answers:

HAMPTON BAY SL18P-R5X-DB-2 Specifications

General IconGeneral
ModelSL18P-R5X-DB-2
FinishDark Bronze
MaterialAluminum
Lumens1400
Color Temperature3000K
StyleTraditional
Dusk to DawnYes
BrandHampton Bay
Light SourceLED
TypeOutdoor Light
Light Bulb TypeLED

Summary

Product Safety Guidelines

Battery Handling and Disposal

Ni-MH battery: recycle/dispose properly. Avoid fire and excessive heat.

Optimal Charging Conditions

Full sunlight for 10-12 hrs charge; 8-12 cycles for max capacity.

Product Warranty Information

2-Year Limited Warranty

Covers original purchaser defects under normal use; repair/replacement at manufacturer's discretion.

Pre-Installation Steps

Planning and Part Verification

Verify all parts are present against the package contents list before assembly.

Tools and Hardware

Required tools: pencil, screwdriver, drill. Hardware: screws, plastic plugs.

Package Contents

Itemized list: 2 Top Housings (A), 2 Lenses (B).

Installation Procedure

Marking Mounting Location

Mark desired location and drill two holes for screws (AA).

Securing Fixture Points

Insert plugs (BB) and screws (AA), leaving 1/4 in. (5mm) exposed.

Product Operation

Initial Setup and Mounting

Remove isolation strip and mount the light onto the installed screws (AA).

Battery Replacement

Replace old Ni-MH battery with a fresh one via compartment cover.

Maintenance and Troubleshooting

Cleaning the Solar Module

Clean with damp towel; avoid solvents and excessive pressure.

Winter Performance Tips

Clear panel of snow/debris; allow 10-12 hours direct sunlight for recharge.

Troubleshooting Common Issues

Addresses light not turning on, short run time, or low light interference.

Service Parts Information

Replacement Parts List

Lists replacement parts: Top Housing, Lens, Rechargeable battery.

Related product manuals