EasyManua.ls Logo

HAMPTON BAY KW2430-SDV - User Manual

HAMPTON BAY KW2430-SDV
8 pages
Print Icon
To Next Page IconTo Next Page
Loading...
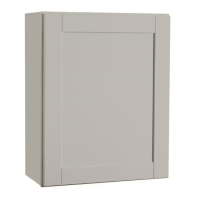
INSTALLATION GUIDE FOR HANGING WALL CABINETS
• ANSI Z87.1 rated safety goggles
• Framing square
• Hammer
• Pry bar
• Phillips and Flathead screwdrivers
• Level
• Tape measure
• Pencil
• Straight edge
• Drill
• Properly rated extension cord
7
/32" drill bit for pre-drilling the back panel
3
/32" drill bits for frame & filler attachment
pilot holes
• Work gloves with slip resistant coating
• Jigsaw or table saw
• Miter box
• Clamps or c-clamps
• Stud finder
• 6’ step ladder
• Wood shims
• Pin nailer
• Small finish nails
• 1 x 2 or 1 x 3 furring strips
Scrap lumber (for 55" propping stick or t-brace)
• Circuit tester
#10 x 2
1
/2" Washer Head screws (for wall
attachment to stud)
#8 x 2
1
/2" Trim Head screws (for frame attachment)
Suggested Tool and Material List
U180769 | 10-2023
WARNING Read Installation Guide thorough-
ly before use and follow all safety precautions
and warnings. Improper installation can cause seri-
ous injury. Use proper Personal Protective Equip-
ment (PPE) including ANSI Z87.1 safety goggles
and work gloves with slip resistant coating.
DANGER To reduce the risk of serious or
fatal injury from fire, explosion, or electrocu-
tion, if gas line or electrical work is involved, have
the work done by a utility company or qualified
service professional. To reduce the risk of shock,
explosion, or injury, turn o all gas, electrical
and water connections prior to performing any
work. Shut o the power to all appliances and
receptables in the kitchen, including lights, at the
fuse-breaker box. Use a circuit tester to make
sure power is o.
WARNING To reduce risk of serious injury
from fall hazard, always use two or more
people for installation. Never attempt installation
without assistance.
Preparation | Before You Begin
1 Verify you have the correct cabinet sizes and
finish. Open and inspect all cabinets prior to
installation as damage can occasionally occur
during shipment from the factory.
2 Once you have ensured that the gas, water
and electric in the room are turned o, that the
plumbing, gas and power supplies are properly
capped, and have removed the old cabinetry and
baseboards, you need to assess the room.
3 Take special note of the floors and walls. Use a
level or straightedge to determine high spots and
other imperfections. Mark any bumpy or bulging
areas. You may have to prep the walls and floors
if things are not plumb, level and square. (Many
people prefer to repaint and replace the flooring
while the room is empty.) The time you spend
preparing the room will help ensure smoother,
easier installation of the cabinetry.
WARNING Failure to use proper screws and
screw placement to attach cabinets to the
wall may result in serious injury from collapse/
fall hazard. Only use screws listed in this Guide
for installations with drywall or wood stud con-
struction. Never use these screws for installation
with concrete, brick, or other material.
WARNING To reduce risk of serious injury
from collapse/fall hazard, if installing cabine-
try with material other than drywall or wood stud
construction, always consult an installation pro-
fessional to identify and obtain proper fasteners.
Prepare the Walls and Floors
1 Locate and mark all the studs using a stud
finder. (To verify the position of your studs,
drive a small finishing nail into the wall in an
area that will be covered up by a cabinet.)
2 Recheck your measurements. Make sure the
cabinets match the available space.
3 Gather the tools you will need as listed below.
Question and Answer IconNeed help?

Do you have a question about the HAMPTON BAY KW2430-SDV and is the answer not in the manual?

Overview

This document outlines the installation guide for hanging wall cabinets, providing comprehensive instructions for homeowners and professionals. It covers everything from safety precautions and necessary tools to detailed steps for measuring, preparing, and mounting the cabinets, as well as installing fillers and addressing potential issues.

Function Description:

This guide details the process of installing wall cabinets in a kitchen or other room. The primary function of the cabinets is to provide storage space. The installation process involves securely attaching the cabinets to the wall, ensuring they are level, plumb, and properly aligned with each other and with any base cabinets. The guide also covers the installation of fillers, which are used to bridge gaps between cabinets and walls, creating a finished and integrated look.

Important Technical Specifications:

  • Drill Bits:
    • 7/32" drill bit for pre-drilling the back panel.
    • 5/32" drill bits for frame & filler attachment pilot holes.
    • 3/32" drill bit for pre-drilling the pilot hole and countersink for #8 x 2 1/2" screws for attaching adjacent face frames.
    • 3/32" pilot hole for 3/32" drill bit.
  • Screws:
    • #10 x 2 1/2" washer head screws (for wall attachment to stud).
    • #8 x 2 1/2" trim head screws (for frame attachment).
    • #8 x 1 1/2" or 1 x 3 furring strips.
  • Support Rails: Temporary support rails are used to hold cabinets in place during installation. These can be 1 x 2 or 1 x 3 furring strips.
  • Leveling: Cabinets must be installed level and plumb. The guide specifies using shims to achieve proper leveling and alignment.
  • Stud Spacing: Wall studs are typically 16" or 24" on center. The installation process emphasizes locating and securing cabinets to these studs for maximum stability.
  • Cabinet Dimensions: The guide refers to various cabinet dimensions, including height, width, and depth, and provides instructions for measuring and marking these dimensions accurately.
  • Filler Dimensions: Fillers are typically trimmed to fit specific gaps, with instructions for measuring and cutting them precisely.

Usage Features:

  • Safety First: Emphasizes reading the installation guide thoroughly before use and following all safety precautions. This includes wearing ANSI Z87.1 rated safety goggles, gloves, and using proper Personal Protective Equipment (PPE). It also warns against electrical hazards, gas leaks, and plumbing issues, advising users to turn off utilities if necessary.
  • Preparation is Key: Provides detailed steps for preparing the work area, including clearing the space, locating studs, and marking reference lines on the wall. It also advises inspecting cabinets for damage before installation.
  • Measurement Accuracy: Stresses the importance of accurate measurements for determining cabinet placement, leveling, and filler sizing. It provides specific instructions for measuring the highest point of the floor, ceiling, and marking level lines.
  • Step-by-Step Installation: Breaks down the installation process into manageable steps, from measuring and marking to mounting cabinets, attaching them to each other, and installing fillers.
  • Troubleshooting and Tips: Offers advice on how to handle common installation challenges, such as uneven walls or floors, and provides tips for achieving a professional finish.
  • BILT App Integration: Promotes the use of the BILT app for interactive 3D instructions, enhancing the user experience and providing visual guidance.
  • Warranty Information: Includes a comprehensive warranty statement from American Woodmark Corporation (AWC), covering defects in materials and workmanship for the original retail consumer purchaser. This warranty outlines the terms, conditions, and limitations of coverage, including what constitutes a defect, how to make a claim, and what remedies are available. It also specifies that the warranty is for residential use only and does not cover damage from improper installation, misuse, abuse, neglect, or natural disasters.

Maintenance Features:

  • Regular Inspection: Although not explicitly detailed as a maintenance feature, the guide implies the need for regular inspection during installation to ensure all components are free of defects and properly aligned.
  • Proper Fastening: The emphasis on using specific screws and drilling techniques ensures that cabinets are securely fastened, reducing the likelihood of future issues that would require maintenance.
  • Shim Usage: The use of shims to level and plumb cabinets helps prevent stress on the cabinet structure and fasteners, contributing to the longevity of the installation.
  • Filler Installation: Proper installation of fillers not only enhances aesthetics but also helps protect cabinet edges and prevents dust and debris from accumulating in gaps, which can simplify cleaning and maintenance.
  • Warranty Support: The warranty information provided ensures that if any manufacturing defects arise, the customer has recourse for repair or replacement, which can be considered a long-term maintenance support feature.
  • Product Information: The guide includes important health notices regarding formaldehyde emissions from building materials, advising users to ensure proper ventilation and consult health professionals if concerns arise. This indirectly contributes to maintaining a healthy indoor environment, which is a form of preventative maintenance for the living space.

HAMPTON BAY KW2430-SDV Specifications

General IconGeneral
BrandHAMPTON BAY
ModelKW2430-SDV
CategoryIndoor Furnishing
LanguageEnglish

Related product manuals