This document is a user's manual for the HANNspree HC284PUB (HSG1457) LCD Monitor, providing comprehensive instructions for its installation, operation, and maintenance. It also includes important safety notices, troubleshooting tips, and technical support information.
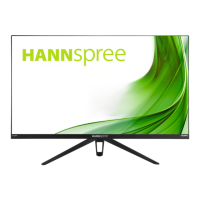
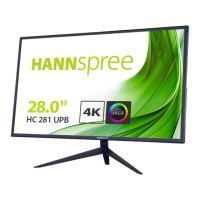
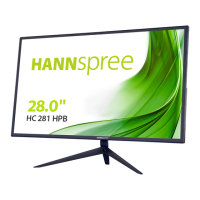
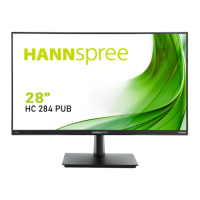
The HANNspree HC284PUB is a 71.12cm / 28" wide-screen TFT Color LCD Monitor designed to provide crisp, clear display quality. It features an ergonomic design and a compact, space-saving case, making it suitable for various environments. The monitor incorporates High-Definition Multimedia Interface (HDMI™) technology, allowing for high-quality audio and video connections.
Installation and Setup
The manual details the process of installing and removing the monitor's stand base. To install, align the stand with the clamping position and insert it. To remove, press the release button and pull the stand away. For wall mounting, the monitor supports VESA 100x100mm brackets with M4, 10mm screws, and a weight capacity of 8kg. Users are advised to consult their specific wall bracket instructions and to have qualified service personnel perform the installation to prevent damage or injury.
Connecting the monitor to a PC involves several steps:
- Connect one end of a DisplayPort (DP) cable to the monitor and the other end to the computer's DP port.
- Optionally, connect an HDMI cable from the monitor to the computer's HDMI port.
- Connect an audio cable between the monitor's audio input and the PC's audio output (green port).
- Connect the 12V DC adapter to the monitor's DC 12V input socket, and then plug the AC power cord into the adapter's AC input socket and a wall outlet.
- Finally, turn on both the monitor and the computer.
The monitor's viewing angle can be adjusted from -5° to 15° for optimal viewing. Users are cautioned not to touch the LCD screen or place fingers near the hinges during adjustment to avoid damage or pinching.
Operating Instructions
The monitor's front panel features several control buttons:
- Power Button: Turns the monitor ON or OFF.
- Power Indicator: Displays blue for ON mode and red for Power Saving mode.
- MENU / ENTER: Activates or deactivates the On-Screen Display (OSD) menu or enters a previous menu.
- Adjust ▼ ▲: Used to adjust brightness and volume when the OSD is off, or to navigate and adjust functions within the OSD menu.
- E Button (Digital Input Models): Enters Source selections (DP, HDMI, etc.) and serves as a confirmation function during OSD start-up.
The OSD menu allows users to customize various display settings:
- INPUT SOURCE: Selects between Auto Source, DP, or HDMI inputs.
- BRIGHTNESS/CONTRAST: Adjusts the brightness and contrast values. The "ACTIVE CONTRAST" option enhances contrast for clearer images by automatically detecting dark and light areas.
- COLOR SETTING:
- GAMMA: Configures display gamma (Off, 1.8, 2.0, 2.2, 2.4, 2.6).
- PICTURE MODE: Selects predefined picture modes (PC, ECO, Movie, Game).
- COLOR TEMPERATURE: Adjusts color temperature (Normal, Warm, Cool).
- HUE: Adjusts the hue of the display.
- SATURATION: Adjusts the saturation of the display.
- LOW BLUE LIGHT: Reduces blue light emission.
- PICTURE QUALITY SETTING:
- SHARPNESS: Adjusts image sharpness.
- RESPONSE TIME: Sets display response time (Off, High, Middle, Low).
- SUPER RESOLUTION: Adjusts super resolution (Off, High, Middle, Low).
- BLACK LEVEL: Adjusts the black level of the display.
- DISPLAY:
- ASPECT RATIO: Sets screen aspect ratio (Wide Screen 16:9, 4:3, 1:1, Auto).
- AUDIO:
- MUTE: Toggles audio mute ON/OFF.
- VOLUME: Adjusts volume level.
- AUDIO SOURCE: Selects audio source (DP or HDMI) during Picture-in-Picture (PIP) or Picture-by-Picture (PBP) modes.
- MULTI-WINDOW:
- MULTI-WINDOW: Activates PIP/PBP function.
- SUB WIN2 INPUT: Selects input source for the second window (DP or HDMI).
- PIP SIZE: Adjusts window size (Small, Medium, Large).
- PIP POSITION: Sets window position (Top Left, Bottom Left, Top Right, Bottom Right).
- SWAP: Swaps the 1st and 2nd windows.
- OSD:
- LANGUAGE: Selects OSD language.
- OSD H-POSITION: Adjusts horizontal position of the OSD.
- OSD V-POSITION: Adjusts vertical position of the OSD.
- OSD TRANSPARENCY: Adjusts OSD transparency.
- OSD TIME OUT: Sets OSD display duration (5 to 100 seconds).
- OSD ROTATION: Rotates the OSD window (Normal, 90, 180, 270).
- OTHER:
- DP VERSION: Switches DP function.
- DDC/CI: Toggles DDC/CI function ON/OFF (optional for dual input mode).
- RESET: Resets all monitor settings to default.
Plug and Play DDC2B Feature
The monitor supports VESA DDC2B, allowing it to communicate its identity and display capabilities to the host system. It requires a video input signal to operate properly; without one, it will appear non-functional.
Maintenance and Troubleshooting
The manual provides several precautions for monitor care:
- Avoid installing the monitor near heat sources, in direct sunlight, or in dusty/vibrating environments.
- Retain original packaging for potential shipping.
- Clean the monitor periodically with a soft cloth; for stubborn stains, use a cloth lightly dampened with mild detergent. Avoid strong solvents.
- Always unplug the monitor before cleaning.
A troubleshooting section addresses common issues:
- Power LED not on: Check power switch and cord connection.
- No Plug & Play: Verify PC and video card compatibility, and check for bent pins on DP or HDMI connectors.
- Display too dark/bright: Adjust Contrast and Brightness controls.
- Picture bounces/wave pattern: Move electrical devices causing interference.
- Power LED ON but no video: Check PC power, video card seating, monitor cable connection, and bent pins. Verify computer operation using the CAPS LOCK key.
- Missing primary colors: Inspect monitor's video cable for bent pins.
- Screen image not centered/sized: Adjust pixel frequency CLOCK and PHASE, or use the E Button hot-key.
- Color defects: Adjust RGB color or select color temperature.
- Screen resolution needs adjustment: Use Windows display settings to adjust resolution.
- No sound from built-in speaker: Check PC audio output cable connection to monitor's LINE IN port, verify volume adjustment, ensure "System > Silence" is OFF in the monitor menu. For HDMI input without sound, select AUDIO INPUT as a PC option and ensure the PC audio output cable is connected to the monitor's LINE IN port.
For Windows 7/8/10 display problems, users are advised to ensure their PC and video card support the OS, install the latest video card drivers, and try recommended display resolutions. If issues persist, users can visit the HANNspree support website.