This document is the User's Manual for the HANNspree HC270HPB (HSG1453) LCD Monitor. It provides comprehensive instructions for setting up, operating, and maintaining the monitor, ensuring users can maximize its features and troubleshoot common issues. The manual emphasizes safety precautions, proper installation, and optimal viewing adjustments to enhance the user experience.
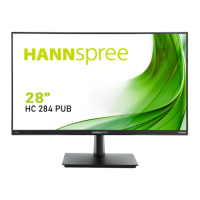
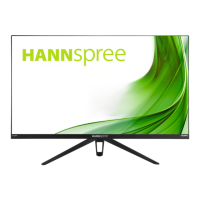
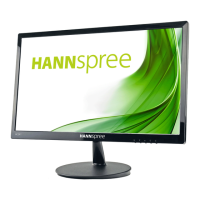
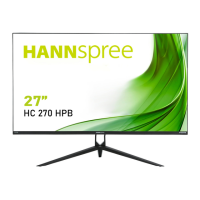
The HANNspree HC270HPB LCD Monitor is designed for a crisp, clear display, featuring a 68.6cm / 27" wide screen TFT color LCD. Its ergonomic and compact case design makes it suitable for various environments, from home offices to professional workspaces. The monitor is equipped with multiple input options, including HDMI and VGA, to ensure compatibility with a wide range of devices such as PCs, game consoles, and media players.
Usage Features
The monitor offers a user-friendly interface with easily accessible control buttons located on the front panel. These buttons allow for quick adjustments to various display settings, including brightness, contrast, and color temperature.
- Menu / Enter Button: This button is used to turn the On-Screen Display (OSD) menu on or off and to confirm selections within the menu.
- Input Source Change / Exit Button (E Button): This button allows users to switch between different input sources (e.g., HDMI, VGA). For analog input models, holding this button for three seconds initiates auto-adjustment, optimizing horizontal position, vertical position, clock, and phase settings. For digital input models, it primarily serves to select the input source and confirm OSD menu selections.
- Brightness Adjustment Buttons (▲ / ▼): These buttons are used to adjust the display's brightness when the OSD is off. When the OSD is active, they serve as navigation buttons to move through menu options or adjust selected functions.
- Volume Adjustment Buttons (▲ / ▼): These buttons control the audio volume, particularly useful for models with incorporated audio. The manual includes a warning about the risk of hearing damage at high volumes.
- Power Button: This button switches the monitor on or off. The power indicator light (blue for ON, amber for Power Saving mode) provides visual feedback on the monitor's status.
The OSD menu provides a detailed array of settings to customize the display according to user preferences:
- Brightness/Contrast: Users can adjust the overall brightness and contrast of the display to suit their viewing environment.
- Active Contrast: This feature automatically detects dark and light areas of the image and enhances contrast for a clearer, sharper picture, especially beneficial for high-contrast images or videos.
- Low Blue Light: An option to adjust the blue light emission from the display, which can help reduce eye strain during prolonged use.
- Image Settings (H-Position, V-Position, Clock, Phase, Sharpness): These settings are crucial for optimizing the image quality, especially with analog inputs.
- H-Position and V-Position: Adjust the horizontal and vertical placement of the screen image.
- Clock: Reduces vertical flicker of characters on the screen.
- Phase: Reduces horizontal flicker of characters on the screen.
- Sharpness: Adjusts the sharpness of the display, with a range from 0 to 100.
- Aspect Ratio: This function allows users to correct screen distortion. "WIDE" provides a full-screen display, while "4:3" scales images proportionally, which may result in black bands on the sides.
- Color Temp (Warm, Normal, Cool): Users can select a color temperature that best suits their preference, influencing the overall warmth or coolness of the display's colors.
- User Settings: Allows for fine-tuning of individual color components (red, green, blue) to achieve specific color balances.
- OSD Settings (Language, H-Position, V-Position, Time-Out, Transparency): These settings control the OSD itself.
- Language: Changes the language of the OSD menu.
- H-Position and V-Position: Adjust the horizontal and vertical position of the OSD menu on the screen.
- OSD Time-Out: Sets the duration (10 to 100 seconds) for which the OSD remains visible before automatically disappearing.
- Transparency: Adjusts the transparency level of the OSD menu.
- Reset: This option restores all monitor settings to their factory defaults, erasing any current user settings.
- Miscellaneous Settings (Signal Source, DDC/CI, Mute, Volume, Black Level):
- Signal Source: Allows users to manually select between analog (VGA) or digital (HDMI) input sources.
- DDC/CI: Enables or disables the Display Data Channel/Command Interface function.
- Mute: Toggles the audio mute function.
- Volume: Adjusts the audio output level.
- Black Level: Adjusts the black level value of the display, affecting the depth of dark areas.
The monitor supports Plug & Play DDC2B, which allows it to communicate its identity and display capabilities to the host system. This feature ensures seamless integration with compatible computers. However, the manual explicitly states that the monitor requires a video input signal to operate properly; it will appear non-functional without one.
Installation and Setup
The manual provides detailed instructions for both installing and removing the monitor stand, as well as for wall mounting.
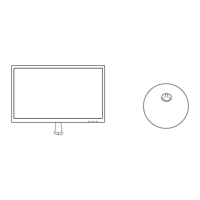
- Stand Installation/Removal: Illustrated steps guide users through attaching or detaching the stand base using screws and covers.
- Wall Mounting: For wall mounting, users need a VESA compatible wall bracket (VESA 100×100, 4 holes, M4, 10mm, 8kg). The instructions emphasize securing the bracket firmly to the wall and then attaching the monitor using the four mount holes on the back. A crucial note advises users to consult their specific wall bracket instructions and warns that improper mounting should only be performed by qualified service personnel, as HANNspree bears no responsibility for accidents or injuries resulting from self-installation.
- Power Source: The monitor operates on a universal power supply (100/120V AC or 220/240V AC) and requires a 12V DC adapter. Users are instructed to connect the adapter to the monitor's DC 12V input socket and the AC power cord to a wall outlet.
- Connecting to a PC: The manual outlines steps for connecting the monitor to a PC using HDMI, VGA, or HDMI to DVI cables. It also details connecting an audio cable from the PC's audio output to the monitor's audio input.
Maintenance Features
The manual includes several precautions and maintenance tips to ensure the longevity and optimal performance of the monitor:
- Environmental Considerations: Users are advised not to install the monitor near heat sources, in direct sunlight, or in places subject to excessive dust or mechanical vibration. It should also not be placed near water sources like bathtubs or sinks. Proper ventilation is crucial to prevent overheating, meaning openings should not be blocked.
- Cleaning: To keep the monitor in good condition, users should periodically clean it with a soft cloth. For stubborn stains, a cloth lightly dampened with a mild detergent solution can be used. Strong solvents, thinners, benzene, or abrasive cleaners should be avoided as they can damage the cabinet. Always unplug the monitor before cleaning.
- Power Protection: To protect the monitor from power surges, it should be unplugged during lightning storms or when it will not be used for extended periods. Overloading power strips and extension cords should be avoided to prevent fire or electric shock.
- Handling: Users are warned not to push any objects into the monitor's slots, as this could cause short circuits. Liquids should never be spilled on the monitor. When adjusting the viewing angle, users should hold the stand to prevent toppling and avoid touching the LCD screen directly to prevent damage. Care should also be taken to avoid pinching fingers near the hinges.
- Servicing: The manual explicitly states that users should not attempt to service the monitor themselves, as opening the cabinet exposes dangerous voltages. All servicing should be referred to qualified personnel.
- Packaging: Users are encouraged to save the original shipping box and packing materials for future use, especially if the monitor needs to be shipped.
Troubleshooting
A dedicated section addresses common problems and provides possible solutions:
- Power LED not on: Check if the power switch is ON and the power cord is connected.
- No Plug & Play: Verify that the PC system and video card are Plug & Play compatible and check for bent pins on the VGA or HDMI connector.
- Display too dark/bright: Adjust contrast and brightness controls.
- Picture bounces/wave pattern: Move electrical devices causing interference.
- Power LED ON but no video: Ensure the computer's power switch is ON, the video card is seated properly, the video cable is connected, and check for bent pins. Verify computer operation by checking the CAPS LOCK LED.
- Missing primary colors: Inspect the monitor's video cable for bent pins.
- Screen image not centered/sized: Adjust pixel frequency (CLOCK and PHASE) or use the auto-adjustment hotkey.
- Color defects: Adjust RGB color settings or select a different color temperature.
- Screen resolution needs adjustment: Adjust resolution via Windows display settings (Properties > Settings > Screen Resolution).
- No sound from built-in speaker: Ensure the PC audio output cable is connected to the monitor's LINE IN port, check sound volume, and verify the "System > Silence" option in the monitor menu is OFF. For HDMI input with no sound, select "AUDIO INPUT as a PC" option and ensure the PC audio output cable is connected to the monitor's LINE IN port.
- "CABLE NOT CONNECTED" error: Check the signal cable connection, tighten screws if loose, and inspect connection pins for damage.
- "INPUT NOT SUPPORT" error: Adjust the computer's display mode to one of the factory preset timing table resolutions provided in the manual.
The manual also includes an addendum for Windows 7/8/10 users experiencing display problems, advising them to ensure their PC and video card support the OS, install the latest video card drivers, and try recommended display resolutions.
Overall, the HANNspree HC270HPB LCD Monitor is designed to be a reliable and versatile display, with comprehensive documentation to guide users through every aspect of its operation and maintenance.