This document is a user manual for the HANNspree HC272PPB (HSG1435) LCD Monitor.
Function Description
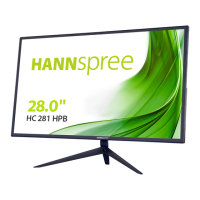
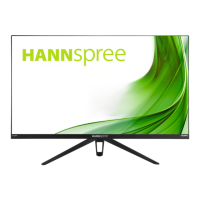
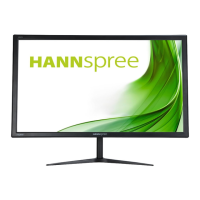
The HANNspree HC272PPB (HSG1435) is a 68.58cm / 27-inch wide-screen TFT Color LCD Monitor designed for crisp, clear display in Windows environments. It features an ergonomic and space-saving, compact case design. The monitor is equipped with a universal internal power supply, allowing operation in either 100/120V AC or 220/240V AC voltage areas without user adjustment. It supports various input sources including DisplayPort (DP), HDMI, and VGA, along with an audio input. The monitor is designed for both desktop use with its stand base and wall mounting using a VESA compatible bracket (VESA 100x100, 4 holes, M4, 10mm, 8kg).
Important Technical Specifications
LCD Panel:
- Driving system: TFT Color LCD
- Size: 68.58cm / 27” Diagonal
- Pixel pitch: 0.2331mm(H) × 0.2331mm(V)
- Display Colors: 16.7M Colors
- Maximum Screen Size: Hor.: 596.74mm, Ver.: 335.66mm
Video:
- H-Frequency: 31KHz - 89KHz
- V-Frequency: 56Hz - 75Hz
- Max. Resolution: 2560 x 1440 @60Hz
Power:
- Power Source: Power Adaptor 12.0V, 4.0A
- Power consumption: ON Mode: 35W (Typical), Power Saving Mode: <0.5W, OFF Mode: <0.3W
Audio:
- Audio output: Rated Power 2.0 W rms (Per channel)
Input Terminal:
Environmental Considerations:
- Operating Temp: 0° to 40°C
- Storage Temp.: -20° to 60°C
- Operating Humidity: 20% to 80%
Physical Specifications:
- Dimensions: 623.5 (W) × 43.3 (H) × 460 (D) mm (24.5 "(W) × 1.7 "(H) × 18.1 "(D))
- Weight (NW): 4.4 kg (9.7 lb)
Compliance:
- This device complies with EMC directive 2014/30/EU, 2014/35/EU, and 93/68/EEC regarding Low Voltage directive.
- VESA DDC2B™ compatible for Plug & Play functionality.
Usage Features
Installation:
- Stand Base Installation/Removal: The manual provides clear steps with diagrams for installing and removing the monitor's stand base, involving screws and a press mechanism.
- Wall Mounting: The monitor supports VESA 100x100 wall mounting. Users are advised to purchase a VESA compatible wall bracket and follow the specific wall bracket instructions. It emphasizes that wall mounting requires special skill and should be performed by qualified service personnel.
- Power Connection: The monitor uses a 12V DC adapter. Users need to connect the adapter to the monitor's DC 12V input socket and the AC power cord to a wall outlet.
- Connecting to a PC: The monitor offers multiple connection options:
- DP Cable: Connects to the computer's DP port.
- HDMI Cable: Connects to the computer's HDMI port.
- HDMI to DVI Cable (optional): Connects to the computer's DVI port.
- VGA Cable (optional): Connects to the computer's VGA port.
- Audio Cable: Connects the monitor's audio input to the PC's audio output (green port).
Adjustments:
- Viewing Angle Adjustment: The monitor's angle can be adjusted from -5° to 15° for optimal viewing. Users are cautioned not to touch the LCD screen or place fingers near hinges during adjustment.
- OSD (On-Screen Display) Control: The monitor features front panel control buttons for various settings:
- Power Button: Turns the monitor ON/OFF.
- AUTO Button: Serves as Input Source / Return and performs auto adjustment (hold for 3 seconds) for VGA input to optimize horizontal/vertical position, clock, and phase. For digital input models, it enters Source selections.
- UP/DOWN Buttons: Adjust Brightness and Volume when OSD is off, or navigate and adjust functions when OSD is on.
- MENU / ENTER Button: Turns the OSD menu on/off or enters/confirms selections.
OSD Menu Settings:
- Brightness/Contrast: Adjusts display brightness and contrast values.
- Preset Mode: Selects between PC, MOVIE, GAME, or ECO modes (model-dependent).
- Active Contrast: Optimizes contrast for high-contrast images and videos.
- Response Time: Sets display response time to MINIMUM, INTERMEDIATE, or MAXIMUM (model-dependent).
- Image Setting:
- H-POSITION / V-POSITION: Adjusts horizontal and vertical screen image position (VGA only).
- CLOCK: Reduces vertical flicker of characters (VGA only).
- PHASE: Reduces horizontal flicker of characters (VGA only).
- Image Ratio: Adjusts aspect ratio (WIDE for full screen, 4:3 for original proportion).
- Sharpness: Adjusts display sharpness from 0 to 100.
- Color Setting: Adjusts color temperature (RED/GREEN/BLUE) or allows user-defined RGB levels.
- Low Blue Mode: Adjusts blue light output.
- OSD Setting:
- Language: Changes OSD language.
- H-POSITION / V-POSITION: Adjusts horizontal and vertical OSD position.
- Time Out: Sets OSD display duration (10 to 100 seconds).
- Transparency: Adjusts OSD transparency.
- Reset:
- Auto Config / Auto Color: Auto adjustment functions.
- Reset: Resets all settings to default.
- Extra:
- Input Select: Changes input source (Analog/VGA, Digital/HDMI/DP).
- Audio Input: Selects audio input source (HDMI or PC LINE IN).
- Mute: Toggles audio mute (model-dependent).
- Volume: Adjusts volume level (models with incorporated audio).
- DDC/CI: Toggles DDC/CI function (dual input mode optional).
Plug & Play DDC2B Feature:
- The monitor supports VESA DDC2B, allowing it to communicate its identity and display capabilities to the host system. A video input signal is required for proper operation.
Maintenance Features
General Precautions:
- Placement: Avoid placing the monitor near water, on unstable surfaces, near heat sources, in direct sunlight, or in dusty/vibrating environments. Ensure proper ventilation.
- Power: Use the correct power source. Unplug during lightning storms or prolonged disuse to prevent damage from power surges. Avoid overloading power strips.
- Handling: Do not push objects into cabinet slots or spill liquids on the monitor.
- Servicing: Do not attempt to service the monitor yourself; refer all servicing to qualified personnel.
- Packaging: Save the original shipping box and packing materials for future transport.
Cleaning:
- Periodically clean with a soft cloth. Stubborn stains can be removed with a cloth lightly dampened with a mild detergent solution.
- Caution: Never use strong solvents (thinner, benzene) or abrasive cleaners, as they can damage the cabinet. Always unplug the monitor before cleaning.
Troubleshooting (FAQ):
- Power LED not on: Check power switch, power cord connection.
- No Plug & Play: Check PC and video card compatibility, inspect VGA connector pins.
- Display too dark/bright: Adjust Contrast and Brightness Controls.
- Picture bounces/wave pattern: Move electrical devices causing interference.
- Power LED ON but no video: Check computer power, video card seating, monitor's video cable connection and pins, and computer's operational status (e.g., CAPS LOCK key).
- Missing primary colors: Inspect monitor's video cable and pins.
- Screen image not centered/sized: Adjust pixel frequency (CLOCK) and PHASE, or use AUTO Button.
- Color defects: Adjust RGB color or select color temperature.
- Screen resolution needs adjustment: Adjust resolution via Windows display settings.
- No sound from built-in speaker: Check PC audio output cable connection, monitor's LINE IN/AUDIO IN port, sound volume adjustment, System > Silence option in monitor menu. For HDMI input, select AUDIO INPUT to HDMI or PC.
Error Messages:
- CABLE NOT CONNECTED: Check signal-cable connection and pins.
- INPUT NOT SUPPORT: Adjust computer's display mode to one of the factory preset timing table resolutions provided in the manual. The manual lists numerous resolutions and corresponding horizontal/vertical frequencies for both PC and video modes (e.g., 640x480 @70Hz, 2560x1440 @60Hz, 1920x1080p @60Hz).
Notes on LCD Monitors:
- Normal Symptoms: Screen flicker upon initial use, slightly uneven brightness, minor pixel blemishes (0.01% or less), and afterimages from prolonged static image display are considered normal and do not indicate a problem.
- Malfunctions: Sudden erratic flashes or backlighting failure require contacting a dealer or service center; self-repair is not recommended.