29
The DC current
This section describes how to configure a DC current measurement from the front
panel.
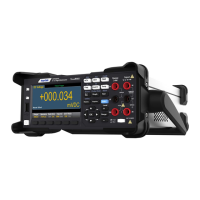
Step 1: Configure the test leads, as shown below.
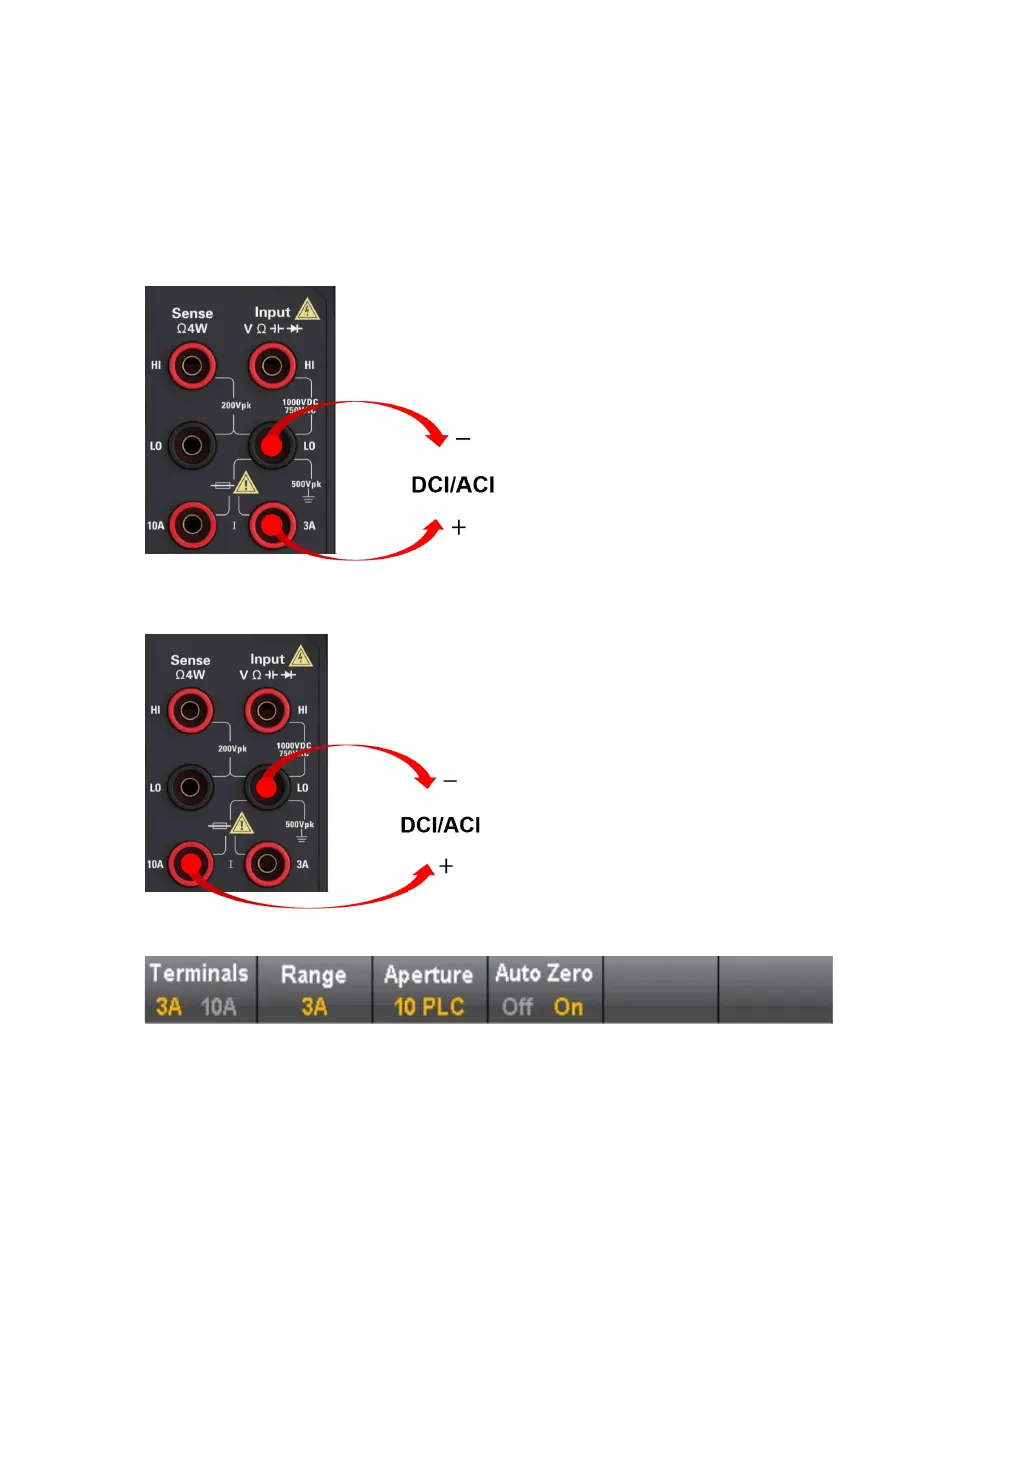
On the HDM3000, you can also configure the measurement using the 10A terminal,
which is recommended when measuring currents greater than 3A:
Step 2: Press [DCI] on the front panel.
Step 3: For the HDM3000, with Aperture NPLC=10PLC by default, use the
Up/Down arrow keys to specify the integration time in the Power Line Cycle
Number (PLC) for measurement.
1, 10 and 100 PLCs provide normal mode (line
frequency noise) suppression.
Choose 100 PLC to provide the best noise suppression but the slowest measurement
speed:
Step 4: By default, the instrument selects 3A terminal. Use the Terminals soft keys
to switch between the 3A and 10A input terminals. When you change it to 10 A, the
 Loading...