37
Step 2: Press the one on the front panel .
Step 3: To remove the test lead capacitance, do the following operations:
Disconnect the probe end of the positive and negative test leads from the test
circuit and leave it open.
Press Null.
The DMM subtracts this null value from the capacitance
measurement.
Step 4: Press Range to choose a range for measurement. You can also use the [+], [-]
keys on the front panel to select the range.
Automatically select range for
measurement based on input.
Compared with manually selected range, auto range
adjustment is more convenient, but can lead to slower measurement. Automatic
adjustment range can be adjusted down to less than 10% of the range, can also be
adjusted up to more than 120% of the range. When the auto range adjustment range
is off, the instrument will not report "overload" if the reading exceeds 120% of the
range (capacitance measurements only). Overload occurs only when the algorithm
timeouts because the applied capacitance is too large to make measurements. In
capacitance measurement mode, if you apply a DC voltage or short connection to the
input terminal, the instrument will report an "overload".
Continuity
This section describes how to configure continuity tests from the front panel.
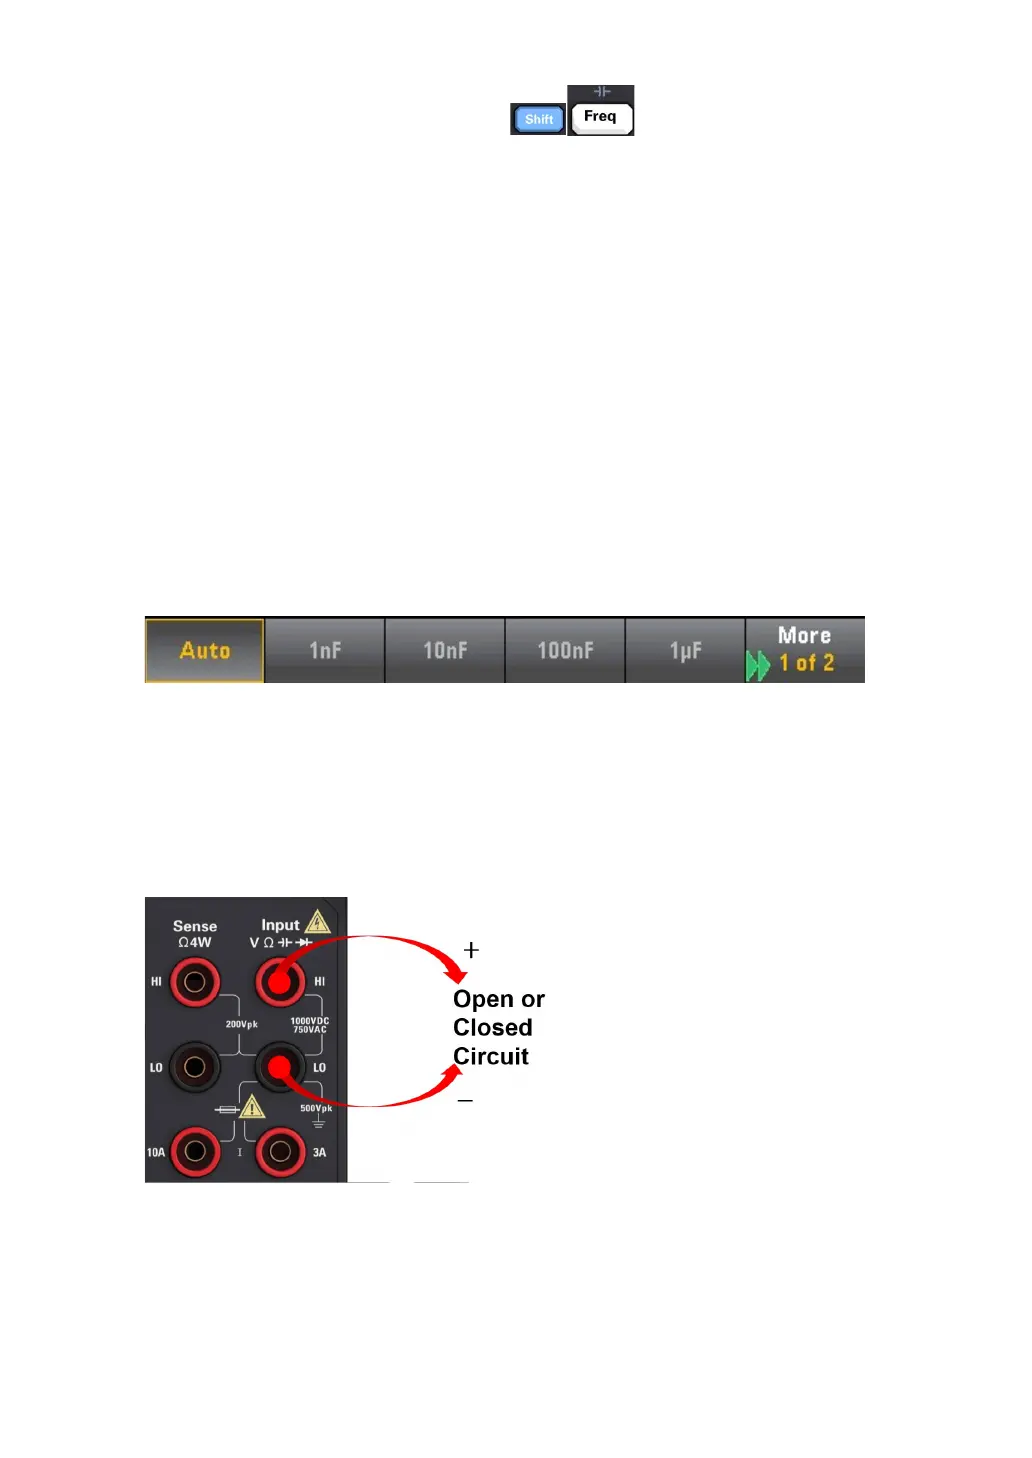
Step 1: Configure the test leads, as shown below.
Step 2: Press [Cont] on the front panel to open a menu. You can use this menu to
choose to use buzzer or disable buzzer.
 Loading...