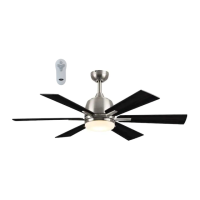
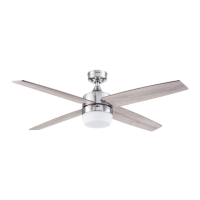
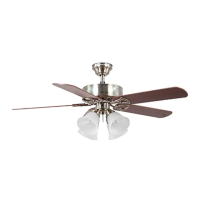
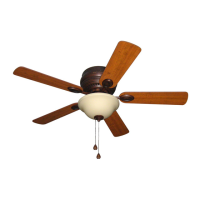
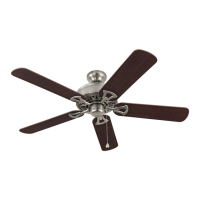
This document describes the Bradbury Ceiling Fan, a device designed to provide air circulation and illumination in residential settings. The fan is available in several models: BRD48BNK6LR, BRD48MBK6LR, and BRD600SB6LR. It is distributed by Litex Industries Inc. and comes with a limited lifetime warranty.
Function Description
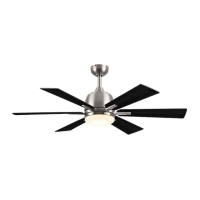
The Bradbury Ceiling Fan serves a dual purpose: air circulation and lighting. It features a motor housing, a downrod (for standard or angled mounting), a canopy, a mounting bracket, a yoke cover, an LED light kit, blades, a fitter plate, and a shade. The fan operates with a remote control receiver and transmitter, allowing users to adjust fan speed and light settings conveniently.
For air circulation, the fan offers three speed settings: high, medium, and low. It also includes a reverse switch located on the top of the motor housing, which allows users to optimize airflow for different seasons. In warmer weather, setting the reverse switch to the LEFT position creates a downward airflow, producing a wind chill effect. In cooler weather, setting the switch to the RIGHT position results in an upward airflow, which helps move stagnant, hot air off the ceiling area. It is crucial that the reverse switch is set either completely LEFT or completely RIGHT for the fan to function; if it is in the middle position, the fan will not operate.
For lighting, the fan incorporates an LED light kit. The remote control allows users to turn the light on or off and to dim or brighten it. Holding down the light button on the remote control activates the dimmer function, with the lights varying cyclically over 8 seconds. The light button also has an auto-resume function, which recalls the last brightness setting used. The LED component is designed for this specific application and should not be serviced by untrained personnel.
Usage Features
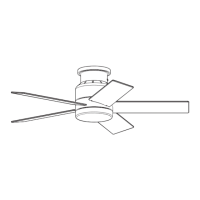
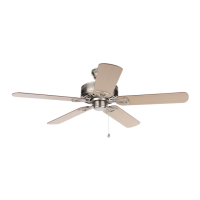
The fan offers flexible installation options, including downrod-style mounting for standard or angled ceilings (up to 19° maximum angle) and closemount-style mounting for standard ceilings only. Downrod-style mounting is recommended for ceilings 8 ft. or higher, with longer downrods available (not included) for taller or angled ceilings to ensure proper blade clearance. A minimum clearance of 7 ft. from the blades to the floor and at least 30 in. from the end of the blades to any obstruction is required for safe operation.
Installation involves securing the mounting bracket to an appropriate outlet box, which must be marked "ACCEPTABLE FOR FAN SUPPORT OF 35 LBS. OR LESS" and securely attached to the building structure. A metal octagonal outlet box is recommended; plastic outlet boxes should not be used. The fan's net weight, including the light kit, is 16.98 lbs.
Wiring connections are made using wire connectors provided in the remote pack. It is important to ensure all electrical connections comply with local codes, ordinances, the National Electrical Code, and ANSI/NFPA 70-1999. A qualified electrician or a do-it-yourself wiring handbook is recommended for those unfamiliar with electrical wiring. The wire connectors are designed to accept one 12-gauge house wire and two lead wires from the fan. If house wires are larger or more numerous, an electrician should be consulted for proper wire connector sizing.
The remote control transmitter is programmed to the fan's receiver during initial setup. This involves restoring electrical power and pressing and holding the "0" button on the remote for 5 seconds until the fan light blinks twice, confirming the learning process. The remote control is not designed for use with solid-state fans and has an electrical rating of 120V / 60 Hz with a motor amperage of 1.25 MAX. Using a full-range dimmer switch (not included) to control fan speed is explicitly warned against, as it can cause a loud humming noise and poses a risk of fire or electrical shock.
For optimal performance, the fan blades should be at least 30 inches from any obstruction and 7 ft. above the floor. The assembly process should avoid the use of power tools for blade installation to prevent damage.
Maintenance Features
Regular maintenance is recommended to ensure the fan's longevity and performance. At least twice a year, the lower canopy should be lowered to check the downrod assembly and tighten all screws on the fan. The motor housing should be cleaned with only a soft brush or a lint-free cloth to avoid scratching the finish. The blades can be cleaned with a lint-free cloth, and a light coat of furniture polish may be applied to wood blades for added protection.
Before performing any maintenance, the main power supply to the fan must be shut off. Water or a damp cloth should not be used to clean the ceiling fan. The LED light kit has a total wattage of 18 watts, and users are advised not to attempt to replace the LEDs themselves.
The remote control battery should be removed if the transmitter will not be used for long periods to prevent damage. Batteries should be inserted with the correct polarity. When disposing of batteries, local and state recycling or hazardous waste coordinators should be consulted for proper disposal methods.
Troubleshooting guidance is provided for common issues such as the fan not moving, noisy operation, excessive wobbling, or the light failing. These issues often relate to the reverse switch not being engaged, power supply problems, faulty wire connections, loose or unbalanced blades, or insecure mounting. Corrective actions typically involve checking and tightening connections, replacing damaged parts, or adjusting the fan's position.