=))6'F)X"/'?(.*2&&2*$)(
>)*"3 Door and Back Covers (16, 17) not shown on
illustrations to provide a clear view of installation.
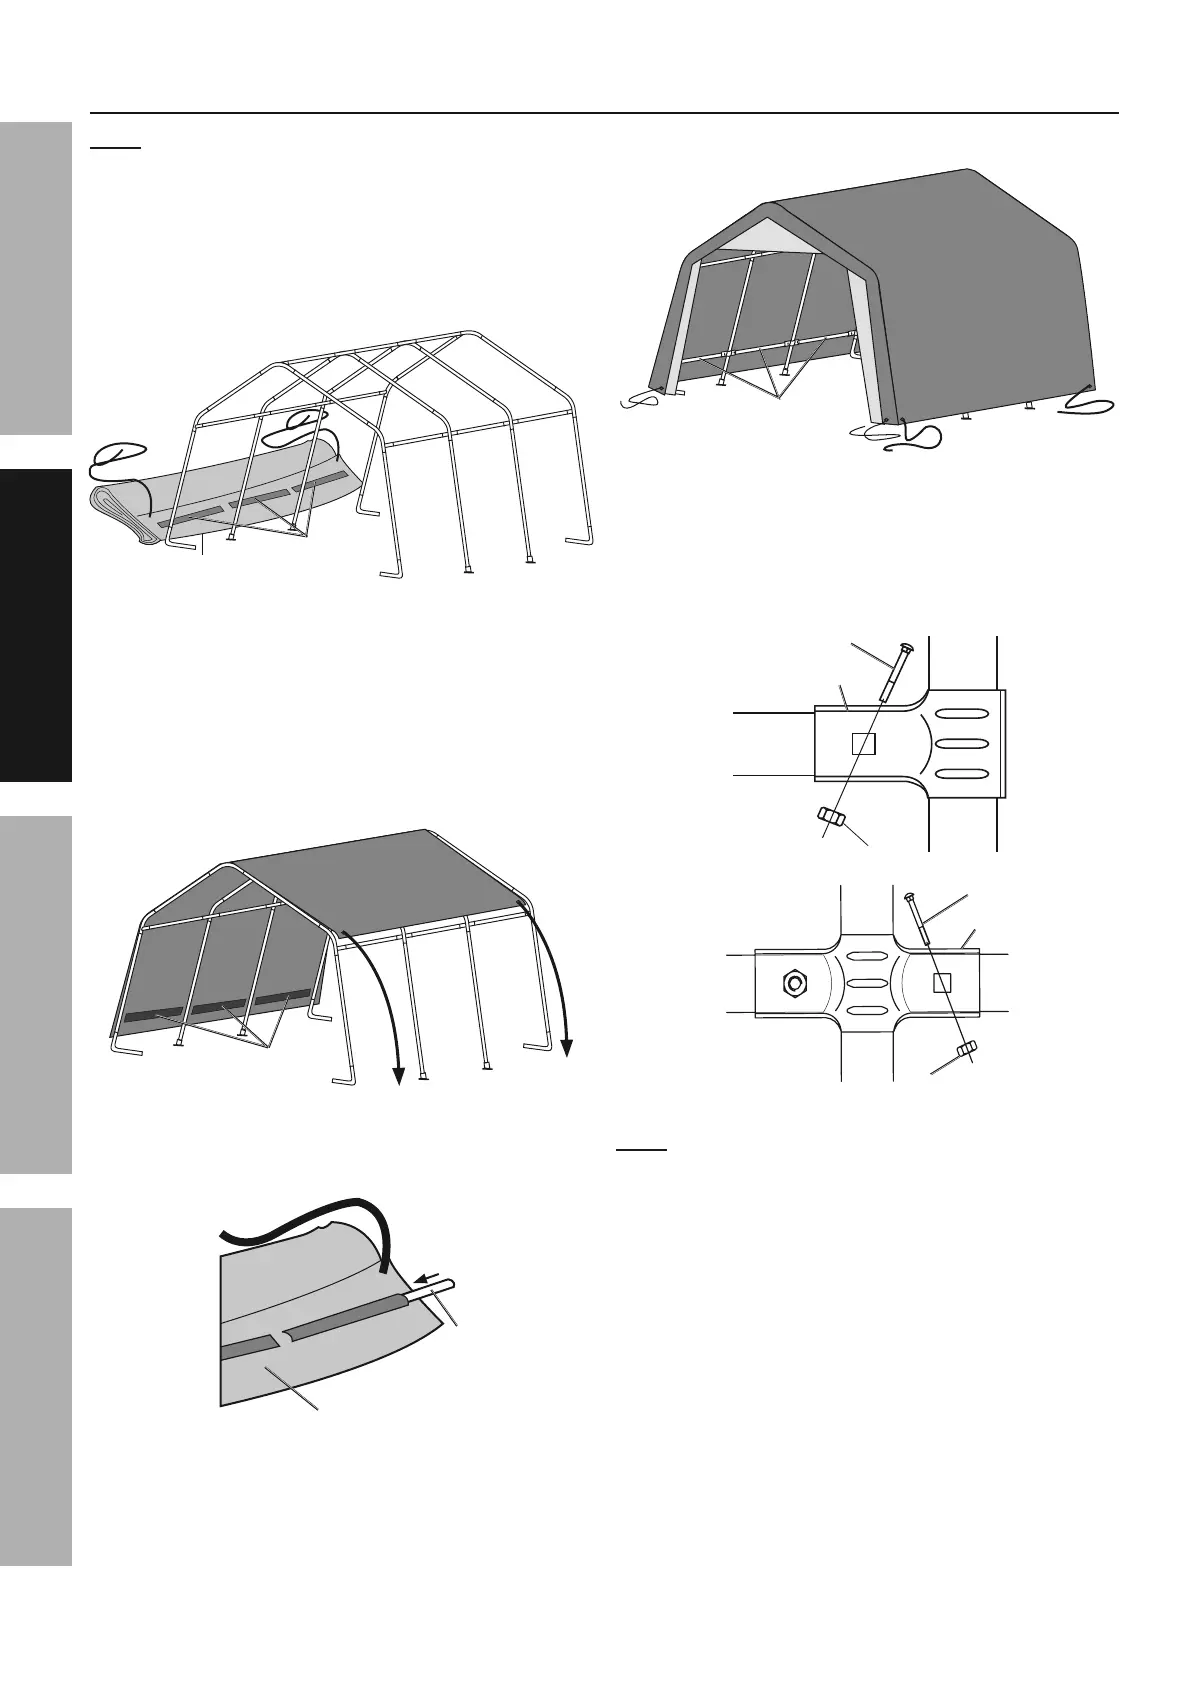
1. Lay the Roof Cover (15) on the ground next
to the frame. Make sure that the edges with
black straps are alongside the Door/Back
Covers (16, 17) and one set of the fabric tubes
is facing upwards, as shown in Figure R.
OS
L21/$%'E+1".
L$7+/"'=3''<&$7('=))6'F)X"/'0$*#'L/28"
2. Throw the ends of the straps over the frame.
3. Move to the other side of the frame and pull
the Cover over the frame. Make sure that the
Roof Cover is centered on the frame. If a small
adjustment is needed, two people should pull
together from the same end of the Portable Garage
so that the Roof Cover does not become twisted.
L21/$%'E+1".
L$7+/"'D3''V+&&'=))6'F)X"/'JX"/'L/28"'W.$(7'D*/24.
4. Insert the Bottom Rails (5) into the fabric
tubes on each side of the Roof Cover.
OS
S
L$7+/"'E3''?(."/*'I)**)8'=2$&.
5. Make sure the Bottom Rails are level and horizontal.
I)**)8'=2$&.'gSh
L$7+/"'W3''I)**)8'=2$&.'$('4&2%"-
6. Attach the Bottom Rails to the Corner
Studs (2) using 3-Way End Rail Clamps (9),
Bolts and Nuts (13, 14), and to the Center
Studs (1) with 4-Way Center Rail Clamps (10),
as shown in Figure V.
Ob
Od
Oc
Ob
U
Oc
L$7+/"'!3''bP'2(,'cP;2C'=2$&'F&284'F)(("%*$)(.
>)*"3 Only finger tighten the Nuts at this point.
7. Make sure that all the Bottom Rails are of the same
height from the ground, then tighten all Nuts.
8. Secure the four corners to the Corner Legs (6)
using Ratchet Tie-Downs (8); see Securing
Ratchet Tie-Downs on page 10.
Page 12 L)/'*"%#($%2&'M+".*$)(.N'4&"2."'%2&&'OPQQQPQRRPSTUT- Item 62859
D<L9EG JV9=<E?J> H<?>E9><>F9D9EWV