2.22REAR SHOCK ABSORBERS
GENERAL
When removing the shocks for repair or replacement, remove
and install one shock first, then the other. This will eliminate
the need for raising the rear end of the motorcycle. If it is
necessary to remove both shocks at once, place the motorcycle
on a center stand with the rear wheel raised off the ground.
For information on preload adjustment and suspension settings,
see 1.18 SUSPENSION ADJUSTMENTS.
REMOVAL
1. Block motorcycle underneath frame so rear wheel is raised
off the ground.
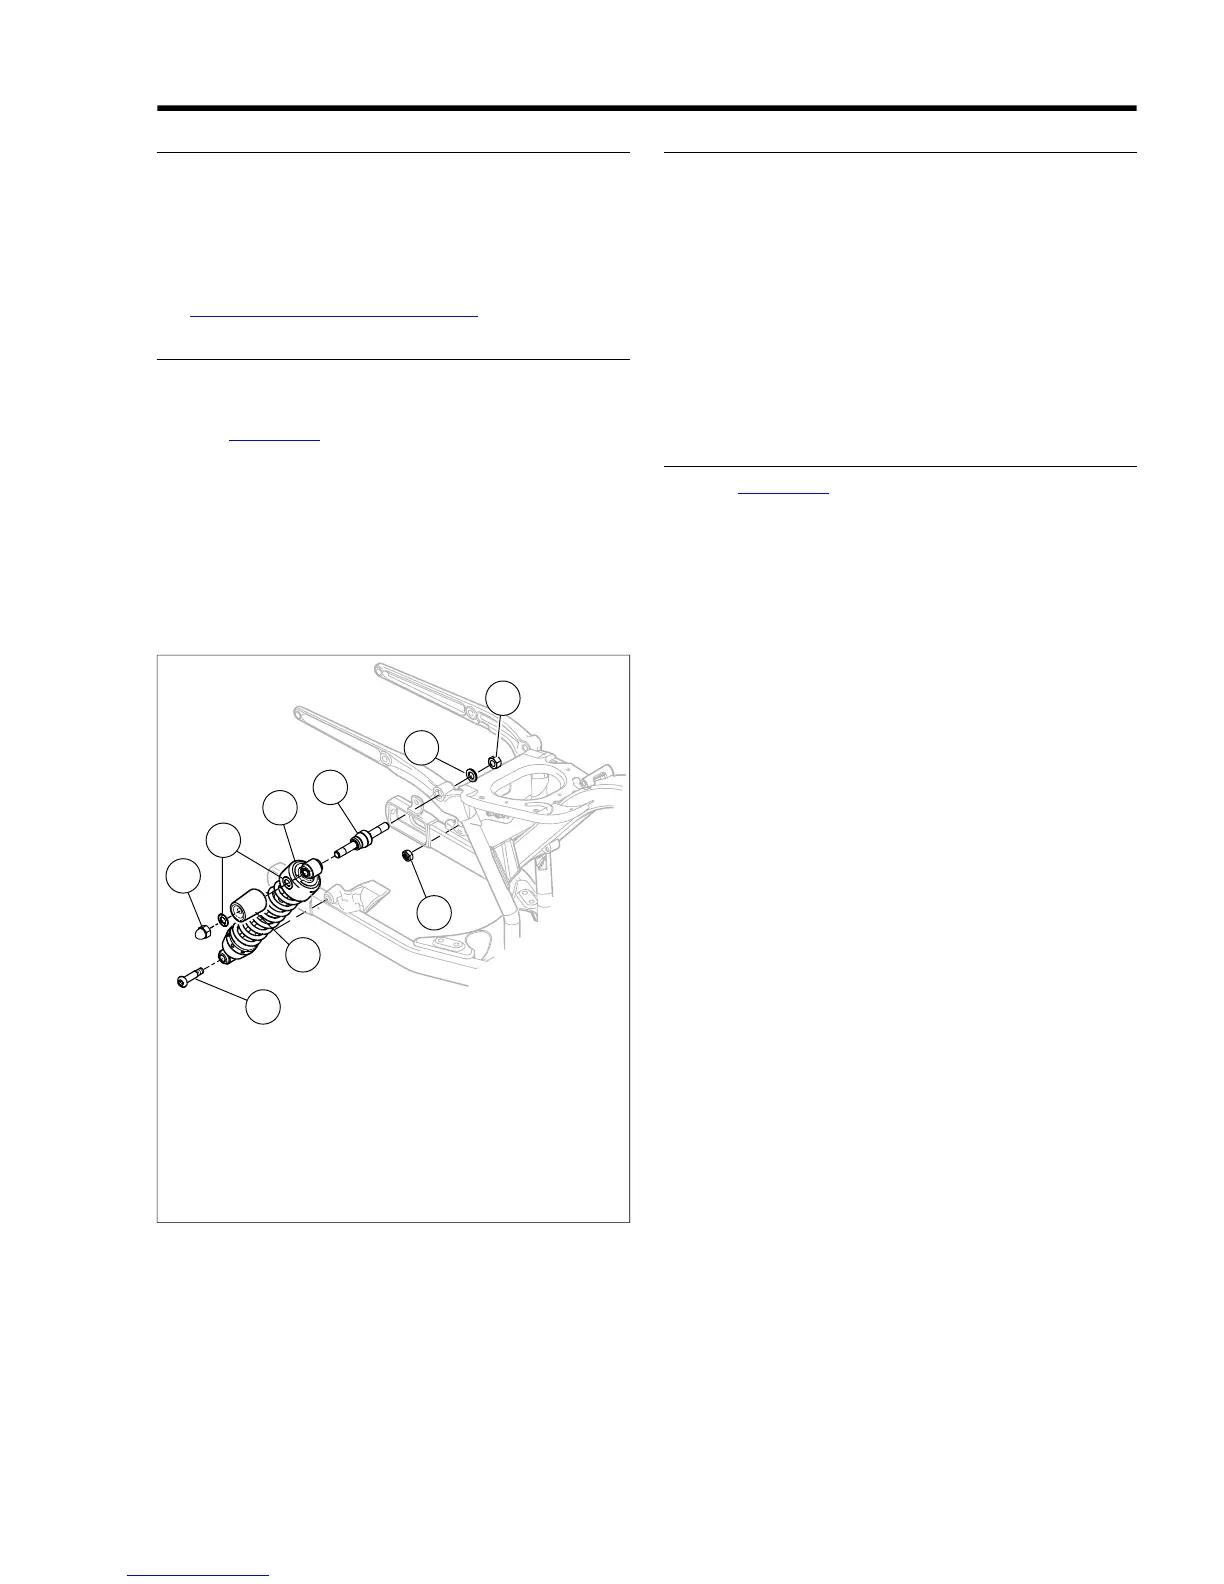
2. See Figure 2-97. Remove lower shock mount screw (1).
Nut (9) is only used on left side.
3. Remove upper shock mount nut (2), outer washer (4),
chrome cover (3), inner washer (4), and shock absorber
(5).
4. Repeat for other shock absorber.
5. If stud (6) is to be removed, remove nut (8) and washer
(7).
1. Lower mounting screw (2)
2. Upper mounting nut (2)
3. Cover, chrome (FXDB, FXDC only) (2)
4. Washer (4)
5. Shock absorber (2)
6. Stud (2)
7. Hardened washer (2)
8. Nut (2)
9. Jam nut (lower-left side only)
Figure 2-97. Rear Shock Absorber Mounting (Typical)
INSPECTION
NOTE
Shocks are non-repairable items, except for the rubber
mounting bushings. If the shock is leaking or damaged, it must
be replaced as an assembly.
1. Examine the rubber mounting bushings for cracks or wear.
Examine the shock for leaks.The unit should not leak and
should compress slightly easier than it extends. Compare
the action of the shock with a new one to judge if it is worn.
Replace the shock if necessary.
2. Clean and examine the shock mounting hardware. Replace
parts that are worn or damaged.
INSTALLATION
1. See Figure 2-97. If removed, install stud (6), hardened
washer (7) and nut (8).Tighten to 70-85 ft-lbs (101.7-115.2
Nm).
2. Fasten each shock to the frame and rear fork using the
original hardware.
3. Attach lower shock mount to rear fork.
a. Apply two to three drops of LOCTITE THREAD-
LOCKER 243 (blue) to threads of bottom bolt (1).
b. Install bolt and hand tighten.
4. Apply two to three drops of LOCTITE THREADLOCKER
243 (blue) to threads of shock mount nut (2).
a. Install inside washer (4), shock (5), cover (3), (if
applicable,) outside washer (4) and upper shock
mount nut (2).
b. Hand tighten nut (2).
NOTE
Before tightening, rotate shock cover (4) counterclockwise to
provide for proper alignment when tightened.
5. Tighten upper and lower shock mount screws as follows:
a. Lower mount: 30-40 ft-lbs (40.7-54.2 Nm)
b. Upper mount: 30-40 ft-lbs (40.7-54.2 Nm)
2008 Dyna Service: Chassis 2-65