3.29OIL PAN
REMOVAL
NOTE
When jacking up motorcycle, do not apply pressure directly to
the oil pan. Damage can occur unless measures are taken to
distribute the pressure (such as a block of wood placed
between the jack and the oil pan). A suitable lift which applies
pressure at the tires is the only recommended method for
raising the motorcycle.
1. Position motorcycle on a suitable lift.
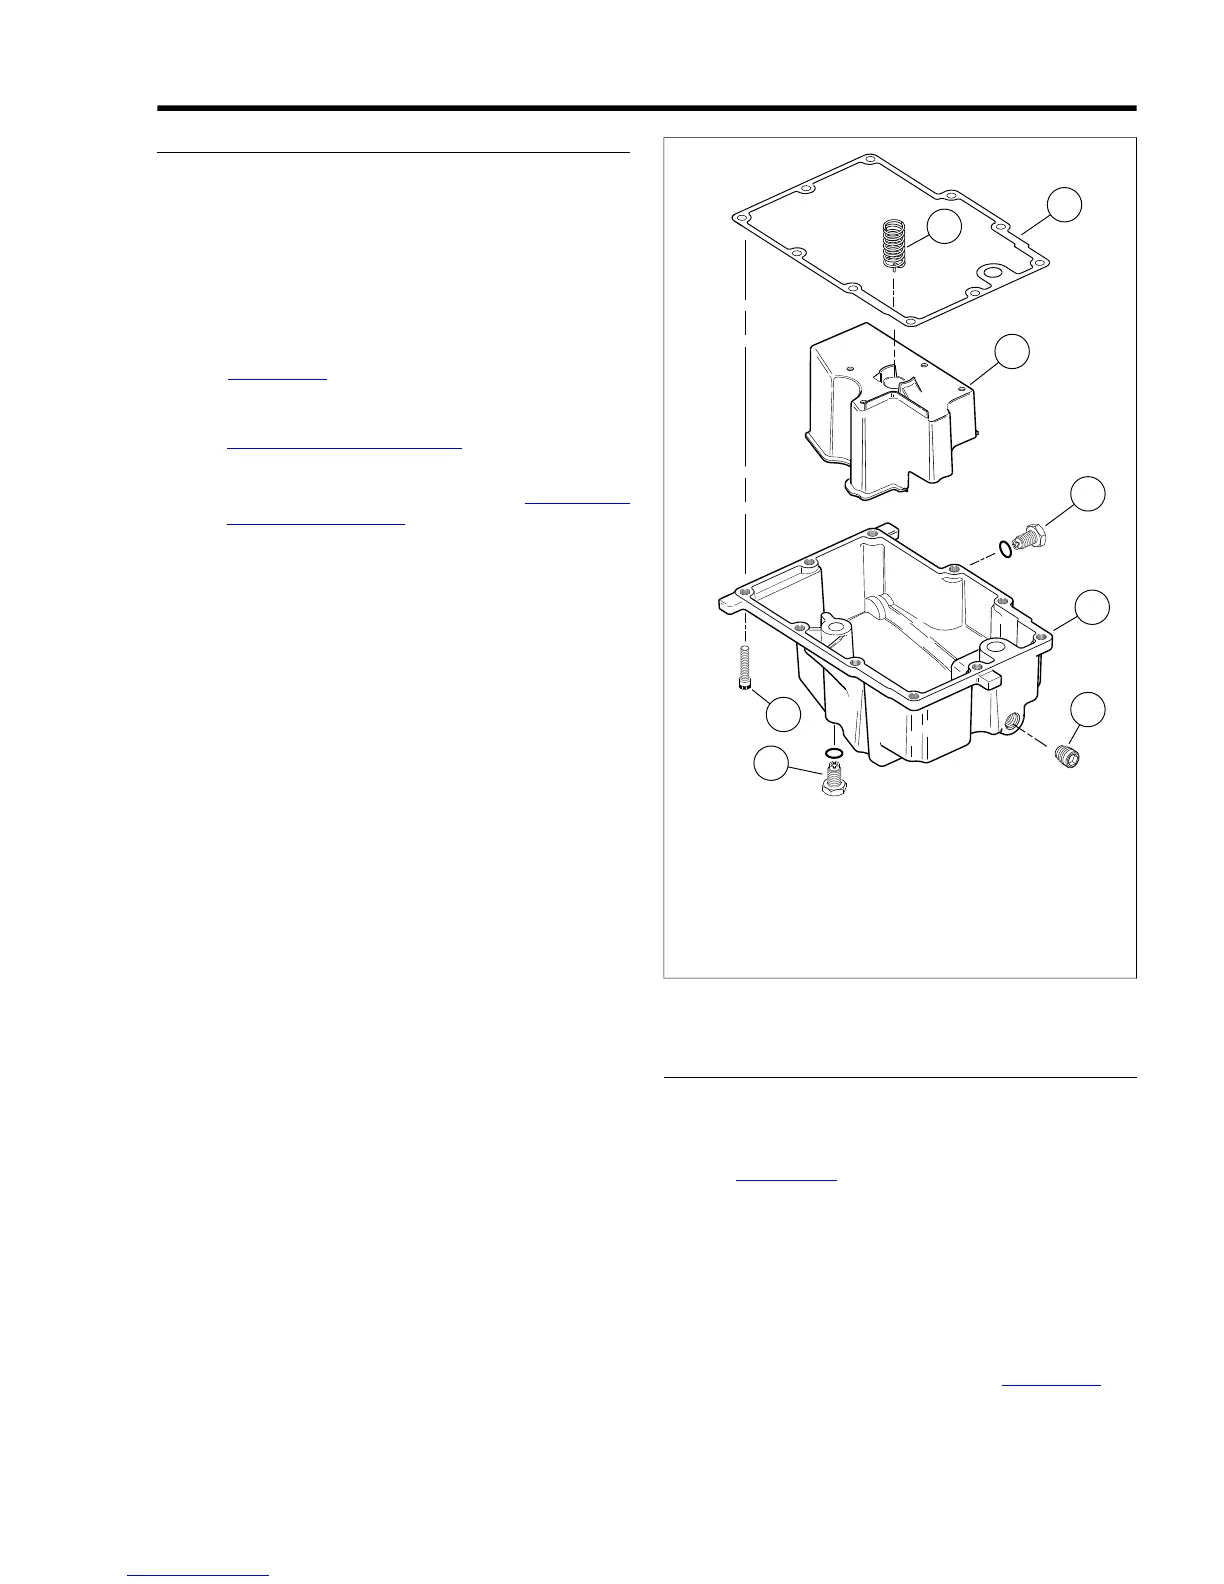
2. See Figure 3-147. Drain fluids from oil pan.
a. Remove engine oil drain plug (4), fill plug/dipstick and
oil filter. Drain oil into suitable container. See
1.4 ENGINE OIL AND FILTER.
b. Remove transmission drain plug (7). Drain transmis-
sion fluid into suitable container. See 1.10 TRANS-
MISSION LUBRICANT.
3. Remove ten screws (8) that secure the oil pan to the
transmission housing.
4. Remove oil pan (5) and gasket (1). Discard gasket.
5. Remove baffle assembly (3) and spring (2) from oil pan.
1. Gasket
2. Spring
3. Baffle assembly
4. Engine oil drain plug
5. Oil pan
6. Pipe plug
7. Transmission drain plug and O-ring
8. Screw (10)
Figure 3-147. Oil Tank: Dyna Glide
INSTALLATION
1. Clean and examine all flange surfaces. Examine drain
plug O-rings for tears or damage. Replace O-rings as
required.
2. See Figure 3-147. Insert baffle assembly (3) and spring
(2) in oil pan.
3. Place new gasket (1) on oil pan.
NOTE
Use a few drops of HYLOMAR to keep gasket in place and
simplify installation.
4. Position gasket and oil pan on transmission housing and
install with ten screws (8). Tighten to 84-108 in-lbs (9.5-
12.2 Nm) following sequence shown in Figure 3-148.
2008 Dyna Service: Engine 3-99



 To Next Page