3.28FLYWHEEL AND CONNECTING RODS
REMOVAL OVERVIEW
1. Perform all steps under 3.15 TOP END OVERHAUL:
DISASSEMBLY.
2. Perform all steps under 3.17 BOTTOM END OVERHAUL:
DISASSEMBLY.
3. Remove sprocket shaft bearing. See 3.27 CRANKCASE.
INSPECTION
NOTE
Do not attempt to straighten connecting rods. Straightening
rods will damage both the upper bushing and lower bearing.
1. Replace the flywheel/connecting rod assembly if any of
the following conditions are noted:
a. Connecting rods are bent or twisted.
b. Connecting rods do not fall under their own weight or
are in a bind.
c. Sprocket teeth are worn in an irregular pattern or
chipped.
d. The crankshaft (roller) bearing inner races are
brinelled, burnt, scored, blued or damaged.
NOTE
Bluing on connecting rods is part of the hardening process and
is considered a normal condition.
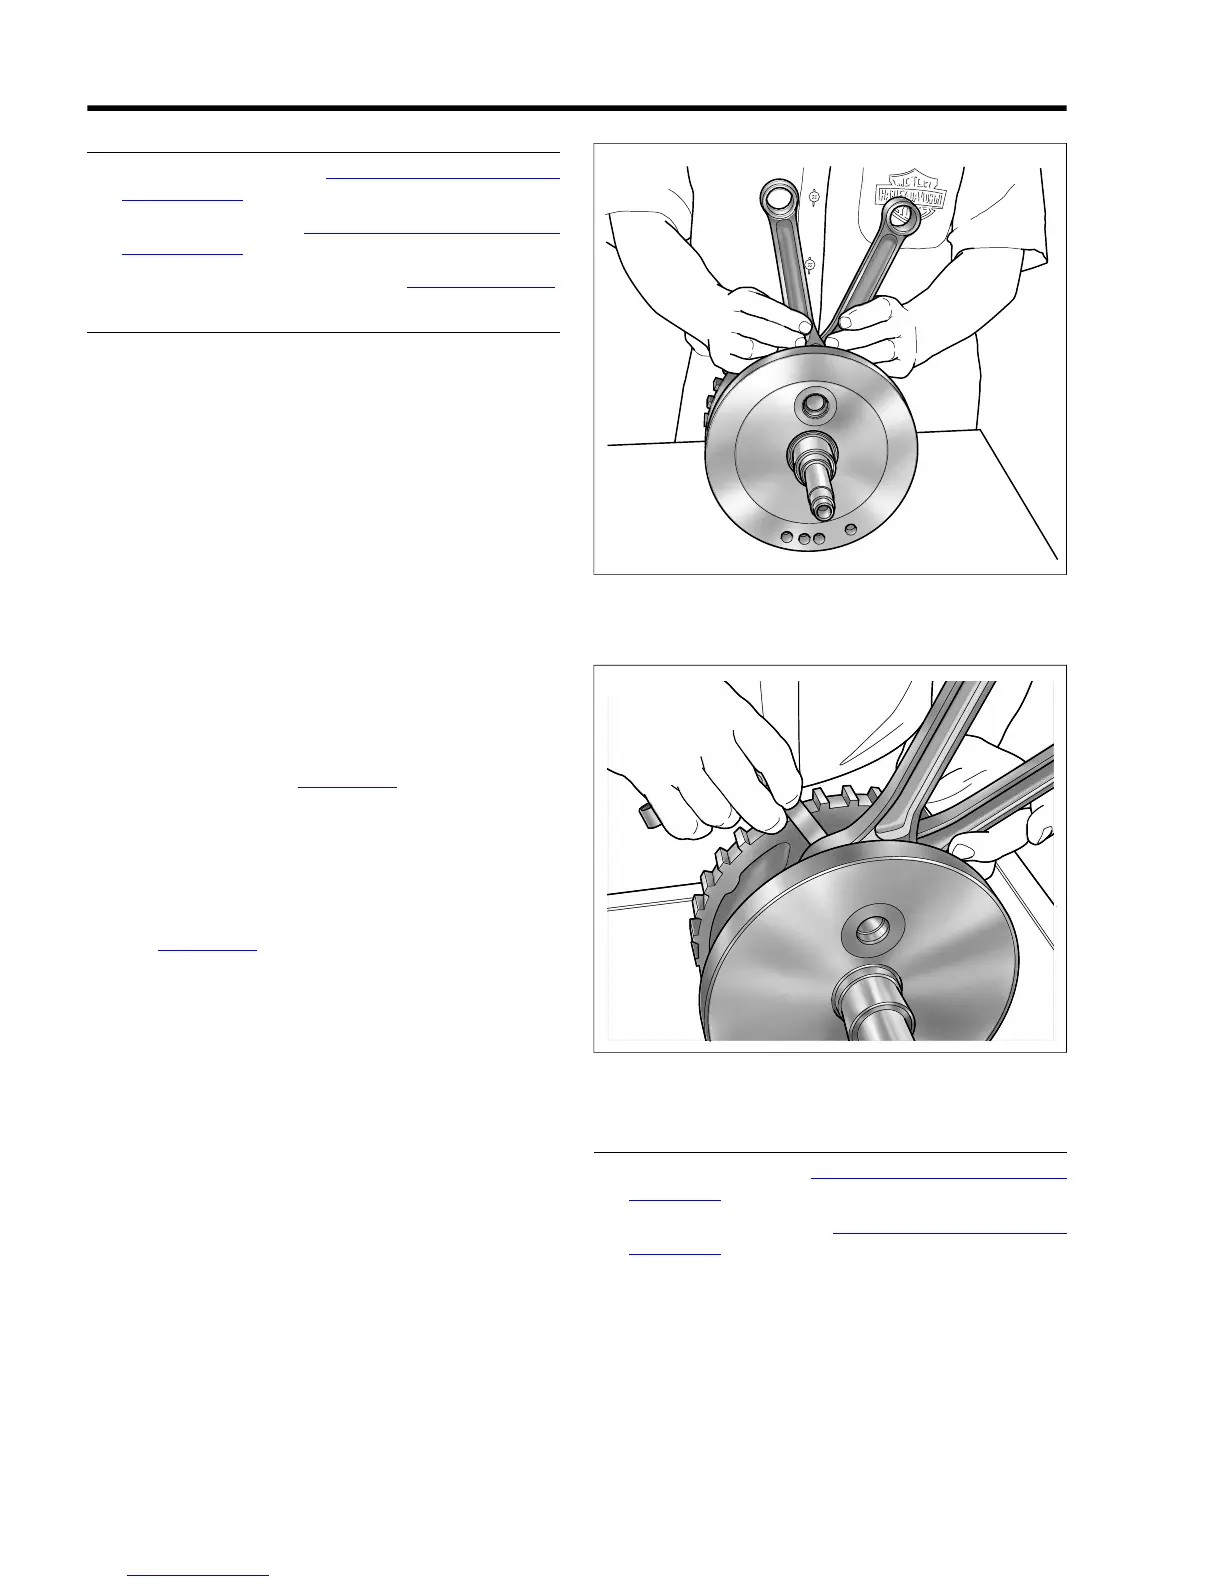
2. Check connecting rod bearing clearance. Orient the
assembly as shown in Figure 3-145.
a. Holding the shank of each rod just above the bearing
bore, pull up and down on the connecting rods.
b. Any discernible up and down movement indicates
excessive lower bearing clearance. Replace the fly-
wheel/connecting rod assembly.
3. See Figure 3-146. Check connecting rod side play.
a. Insert a feeler gauge between the thrust washer and
the outboard side of the connecting rod.
b. Replace the assembly if rod side play exceeds 0.020
in. (0.51 mm).
NOTE
If the flywheel, connecting rods or right side bearing inner race
need to be replaced, then replace the entire flywheel assembly.



 To Next Page