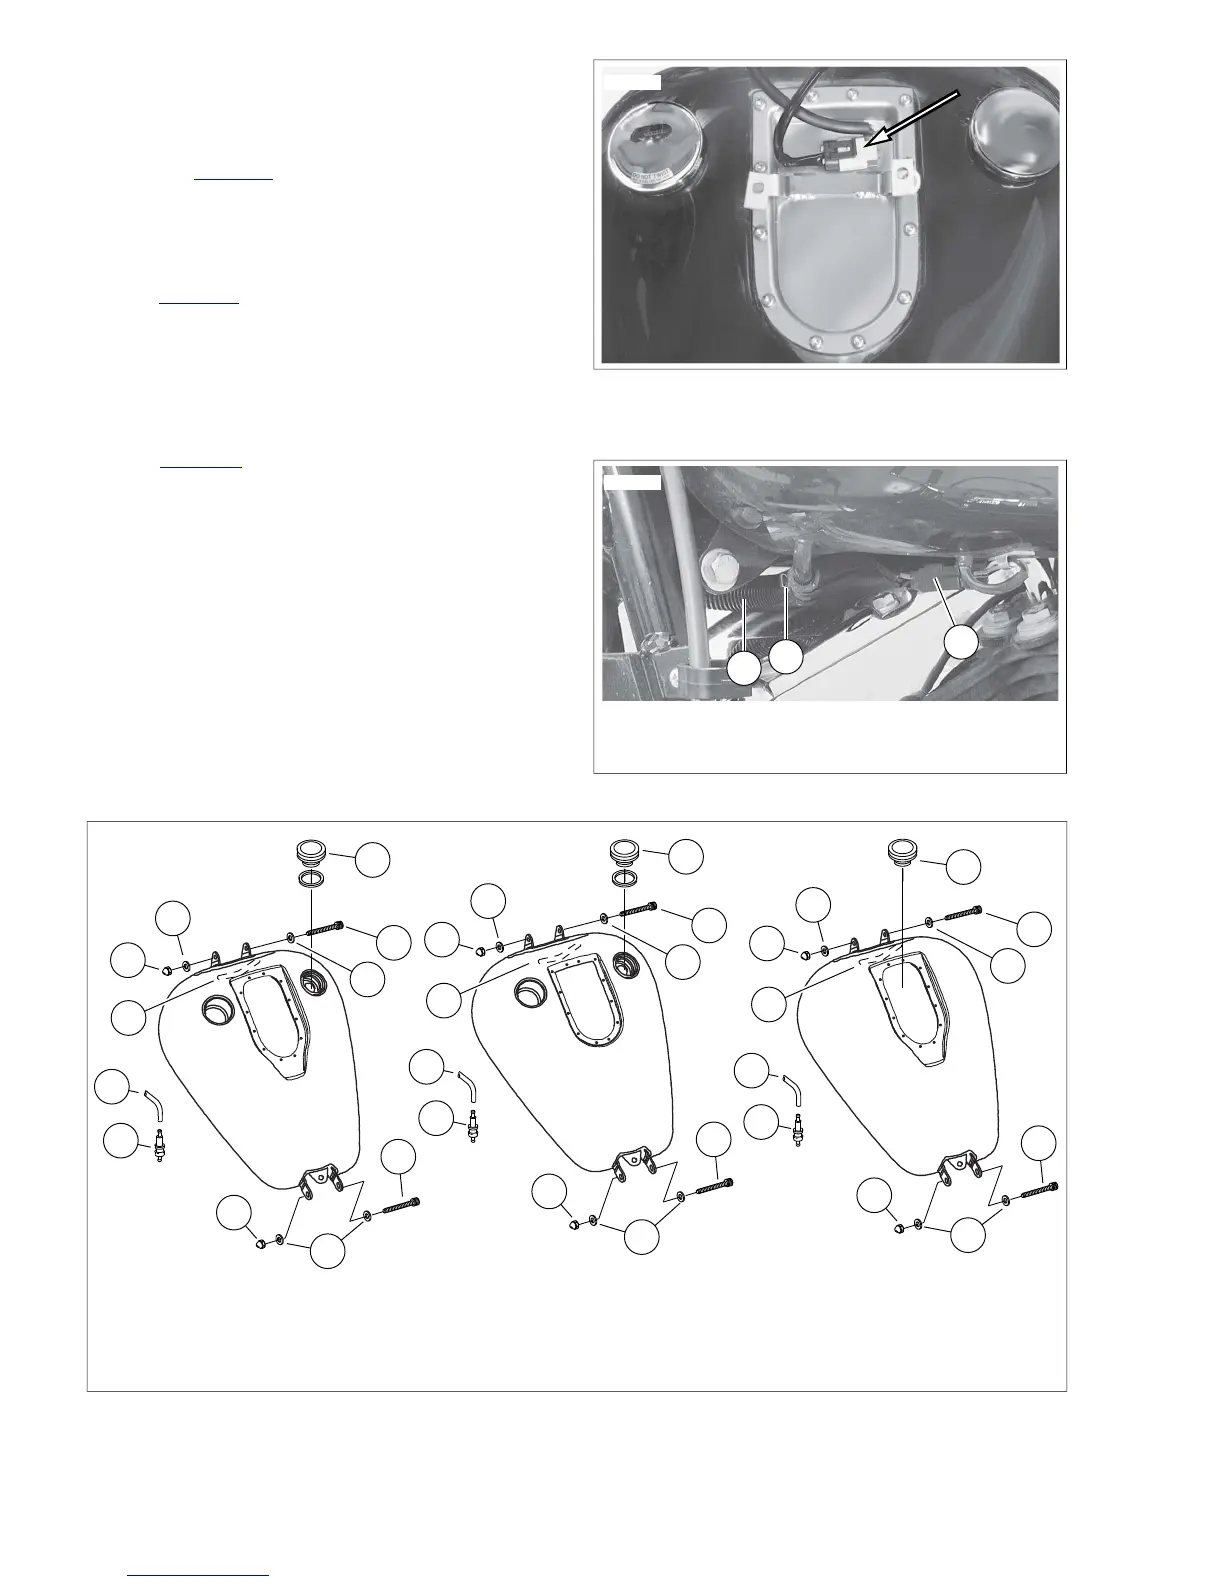
7. Drain fuel tank.
a. Obtain a short section of hose (5/16 inch I.D.). Insert
bolt in one end of hose and install hose clamp to
ensure that end is securely plugged.
b. See Figure 4-6. Cut clamp (2) from one end of cros-
sover hose (3). Quickly replace crossover hose on
fuel tank fitting with open end of short hose while dir-
ecting flow of gasoline from free end of crossover
hose into suitable container.
8. See Figure 4-7. Disconnect crossover hose (1) and con-
tinuous venting vent line (9).
9. Remove the front mounting bolt (2), flat washers (3), and
acorn nut (4).
10. Remove the rear mounting bolt (5), flat washers (6), and
acorn nut (7).
11. See Figure 4-6. Disconnect fuel gauge connector [117]
(1) located under left side of fuel tank.
6.1. Flat washer (2)Crossover line
2. 7.Front mounting fastener Acorn nut
8.3. Fuel capFlat washer (2)
4. 9.Acorn nut Continuous venting system vent line
10.5. Vapor valveRear mounting fastener
Figure 4-7. Fuel Tank (Left: FXDL, FXDB, Center: FXDWG, FXDC, FXDF, Right: FXD)
4-8 2008 Dyna Service: Fuel System



 To Next Page