1. Rear exhaust pipe
2. Bellcrank
3. Battery cover
4. Active exhaust cable
5. Cable end
6. Active exhaust module
Figure 4-64. Active Exhaust Bellcrank Location
REMOVAL: FXDF
NOTE
If removing exhaust as an assembly and not removing mufflers,
skip muffler removal steps.
1. Remove seat.
2. See Figure 4-65. Disconnect rear O2 sensor connector
[137]. Note wire routing for proper installation.
3. See Figure 4-66. Open front electrical caddy cover and
disconnect front O2 sensor connector [138] (1). Remove
connector housing from caddy.
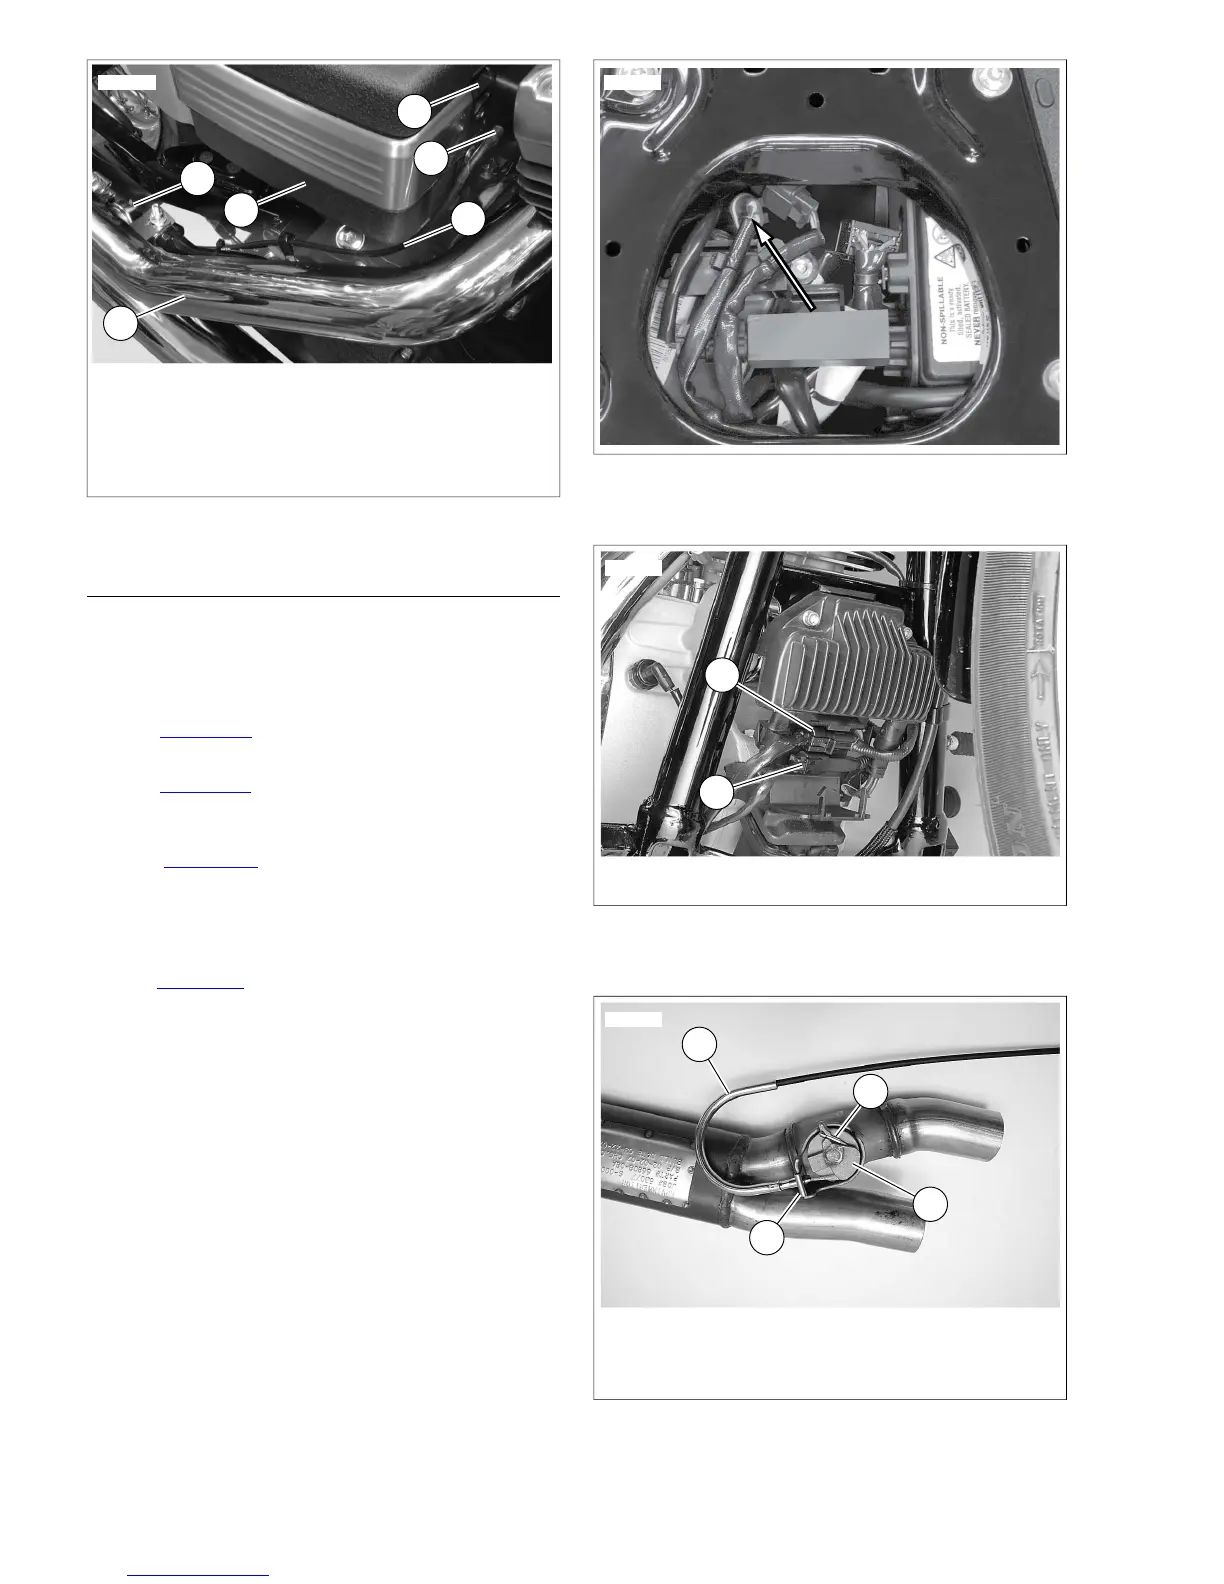
4. See Figure 4-67. On models with an active exhaust
module, remove active exhaust cable (1):
a. Remove cable and retainer (2) from exhaust pipe.
b. Remove ferrule (3) from bellcrank (4).
5. See Figure 4-68. Remove bolt (1) and washer (2) attaching
mufflers together.
6. Remove muffler support bracket bolt (4) and washer (3)
attaching mufflers (22, 23) to rear exhaust bracket (5).
7. Loosen locknuts on muffler clamps (21). Remove mufflers.
8. Loosen or remove heat shields (16, 17, 18) by opening
worm drive clamps (15, 19).
9. Remove flange nuts (12) from front and rear cylinder head
exhaust studs.
10. Remove head pipe assembly (14).
11. If necessary, remove flange locknuts (7) and bolt (8) to
remove muffler bracket (5).