SWITCH REPAIR/REPLACEMENT
Upper Housing Repair
NOTE
Replace the engine stop and engine start switches as a single
assembly even if only one switch is determined to be faulty.
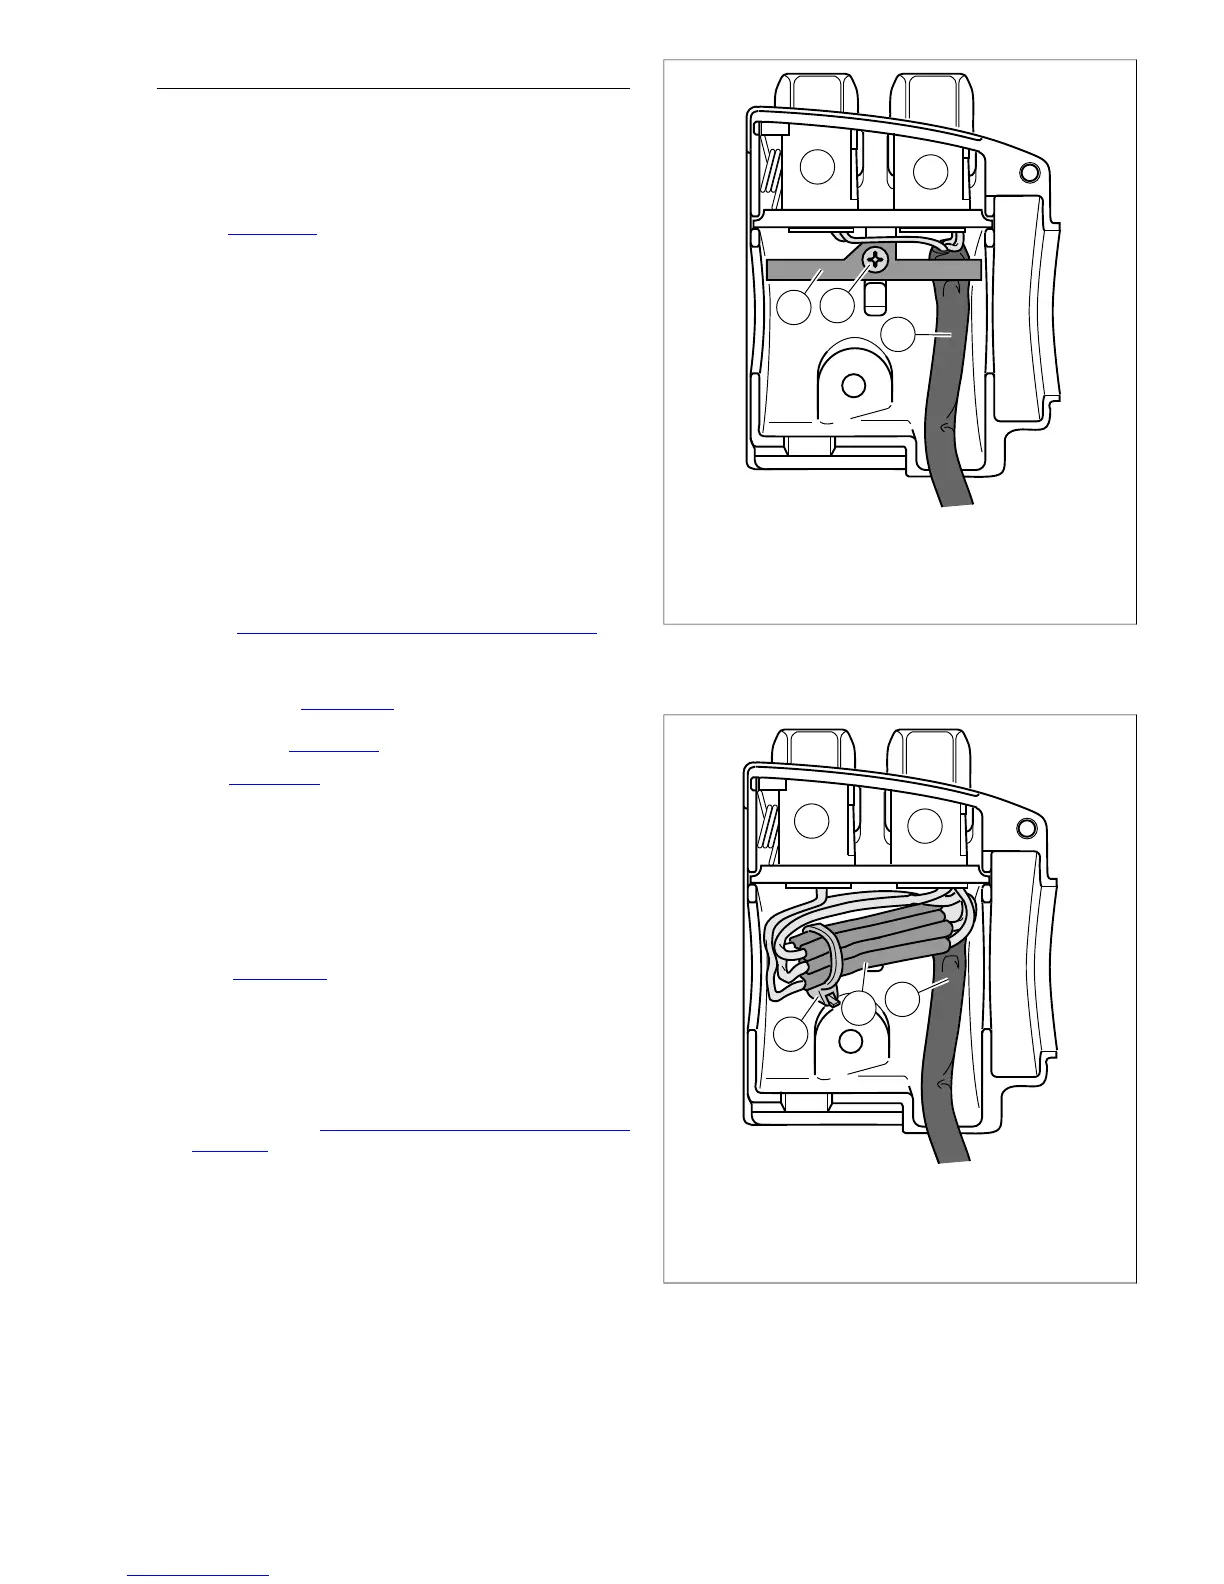
1. See Figure 8-86. From inside the switch housing, remove
the screw with lockwasher (4) to release the bracket (5).
Remove the bracket and switch assembly from the
housing.
2. Move cable conduit (3) from beneath wing of bracket. Cut
wires 0.25 in. (6.4 mm) from old switches (1, 2). Discard
old switch and bracket assembly.
3. Slide conduit forward over cut ends of switch wires and
cut off 0.5 in. (12.7 mm) of conduit (3) material. Push
conduit back to access switch wires.
4. Separate new engine stop switch (2) and engine start
switch (1) wires into two bundles.
NOTE
Replacement stop switch and start switch wires are cut to
length; 2.5 in. (63.5 mm) and 2.0 in. (50.8 mm) respectively,
and partially stripped.
5. See 8.28 HANDLEBAR SWITCH ASSEMBLIES for
information on splicing and general repair practices.
6. Loop switch wires so that spliced lengths are positioned
as shown in Figure 8-87. Route wires downstream of
splices beneath wing on engine stop switch side of bracket
as shown in Figure 8-86.
7. See Figure 8-87. Install a new 7.0 in. (177.8 mm) cable
strap (5) beneath wing on engine start switch side (1) of
bracket and capture wire splices (4).
8. Place switch assembly into upper housing aligning hole
in bracket with threaded hole in boss. Be sure that bracket
is fully seated. The step at the edge of the boss captures
the bottom edge of the bracket, while tabs on each side
of the bracket fit in slots cast into the housing.
9. See Figure 8-86. Install screw and lockwasher (4) to
secure bracket (5) inside housing. Verify that wing on
engine stop switch (2) side of bracket captures edge of
conduit (3) as shown.
10. Securely tighten cable strap to draw splices to bracket.
Remove any excess cable strap material.
11. Continue with 8.29 RIGHT HANDLEBAR SWITCH,
Assembly.



 To Next Page