5. Once the pistons have been fully retracted into their bores,
pull pad pin part way until the inside pad drops free. Note
the pad's original orientation for replacement purposes.
6. Continue to remove the pin until the outer pad drops free.
Always replace brake pads in complete sets for correct
and safe brake operation. Improper brake operation could
result in death or serious injury. (00111a)
7. Inspect pad pin for grooving and wear. Measure the pad
pin diameter in an unworn area, and then in the area of
any grooving or wear. If wear is more than 0.015 in. (0.38
mm), replace pin.
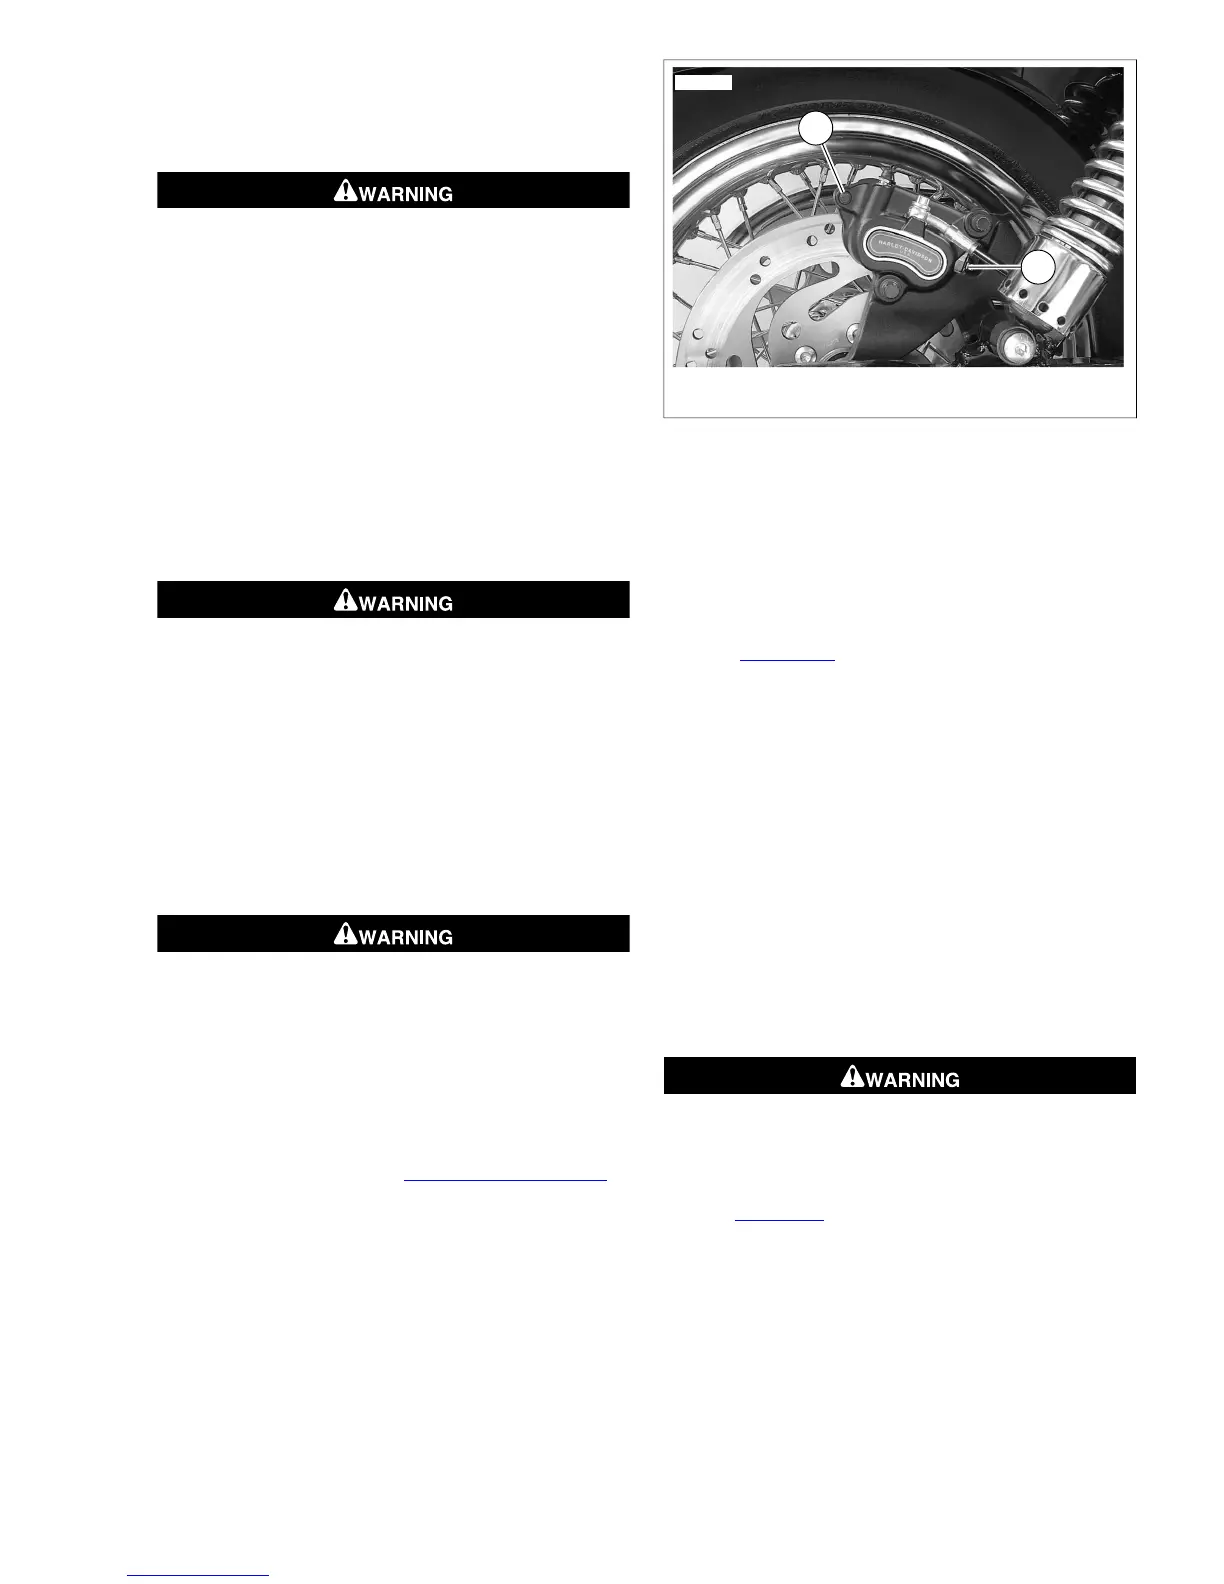
8. Install new outer brake pad using the same orientation as
the pad previously removed. Curved portion of pad must
face up and tab must engage slot (2) in caliper housing.
9. Partially install pad pin until it retains the outer pad.
10. Install the inner pad and ensure tab engages slot in caliper
housing. Finish installing pad pin and tighten to 80-120
in-lbs (9.0-13.6 Nm).
After servicing brakes and before moving motorcycle,
pump brakes to build brake system pressure. Insufficient
pressure can adversely affect brake performance, which
could result in death or serious injury. (00279a)
11. Pump brake pedal to move pistons out until they contact
both brake pads.Verify piston location against pads.
12. Check brake fluid level in master cylinder. Fill to proper
level if necessary using D.O.T. 4 BRAKE FLUID. Install
master cylinder reservoir cap.Tighten reservoir cap screws
to 6-8 in-lbs (0.7-0.9 Nm).
13. Install right saddlebag if necessary.
After repairing the brake system, test brakes at low speed.
If brakes are not operating properly, testing at high speeds
can cause loss of control, which could result in death or
serious injury. (00289a)
14. Test brake system.
a. Turn ignition switch ON. Pump brake pedal to verify
operation of the brake lamp.
b. Test ride the motorcycle. If the brakes feel spongy,
bleed the system. See 1.15 BLEEDING BRAKES.
NOTE
Avoid making hard stops for the first 100 miles (160 km) .This
allows the new pads to become conditioned to the brake discs.
1. Pad pin
2. Tab slot
Figure 1-34. Pad Retaining Pin (Rear Caliper Shown)
Front Brake Caliper
1. Remove the front master cylinder reservoir cap. As the
pistons are pushed back into the caliper, fluid level may
rise above the recommended 1/8 in. (3.2 mm) below the
gasket surface. Fluid may need to be removed to allow
for this.
2. See Figure 1-35. Loosen, but do not remove bridge
bolt/pad pin (3) (metric).
3. Remove both caliper mounting bolts (1, 2) (metric). Detach
caliper from front forks and brake disc.
4. Pry the pads back to force all four caliper pistons into their
bores.
NOTE
The brake pads have tabs that are clipped onto the pad springs.
Disengage the tabs from the pad springs as you remove the
pads.
5. With the pistons retracted, remove the bridge bolt/pad pin
and remove brake pads.
6. Inspect bridge bolt/pad pin for grooving and wear. Measure
the pad pin diameter in an unworn area, and then in the
area of any grooving or wear. If wear is more than 0.015
in. (0.38 mm), replace the pin.
Always replace brake pads in complete sets for correct
and safe brake operation. Improper brake operation could
result in death or serious injury. (00111a)
NOTES
• See Figure 1-36. Ensure the pad spring tabs (1) on brake
pad engage the pad springs in the pistons.
• If the directional tab (2) does not face down when caliper
is installed, brake noise may develop.
7. Install new pads into caliper. The directional tab (2) must
face down when caliper is installed.
8. Loosely install the center bridge bolt/pad pin.
2008 Dyna Service: Maintenance 1-31


 To Next Page
 Loading...