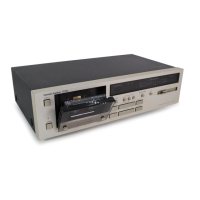
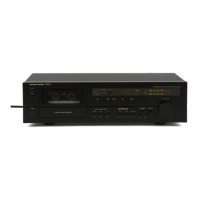
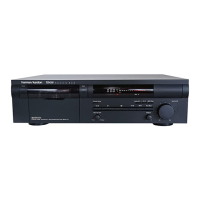
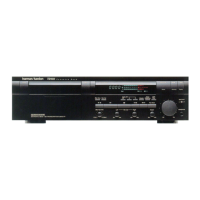
A Power Switch – Press this switch
once to turn the unit on. Press it again
to turn it off. An indicator around the
switch turns green when the unit is
turned on.
B Secondary Transport – This is
the secondary, playback only,
transport. Use it for tapes that will be
the source material during dubbing
operation.
C Remote Sensor – The remote
sensor behind this area is compatible
with the commands from many Harman
Kardon remote controls. Keep this area
clear if you wish to use the DC520 with
a remote control.
D Secondary Counter Reset –
Press this button to reset the counter
for the secondary transport to “0000”.
E Sync Reverse – This button
activates circuitry that compensates
for record and playback tapes of
unequal length.
F Information Display – This
display provides detail about the
operation of the DC520. See the
separate explanation of each indicator
on page 4.
G Copy Button – Press this button
to activate normal speed dubbing
H Primary Counter Reset – Press
this button to reset the counter for the
primary transport to “0000”.
I High Speed Copy – Press this
button to activate high speed dubbing.
J Record Mute – Press this button
during recording to momentarily mute
the input and insert blank space.
K Primary Transport – Insert
tapes here for recording or playback.
This transport should always contain
the record tape during dubbing.
L Primary Transport Eject –
Press this button to open the primary
transport door.
M Primary Transport Fast
Forward – Press this button to rapidly
advance the primary tape.
N Primary Transport Rewind –
Press this button to rewind the primary
tape.
O Primary Transport Forward
Play – Press this button to play the
primary tape.
P Primary Transport Reverse
Play – Press this button to play the
primary tape in a reverse direction.
Q Primary Transport Stop –
Press this button to stop the primary
transport.
R Pause – Press this button to pause
the transport in use.
S Record – Press this button to
place the unit in the record ready
mode. Press it simultaneously with a
play button OP to start a recording.
T Headphone Jack – Insert stereo
headphones here for private listening
or record monitoring.
U Input Balance – This control
adjusts the left/right record balance.
V Input Level – This knob controls
the input level during recordings.
W Secondary Transport
Fast Forward – Press this button to
rapidly advance the secondary tape.
X Secondary Transport Rewind
– Press this button to rewind the
secondary tape.
Y Secondary Transport
Forward Play – Press this button to
play the secondary tape.
Z Secondary Transport
Reverse Play – Press this button to
play the secondary tape in a reverse
direction.
a Secondary Transport Stop –
Press this button to stop the secondary
transport.
b Dolby NR Selector – This switch
selects which type of Dolby Noise
Reduction, if any, is in use.
c Direction Mode Selector –
This switch selects the playback/auto
reverse mode for the tape in use.
d Secondary Transport Eject –
Press this button to open the
secondary transport door.

 Loading...