EasyManua.ls Logo

Harman Kardon AVR 254 - User Manual

Harman Kardon AVR 254
2 pages
Print Icon
To Next Page IconTo Next Page
Loading...
This Harman Kardon
®
software upgrade will
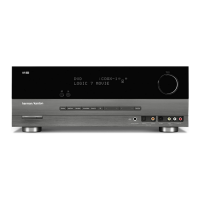
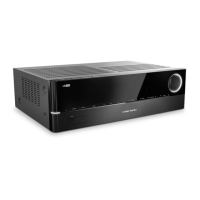
improve the performance of your AVR 254
or AVR 354 by updating its internal
operating system, DSP (digital signal
processing) firmware and video-processing
software. Unlike many consumer products,
which are designed with “fixed” memory,
this Harman Kardon product features flash
memory that is upgradeable through a
standard RS-232 serial port. To install the
software, please follow these instructions.
If you have any questions, consult
the Harman Kardon Web site at
www.harmankardon.com.
Important Note:
We have specially designed this software for
use with Harman Kardon AVR 254 and AVR 354
receivers. Use with any other models or brands
may cause damage to the product.
DO NOT USE THIS SOFTWARE WITH
ANY OTHER PRODUCTS.
System Requirements
To install the software upgrade, you will need to
purchase a standard RS-232 connection cable. Do
not use a “null modem” cable, as it uses connection
links that are not compatible with your AVR. If your
computer is not equipped with a serial port, you may
use one of the USB-to-serial-port adapters listed
below that have been tested for interoperability with
the AVRs.
Gigaware
model 26-949
StarTech.com model ICUSB232
IOGEAR model Z-GUC232A
Most other brand-name adapters will also work, but
due to the wide variety of computers, operating sys-
tems and adapters, we cannot guarantee that other
adapters will work in all situations. You will also need
to have access to a computer that is close enough to
be connected to the AVR that you are upgrading. The
minimum system requirements for the computer are:
Processor: Intel
®
Pentium
®
II processor
or equivalent or higher
Operating system: Windows
®
2000 SP4 or higher
(for Windows 2000 or Windows XP, your system
may require you to have “administrator” user rights)
Hard-drive space: 10MB available
System RAM: 128MB
CD-ROM drive (when using the CD-ROM version
of the program)
RS-232 serial port
Installation Instructions
Upgrading your receiver is easy; but for the upgrade
to work properly, it is important to follow the instruc-
tions below precisely. The upgrade will take about
45 minutes. Once it begins, you must complete
the entire process in one session. Please allow
sufficient time to run through all the steps. PLEASE
READ THESE INSTRUCTIONS CAREFULLY BEFORE
PROCEEDING.
Upgrading your unit will erase all system memories.
You will lose any configuration settings or tuner pre-
sets that you have entered. To reestablish the set-
tings after completing the upgrade, you may wish
to write down your current system configurations in
the sections provided in your AVR’s user manual.
Press in the Main Power button on your AVR, but
leave the AVR in the Standby mode.
If you are using files downloaded from the
Harman Kardon Web site to upgrade the AVR,
use Windows Explorer, or any other file-manage-
ment program, to locate the folder where you have
downloaded the upgrade file. Click on the file
named HKAVRupgrade.exe. The file will then
automatically unpack all of the files needed to
upgrade your AVR.
If you are loading the upgrade from a CD-ROM,
insert the disc in your computer’s drive.
Locate the directory for the CD-ROM or the
downloaded files and click on the file named
HK_Upgrader.exe. It is easy to recognize;
depending on the display mode for your file
manager, the icon should be a stylized version
of the volume-control knob on your AVR.
A new window with the “Welcome” screen will open
when the loader program starts. ClickContinue”
to proceed.
You will be reminded to record your receiver’s
settings if you have not already done so. Click
“Continue” to proceed.
The next screen contains the End-User License
Agreement for this software upgrade. Please read
this important document, using the scroll bar on the
right side of the window to move down through the
copy. If you agree to the terms of the agreement,
click “I accept this license agreement” and
then click “Continue” to proceed. Otherwise, click
on “I do not accept this license agreement” to
cancel the upgrade and exit the loader program.
When the screen changes, you will be prompted to
enter the location where the files for this upgrade are
located. Click “Browse” to open a file-finder win-
dow, and then navigate to the correct folder. Click
on that folder and then click “Open. Note that the
file names will automatically appear in the “Current
Selections” window. Click “Continue” to proceed.
Following the instructions on the next screen,
connect the serial cable to both the AVR and your
computer (or to the USB-to-serial-port adapter, if
you are using one). Next, use the pulldown tab on
your screen to select the serial port for the connec-
tion between your computer and the AVR. If there
is only one serial port, the most common setting is
“COM 1,” but if there are multiple ports or if you
are using a USB-to-serial-port adapter, you may
have to select a different COM port. When you
have selected a COM port, click “Continue” to
proceed. You may have to return to this screen and
choose a different port if the one that you originally
selected does not connect properly.
If your AVR is not already in Standby mode with
amber-colored lighting around the Standby/On and
Main Power buttons, press the Standby/On button.
Click “Continue” when you are ready to proceed.
The final step before the system upgrade begins
is to place your AVR in Download mode and reset
it. Using the tip of a pen or an unbent paper clip,
press in on the Operate/Download button behind
the small hole to the right of the RS-232 connec-
tor on the rear panel of the AVR. The button does
not protrude from the panel; if you are in doubt as
to whether the button is in the correct position, try
pressing it two or three times until you get the feel
for whether it is “in” or “out.” After placing the AVR
in Download mode, press the Reset button on the
left side of the RS-232 connector. The Reset but-
ton is deeply recessed. Press it by “feel,” using the
pen or paper clip. When both of these steps have
been completed, click “Continue” to proceed.
When the next screen appears, click “Upgrade” to
start the process.
Important Note:
Once the upgrade starts, do not interrupt it by
turning your AVR off or exiting the upgrade
program on your computer. Doing so may cause
the upgrade to fail and possibly damage your AVR.
HARMAN KARDON
®
AVR 254/AVR 354
SOFTWARE UPGRADE INSTRUCTIONS
Question and Answer IconNeed help?

Do you have a question about the Harman Kardon AVR 254 and is the answer not in the manual?

Summary

System Requirements for Software Upgrade

Software Upgrade Installation Instructions

Prepare AVR and Locate Upgrade Files

Prepare the AVR by powering it on to standby and locating the upgrade executable file.

Initiate Upgrade Loader and License Agreement

Launch the upgrade program, accept the license agreement, and specify the file location.

Connect Serial Cable and Select COM Port

Connect the AVR to the computer via RS-232 serial port and select the correct COM port.

Enter Download Mode and System Reset

Place the AVR in Download mode using the rear panel button and perform a system reset.

Load DSP Firmware (Part 1)

Load the first segment of the DSP firmware, addressing potential connection issues.

Return AVR to Normal Mode (Part 1)

Return the AVR to normal mode and complete the first firmware write process.

Enter Download Mode for Part 2

Re-enter Download mode on the AVR to prepare for the second phase of the firmware transfer.

Load DSP Firmware (Part 2)

Load the second part of the DSP firmware and return the AVR to normal operating mode.

Load MCU and Video Software

Load the MCU and video software, then return the AVR to normal operating mode.

Final Reset, Verification, and Configuration

Perform a final system reset, verify the upgrade, and re-enter system settings.

Overview

The Harman Kardon AVR 254/AVR 354 is an audio/video receiver designed to provide a high-quality home theater experience. Its primary function is to process and amplify audio and video signals from various sources, delivering them to speakers and a display. A key feature of this device is its upgradeable nature, allowing users to enhance its performance over time through software updates.

Function Description:

The AVR 254/AVR 354 serves as the central hub for a home entertainment system. It integrates multiple functions:

  • Audio Processing: It decodes and processes various audio formats, including surround sound, to deliver immersive soundscapes through connected speakers. The device features digital signal processing (DSP) capabilities, which are continuously improved through firmware updates.
  • Video Processing: The receiver handles video signals from different sources, potentially upscaling or enhancing them before sending them to a television or projector. Its video-processing software is also upgradeable.
  • Amplification: It contains built-in amplifiers to power passive speakers, ensuring robust and clear audio output.
  • Source Switching: The AVR allows users to connect multiple audio and video sources (e.g., Blu-ray players, gaming consoles, cable boxes) and easily switch between them.
  • Connectivity: It offers a range of input and output options, including a standard RS-232 serial port for software upgrades and various audio/video connections.
  • System Calibration: The device supports system calibration features, such as EzSet/EQ™, to optimize speaker and room-equalization settings for the best possible sound in a given environment.

Usage Features:

The AVR 254/AVR 354 is designed for user-friendly operation, with several features that enhance its usability:

  • Flash Memory for Upgrades: Unlike many consumer products with fixed memory, this Harman Kardon product incorporates flash memory. This allows its internal operating system, DSP firmware, and video-processing software to be updated, ensuring the receiver remains current with the latest technologies and performance enhancements.
  • RS-232 Serial Port for Software Installation: Software upgrades are performed via a standard RS-232 serial port, connecting the AVR to a computer. This method provides a reliable way to transfer new software versions.
  • Guided Upgrade Process: The software upgrade process is guided by on-screen instructions from a loader program on the computer. This step-by-step approach helps users navigate the installation, from selecting the correct COM port to placing the AVR in specific modes (Standby, Download, Operate) at the appropriate times.
  • Status Indicators: During the upgrade, the AVR's front-panel display shows messages (e.g., "WRITE COMPLETE") and the computer's loader program displays progress bars and success messages, providing clear feedback on the status of the installation.
  • Reset and Configuration Management: The device includes a Reset button, which is crucial for preparing the AVR for upgrades and for performing a system reset after an upgrade. Users are advised to record their current system configurations and tuner presets before an upgrade, as these will be erased during the process, requiring re-entry.
  • Remote Control Integration: The remote control is used to check the software version number after an upgrade, confirming successful installation.
  • Standby/On and Main Power Buttons: These buttons on the AVR's front panel are essential for controlling the receiver's power state and for transitioning between different modes required during the upgrade process.
  • Operate/Download Button: Located on the rear panel, this recessed button is critical for switching the AVR between "Operate" (normal) and "Download" modes, which are necessary steps for software installation.
  • Troubleshooting Guidance: The upgrade instructions include specific advice for common issues, such as incorrect COM-port selection or improper positioning of the Operate/Download button, guiding users through corrective actions.
  • Post-Upgrade Calibration: After a software upgrade and system reset, users are reminded to recalibrate the system's speaker and room-equalization settings using the EzSet/EQ™ process to ensure optimal audio performance.

Maintenance Features:

While the AVR 254/AVR 354 is primarily a performance device, its design incorporates features that facilitate its long-term maintenance and optimal functioning:

  • Software Upgradability: The most significant maintenance feature is its ability to receive software upgrades. This allows Harman Kardon to release improvements to the internal operating system, DSP firmware, and video-processing software, addressing bugs, enhancing performance, and potentially adding new features without requiring hardware replacement. This extends the lifespan and relevance of the device.
  • Clear Upgrade Instructions: The detailed, step-by-step instructions provided for the software upgrade process are a crucial maintenance aid. They ensure that users can perform updates correctly, minimizing the risk of errors or damage to the unit.
  • System Reset Functionality: The Reset button, accessible on the rear panel, is vital for maintenance. It allows users to perform a full system reset, which is necessary after software upgrades to ensure the new software is properly initialized and to clear any lingering configuration issues.
  • Pre-Upgrade Configuration Backup: The recommendation to record current system settings and tuner presets before an upgrade serves as a user-driven maintenance practice. It helps users restore their preferred configurations quickly after a reset, preventing the need to re-configure everything from scratch.
  • Compatibility Information: The manual specifies compatible USB-to-serial-port adapters and system requirements (operating system, processor, RAM, hard-drive space), which helps users prepare their computer setup for a smooth upgrade, preventing compatibility-related issues.
  • Warning Against Interruption: The explicit warning not to interrupt the upgrade process (e.g., by turning off the AVR or exiting the program) highlights a critical maintenance guideline. Adhering to this prevents potential damage to the AVR's flash memory and ensures the integrity of the software installation.
  • Version Number Verification: The ability to check the installed software version number via the remote control is a practical maintenance feature. It allows users to confirm that an upgrade was successful and to determine if further updates are needed by comparing their version to the latest available on the Harman Kardon website.
  • Online Support: The reference to the Harman Kardon website (www.harmankardon.com) for questions and the availability of new software versions indicates an ongoing support channel for device maintenance.

Harman Kardon AVR 254 Specifications

General IconGeneral
TypeAV Receiver
Channels7.1
HDMI Inputs3
HDMI Outputs1
Frequency Response10 Hz - 100 kHz
Total Harmonic Distortion0.07%
Input Sensitivity200 mV
Signal-to-Noise Ratio100dB
Component Video Input2
Component Video Output1
Digital Optical Input2
Digital Coaxial Input2
Width17.3 inches
Output Impedance / Channel8 ohms
Input Impedance47 kOhms
Surround Sound EffectsYes
Audio Formats SupportedDolby Digital, DTS, Dolby Pro Logic II
Video ConversionUpconversion to HDMI
Height165mm
Power Output50 watts per channel (8 ohms, 20Hz - 20kHz, 0.07% THD)

Related product manuals