The assembly of your strider is now complete. When you try it for the rst time, you should adjust
the tension to the correct level before you begin a full workout.
For minute tension adjustment, simply use the Tension Adjustment Knob (pt.34). Turning the
adjustment knob allows you to change the tension level and vary the intensity of your workout as
you exercise.
For greater tension adjustment, you may loosen or tighten the friction belt by re-strapping it. To
do so, rst turn the tension adjustment knob to the loosest setting. Then re-strap the belt at the
buckle on the top of the fan wheel just beneath the center beam. The more length you allow on
the friction belt the less friction it will cause (less tension). Re-adjust the tension knob after you
nished.
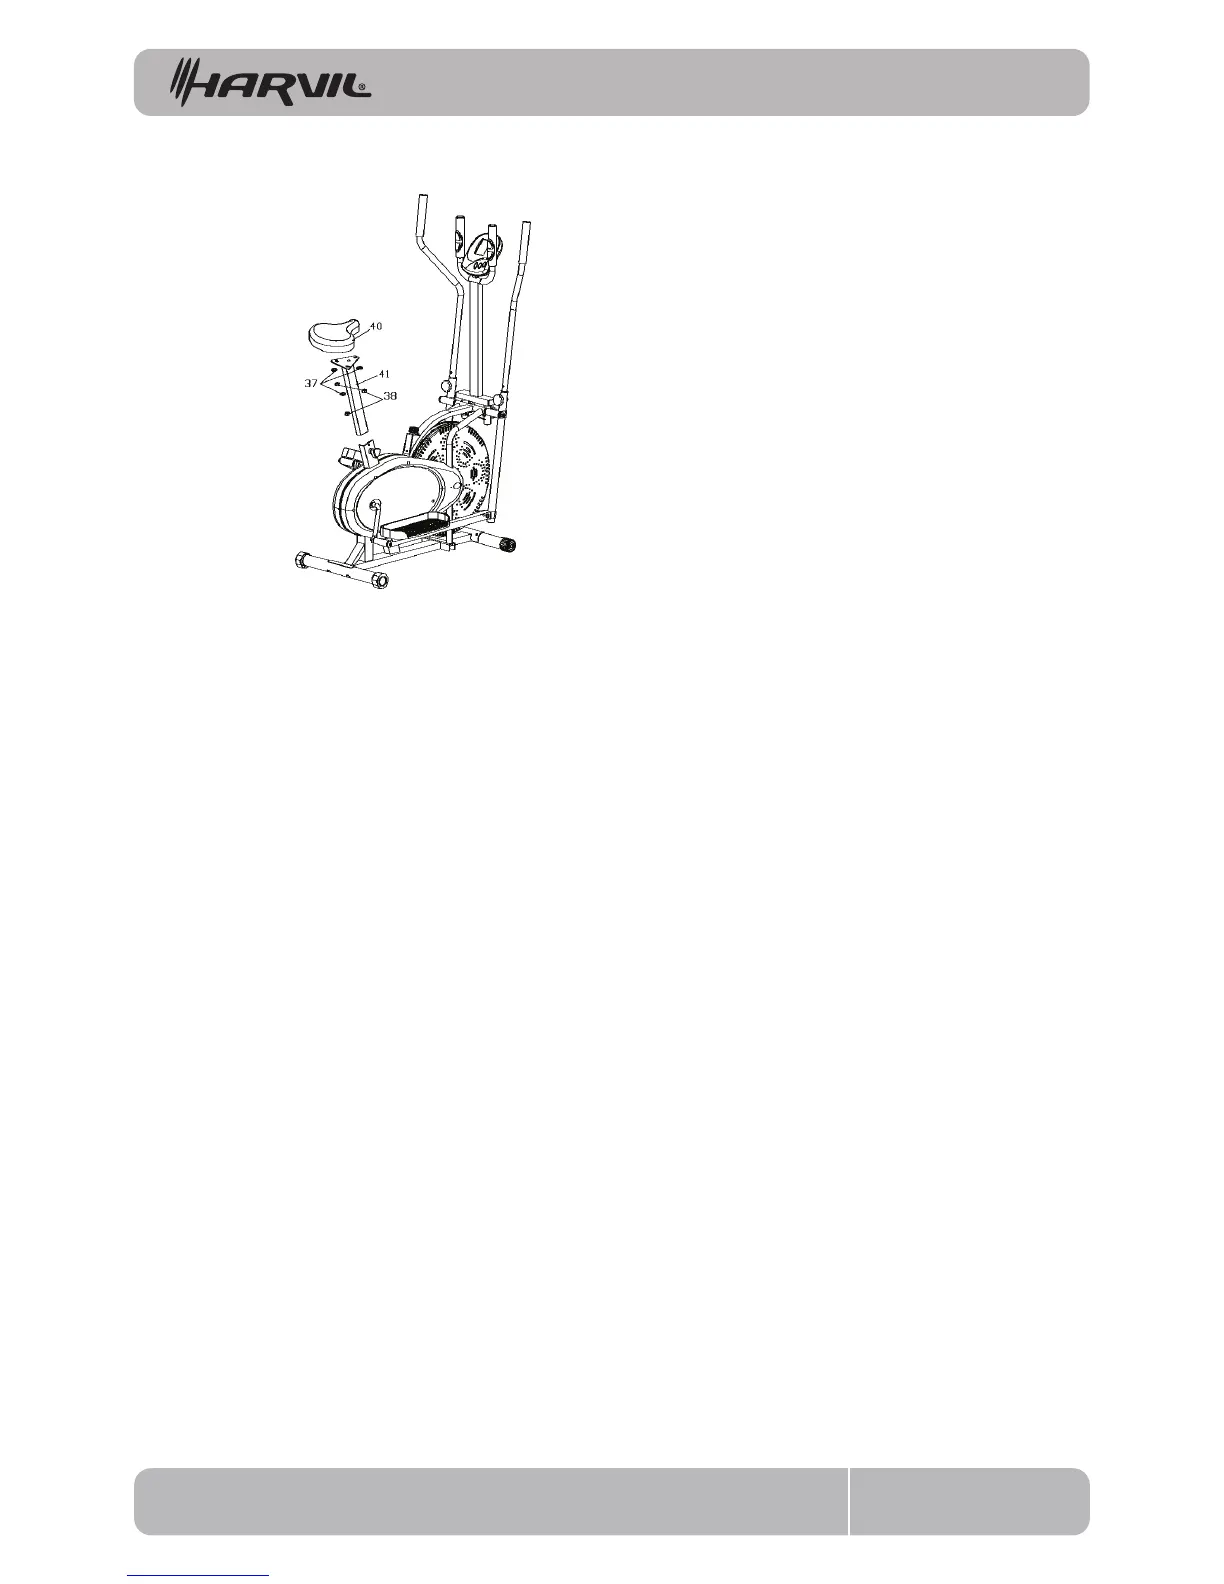
FIG.5:
Remove the washer (No.37) nut (No.38)
from the saddle (No.40), attach the
saddle and saddle post (No.41) as shown
in FIG.6, re-insert and tighten the bolts.
Insert the saddle post into the main
frame as shown in FIG.6, insert and tight-
en the knob (No.42).
EB-1 7
ASSEMBLY INSTRUCTIONS