14
OPERATIONAL INSTRUCTIONS
RM-1
LOAD ADJUSTMENT
The safety and integrity designed into the equipment can only be maintained when the
equipment is regularly examined for damage and wear. Special attention should be given to the
following:
1. Pull on the HANDLEBARS(17, 18) and verify that the SHOCK(22) provides tension.
2. Clean the roller tracks in the CENTER BEAM(1) with an absorbent cloth.
3. Verify that all nuts and bolts are present and properly tightened. Replace missing nuts and bolts.
Tighten loose nuts and bolts.
4. It is the sole responsibility of the user/owner to ensure that regular maintenance is performed.
5. Worn or damaged components must be replaced immediately or the equipment removed
from service until repair is made.
6. Keep your equipment clean by wiping it off with an absorbent cloth after use.
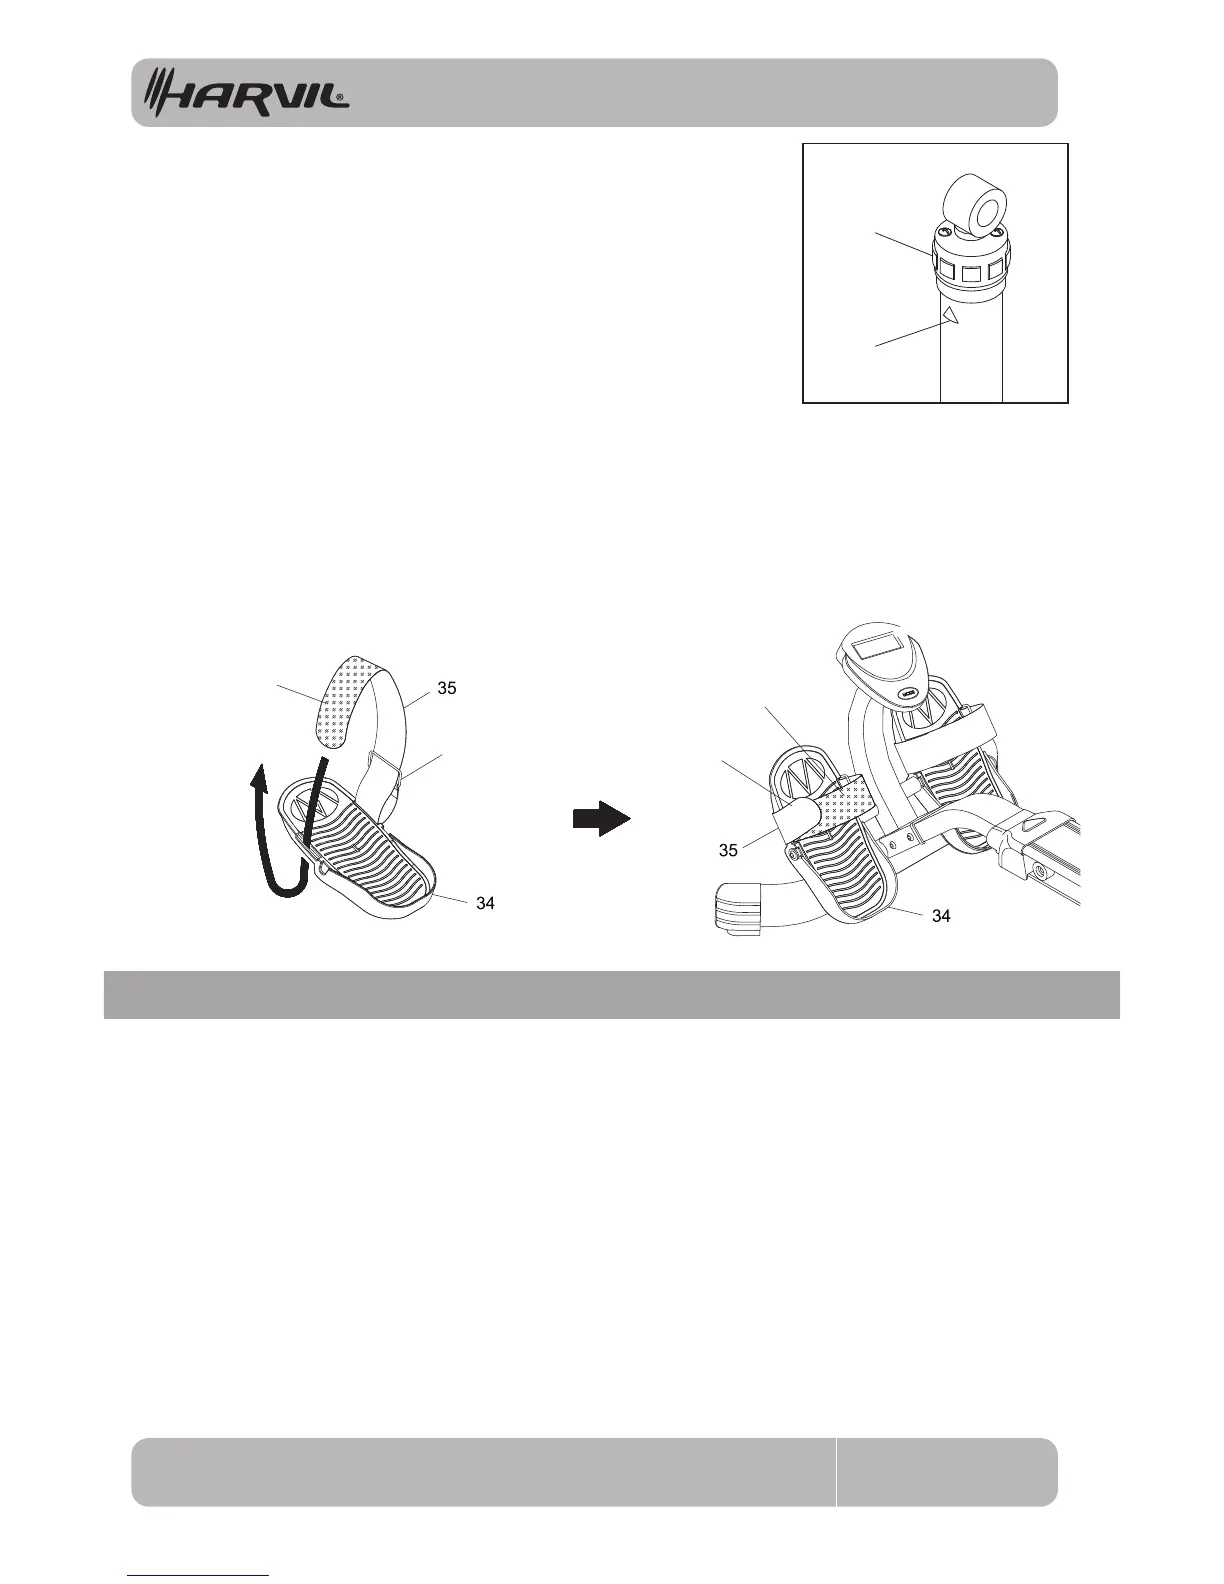
The resistance of the shock can be adjusted by twisting the adjustment
knob at the top of the shock. There are settings from 1 to 12. Setting #1
will provide the lowest resistance. Setting #12 will provide the highest
resistance.
CAUTION: The shock gets HOT after a few minutes of use.
PEDAL STRAP ADJUSTMENT
If you feel it is more comfortable for your workout, you can change to attach the PEDAL STRAP(35) to the
upper position in the PEDAL(34) as shown in illustration 1 below. Run the PEDAL STRAP(35) through the
opening from the bottom of the PEDAL(34), then go through the Steel Ring. Slide the Steel Ring down to
against the PEDAL(34). Run the PEDAL STRAP(35) through the opening in the PEDAL(34) on the other
side from the top as shown in the illustration 1, then make the end of the PEDAL STRAP(35) go up to
attach onto the upper part of the PEDAL STRAP(35) with the Hook & Loop Pad.
Attach the end of the PEDAL STRAP(35) to different position with the Hook & Loop Pad to adjust the length.
Refer to illustration 2.
Adjustment
Knob
Mark
Hook & Loop Pad
Hook & Loop Pad
Steel Ring
1. 2.
End of Pedal Strap
MAINTENANCE
 Loading...