10
Form No. HBGBHCM_CN-0120
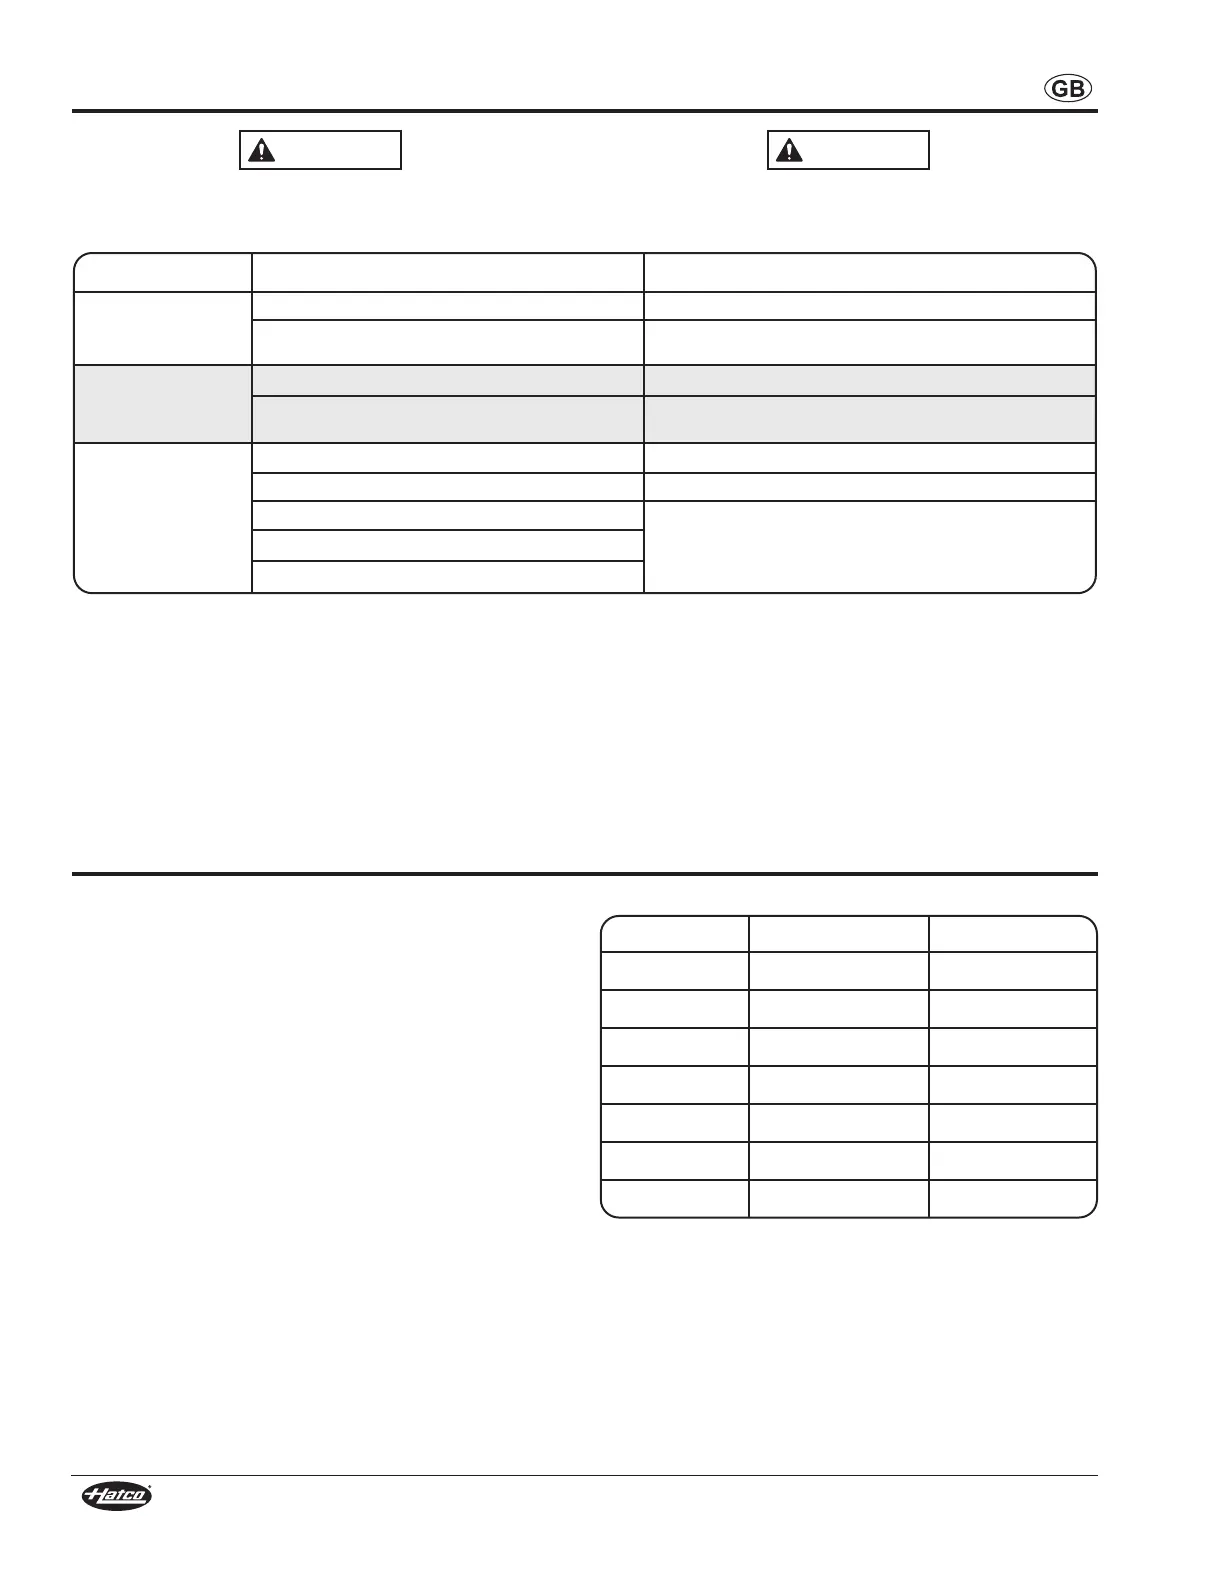
Symptom Probable Cause Corrective Action
Unit too hot. Setpoint temperature set too high. Adjust setpoint temperature to a lower setting.
Unit plugged into an incorrect power supply. Verify with qualified personnel that power supply matches unit
specification.
Unit not hot enough. Setpoint temperature set too low. Adjust setpoint temperature to a higher setting.
Location of unit is susceptible to air currents (air
conditioning ducts or exhaust fans).
Block air currents or relocate unit.
Unit not working at all. Unit not plugged in. Plug unit into proper power supply.
Unit not turned on. Move the Power I/O (on/off) switch to the I (on) position.
Power I/O (on/off) switch is not functioning.
Contact Authorized Service Agent or Hatco for assistance.
Heating element is burned out.
Remote mounted control is defective.
Model Width Depth
HBGBHC-1414 358 mm (14-1/16″) 358 mm (14-1/16″)
HBGBHC-2414 608 mm (23-15/16″) 358 mm (14-1/16″)
HBGBHC-3014 758 mm (29-13/16″) 358 mm (14-1/16″)
HBGBHC-3614 908 mm (35-3/4″) 358 mm (14-1/16″)
HBGBHC-4814 1210 mm (47-5/8″) 358 mm (14-1/16″)
HBGBHC-6014 1510 mm (59-7/16″) 358 mm (14-1/16″)
HBGBHC-7214 1810 mm (71-1/4″) 358 mm (14-1/16″)
This unit must be serviced by qualified personnel only.
Service by unqualified personnel may lead to electric
shock or burn.
ELECTRIC SHOCK HAZARD: Turn OFF power switch,
unplug power cord, and allow unit to cool before
performing any cleaning, adjustments, or maintenance.
TROUBLESHOOTING GUIDE
Installing HBGBHC Models w/No Trim Ring
All HBGBHC models have the option to come without a trim
ring. Professional installation of units without a trim ring is
required.
Use the following procedure when installing models without a
trim ring:
1. Prepare the countertop opening. Refer to “Countertop
Cutout Chart — No Trim Ring” for recommended
countertop cutout dimensions.
2. Support the unit from the bottom with adequate supports
for the weight of the unit and all components.
NOTE: The top surface of the unit should be flush with the
counter or slightly recessed. If the surface is above the
counter surface, the edges could become damaged
from moving pans across the edges.
3. Apply a bead of NSF-approved sealant to the gap between
the unit and the counter. The sealant must be rated for use
at 121°C (250°F) or higher.
4. Install the control box. Refer to the “Installing the Control
Box” procedure in the INSTALLATION section.
5. Plug unit into a properly grounded electrical outlet of the
correct voltage, size, and plug configuration. See the
SPECIFICATIONS section for details.
Countertop Cutout Chart — No Trim Ring
Troubleshooting Questions?
If you continue to have problems resolving an issue, please contact the nearest Authorized Hatco Service Agency or Hatco for
assistance. To locate the nearest Service Agency, log onto the Hatco website at www.hatcocorp.com, select the Support pull-
down menu, and click on “Find A Service Agent”; or contact the Hatco Parts and Service Team at:
Telephone: (0512) 6732-5091
e-mail: infocn@hatcocorp.com
OPTIONS AND ACCESSORIES
 Loading...