Do you have a question about the HAUL MASTER 38897 and is the answer not in the manual?
Attach the Front Cross Brace to the two Bottom Panels using 4 Bolts, 4 Washers, and 4 Nuts.
Connect the two Bottom Panels using 4 Bolts, 4 Washers, and 4 Nuts.
Attach the Tongue Support to the Bottom Panels using 2 Bolts, 2 Washers, and 2 Nuts.
Bolt the 2 Wheel Axle Supports together using 8 Bolts, 8 Washers, and 8 Nuts (hand tighten).
Bolt the Wheel Axle Supports to the Bottom Panels using 8 Bolts, 8 Washers, and 8 Nuts.
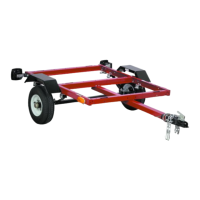
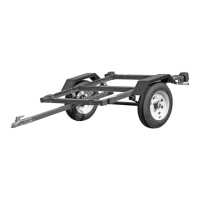
Place Hitch Tongue, insert Wheel Axle, and install 2 Wheel/Tire Assemblies with Washers and Cotter Pins.
Insert Tongue Latch, use Latch Spacer on each side, bolt with Bolt (#29) and Nut (#30), and attach Latch Spring.
Install Hitch Pin Bracket using 2 Bolts, 2 Washers, and 2 Nuts in rear holes; Hitch Pin fits front hole.
Attach Rear Corner Brackets and Rear Cross Brace to the rear of Bottom Panels using hardware.
Assemble the left Side Panel using 2 Bolts, 2 Washers, and 2 Nuts.
Bolt Rear Cross Brace to Bottom Panels using 6 Bolts, 6 Washers, and 6 Nuts.
Install the right Side Panel to the Bottom Panel using 2 Bolts, 2 Washers, and 2 Nuts.
Secure each Side Panel by bolting a Rear Corner Brace using 5 Bolts, 5 Washers, and 5 Nuts.
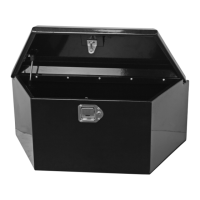
Assemble the Front Panel to the Front Cross Brace and Side Panels using 12 Bolts, 12 Washers, and 12 Nuts.
Assemble Front Corner Braces to corners of Front Panel and Side Panels using 2 Bolts, 2 Washers, 2 Nuts each.
Attach Tailgate Latches to the inside of the Tailgate using 2 Bolts, 2 Washers, and 2 Nuts for each.
| Brand | HAUL MASTER |
|---|---|
| Model | 38897 |
| Category | Utility Vehicle |
| Language | English |