42
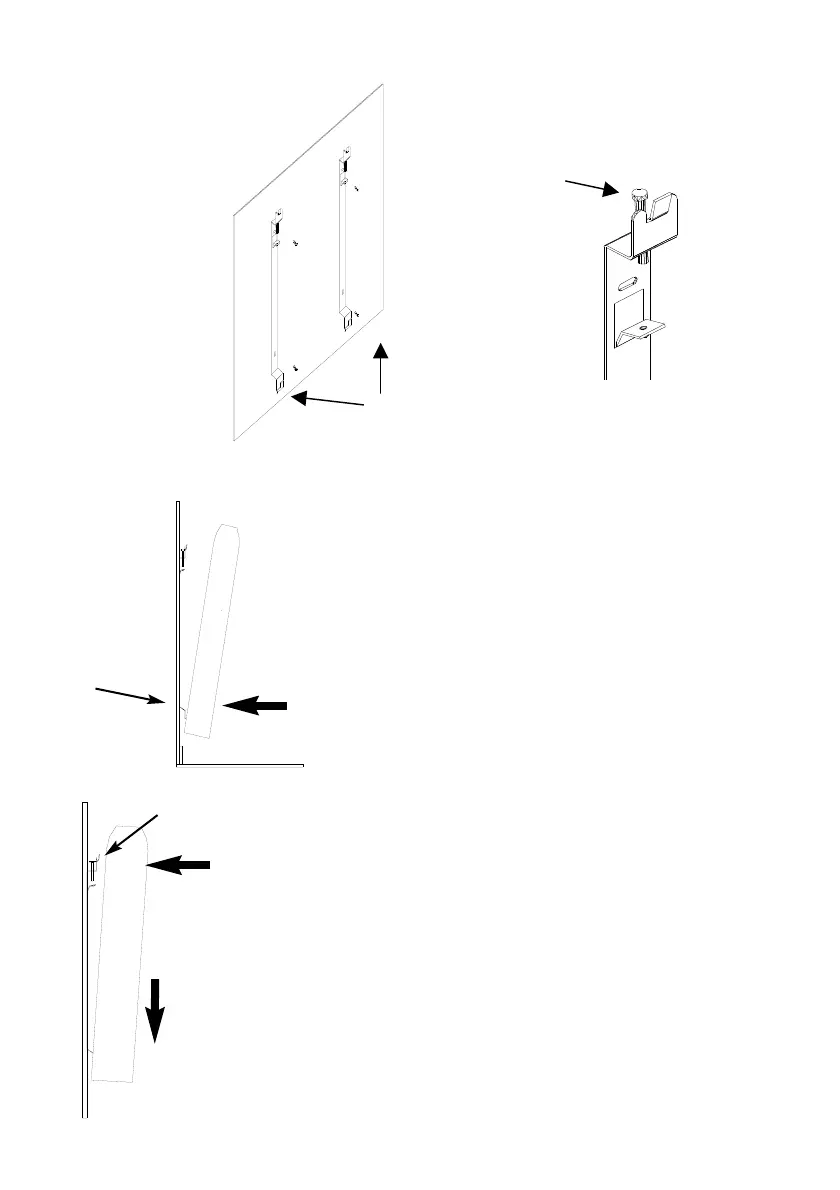
- Take the two 6 x 40 mm screws and
screw each one of them lightly on
both supports (Point 1 Fig. 9).
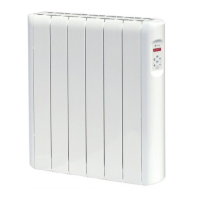
- Then take the appliance in such way
that the controls panel is on the right
side. Incline the appliance with the
upper part towards you.
- Place the transmitter on the lower
side of the wall separators (Point 2
Fig. 10).
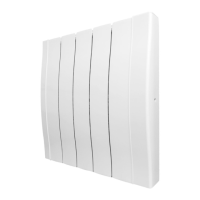
- Move the transmitter carefully towards the
left or right till it is centralized and fixed on
the two canals which are on its back.
- Place the transmitter vertically and once it
is parallel to the wall, let it fall gently till the
upper separators get into both canals
(Point 3, Fig. 11).
- To have the transmitter perfectly fixed to
the wall, screw completely the 6 x 40 mm
screws in the upper part of the separators
(Point 1, Fig. 9).
- Make sure that the transmitter is perfectly
fixed to the wall to avoid future risks.
- Then connect the plug to a nearby power
supply (socket).
- You have just installed the HAVERLAND Thermal Transmitter. We
hope it satisfies your heating needs.
SCREWS
FIG. Nº. 8
FIG. Nº. 9
2
WALL
TRANSMITTER
FLOOR
3
TRANSMITTER
WALL
FIG. Nº. 10
FIG. Nº. 11