REMOVAL OF ES-103 GEARBOX HOUSING _
1. Disconnect electrical power supply.
2. Loosen the four motor mount carriage bolts and slide
motor toward the front of saw.
3. Remove drive belt.
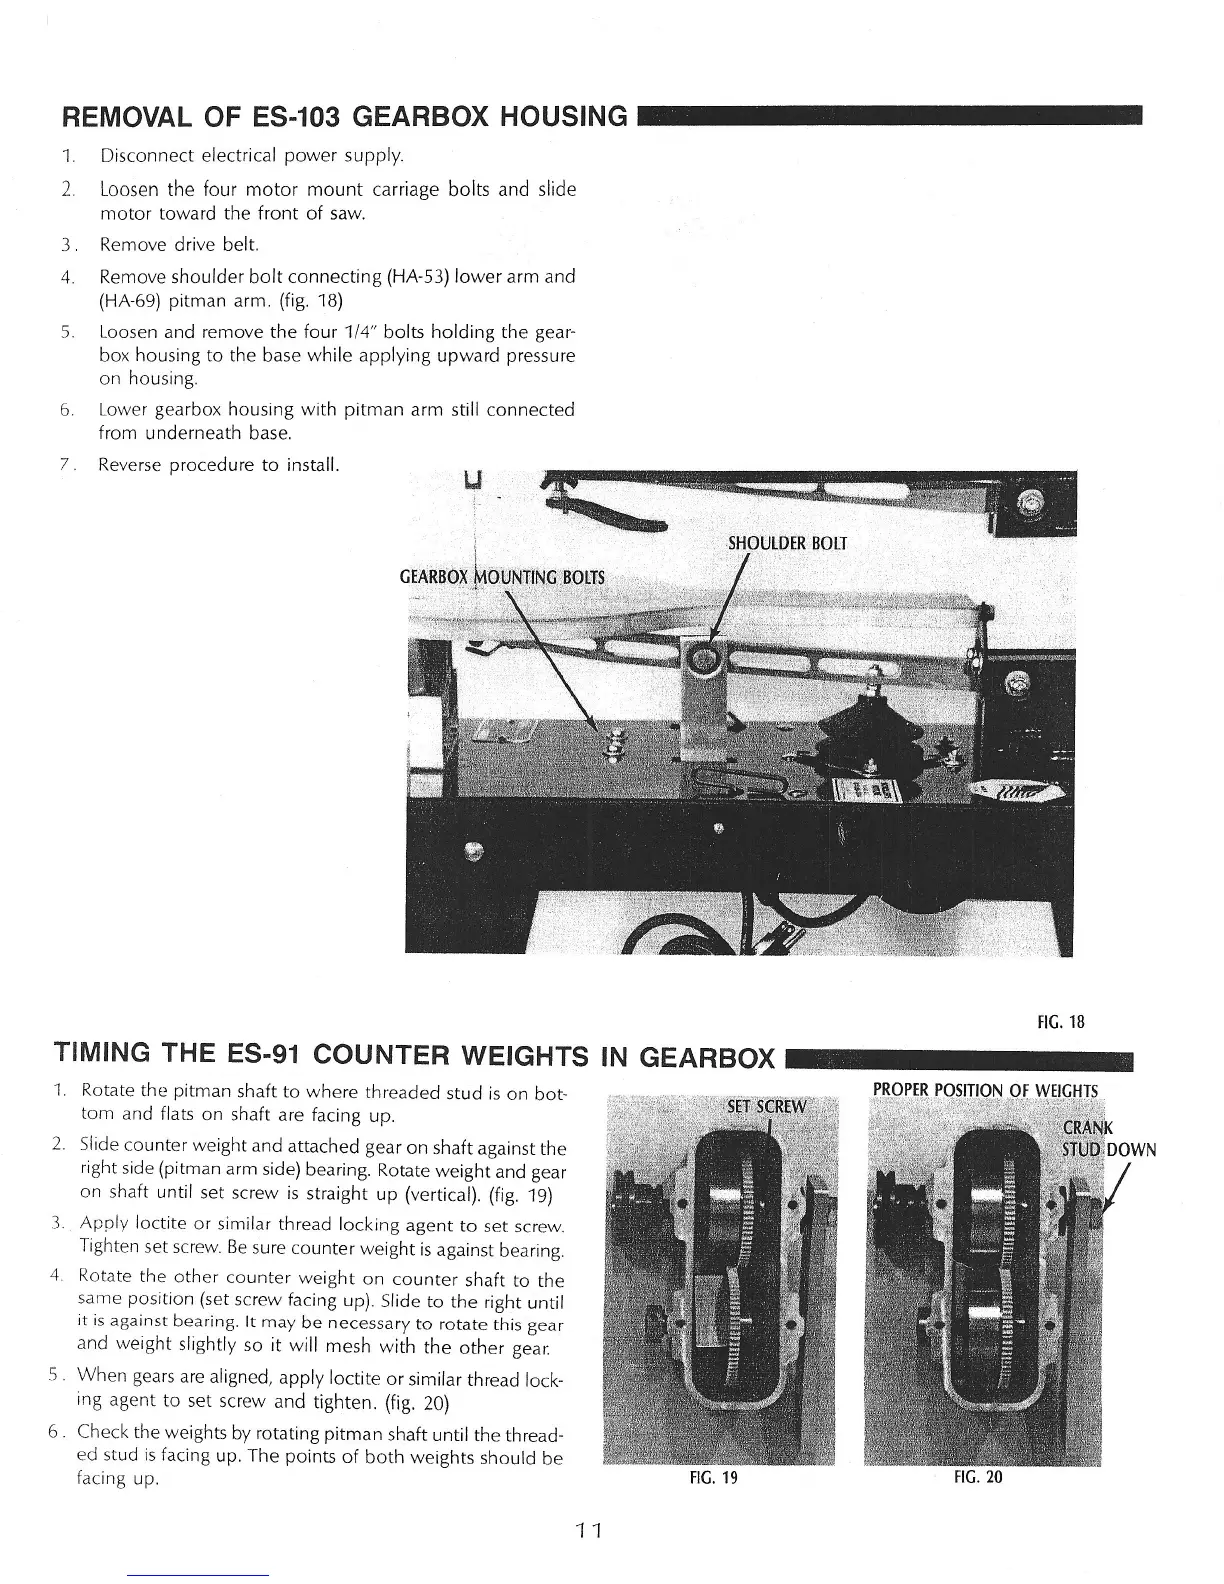
4. Remove shoulder bolt connecting (HA-53) lower arm and
(HA-69) pitman arm. (fig. 18)
5. Loosen and remove the four 1/4" bolts holding the gear-
box housing to the base while applying upward pressure
on housing.
6. Lower gearbox housing with pitman arm still connected
from underneath base.
7. Reverse procedure to install.
FIG. 18
TIMING THE ES-91 COUNTER WEIGHTS IN GEARBOX _
1.
Rotate the pitman shaft to where threaded stud is on bot-
tom and flats on shaft are facing up.
2. Slide counter weight and attached gear on shaft against the
right side (pitman arm side) bearing. Rotate weight and gear
on shaft until set screw is straight up (vertical). (fig. 19)
3. Apply loctite or similar thread locking agent to set screw.
Tighten set screw. Be sure counter weight is against bearing.
4. Rotate the other counter weight on counter shaft to the
same position (set screw facing up). Slide to the right until
it is against bearing. It may be necessary to rotate this gear
and weight slightly so
it
will mesh with the other gear.
S. When gears are aligned, apply loctite or similar thread lock-
ing agent to set screw and tighten. (fig. 20)
6. Check the weights by rotating pitman shaft until the thread-
ed stud is facing up. The points of both weights should be
facing up.
FIG. 19
FIG. 20
11