REMOVAL OF ES-05 TABLE -----------------
1. Disconnect electrical power supply.
2. Remove saw blade from saw (see blade changing).
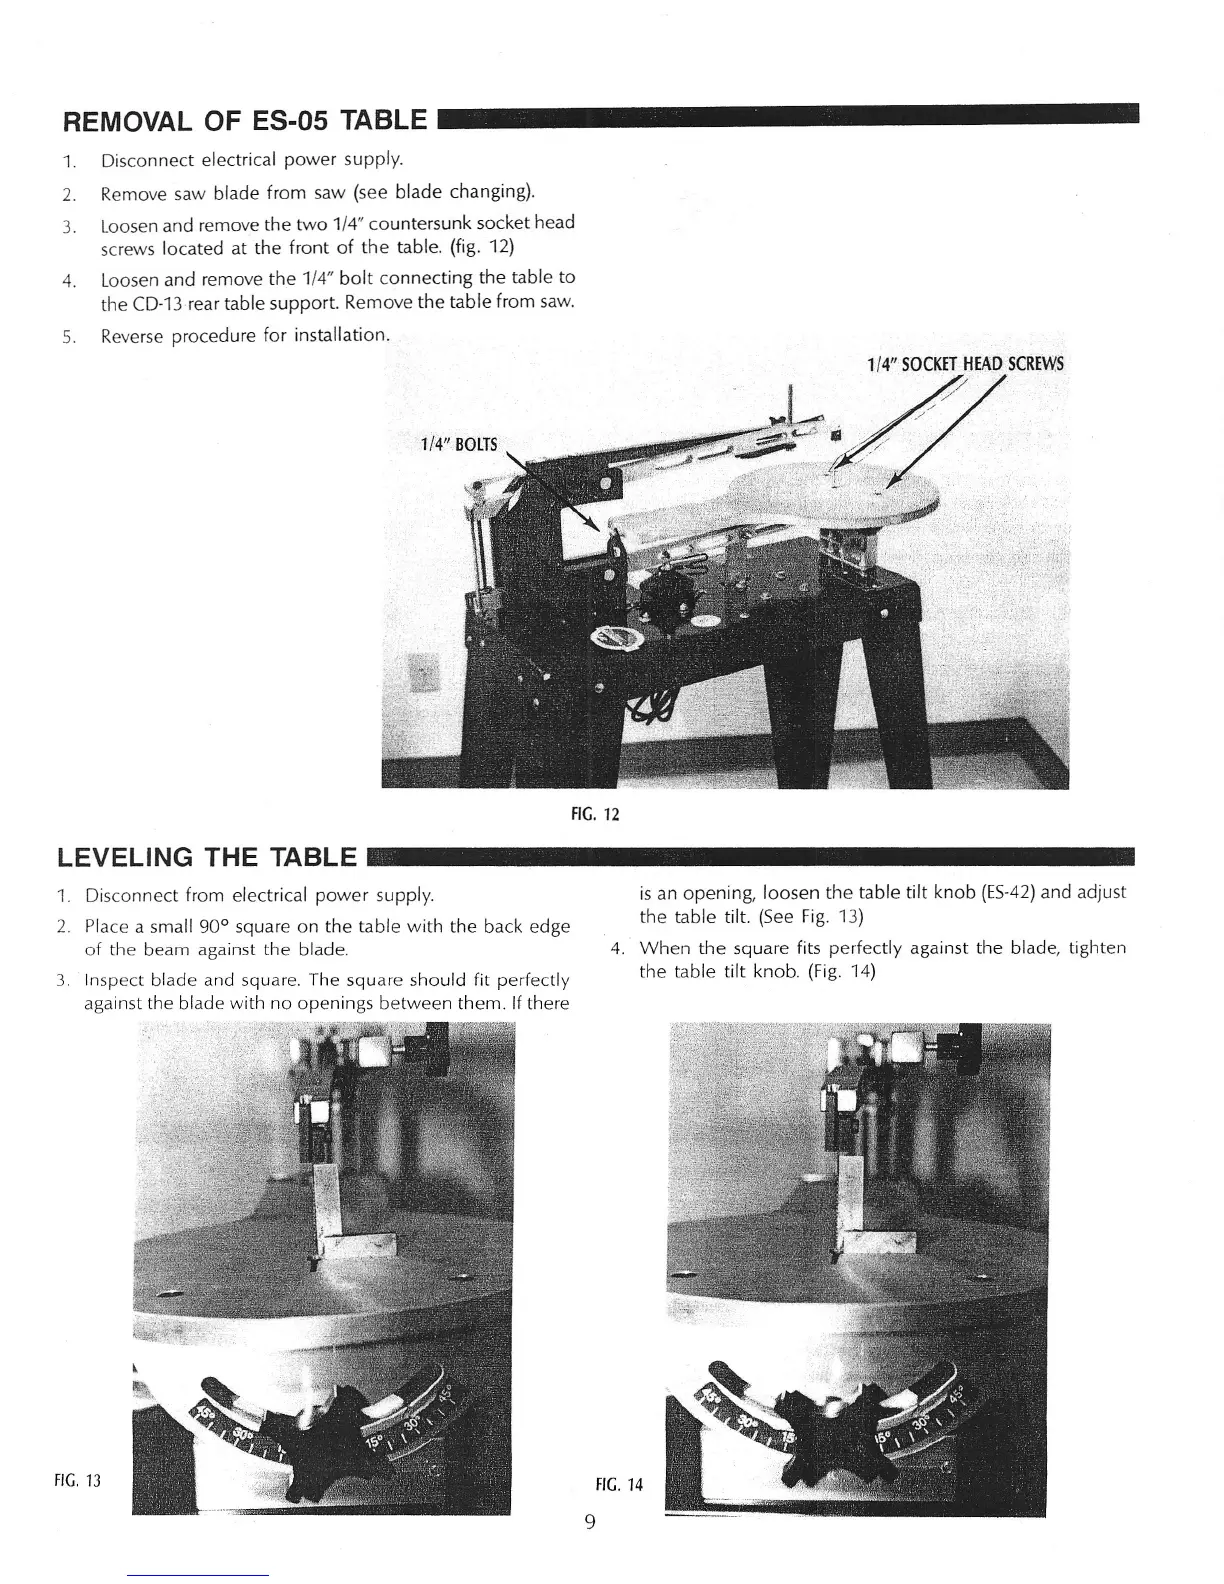
3. Loosen and remove the two 1/4" countersunk socket head
screws located at the front of the table. (fig. 12)
4. Loosen and remove the 1/4" bolt connecting the table to
the CD-13 rear table support. Remove the table from saw.
5. Reverse procedure for installation.
1/4/1
SOCKET HEAD SCREWS
/'
:
..
/
FIG. 12
1. Disconnect from electrical power supply.
2. Place a small 90° square on the table with the back edge
of the beam against the blade.
3 Inspect blade and square. The square should fit perfectly
against the blade with no openings between them.
If
there
is an opening, loosen the table tilt knob (ES-42) and adjust
the table tilt. (See Fig. 13)
4. When the square fits perfectly against the blade, tighten
the table tilt knob. (Fig. 14)
FIG,
13
FIG. 14
9