Use only hayward
®
genuine replacement partsUse only hayward
®
genuine replacement parts 2524
EN EN
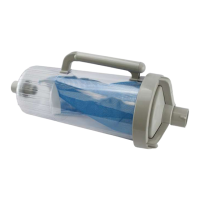
4. With the air out of the entire hose, verify that the Leader Hose and Flow Gauge are
underwater and turn the pump ON. Adjust Flow Regulator Valve knob “faster” or “slower”
until the disc indicator in the Flow Gauge settles between “Maximum” and “Minimum”
flow. NOTE: If you have an extraordinarily strong pump, you may need to open the main
drain slightly.
5. Turn off the pump. Remove the Double Hose Clip and Flow Gauge from the Leader Hose.
Submerge the TracVac™ cleaner to remove all air and then connect the cleaner to the
Leader Hose. Cleaner installation is now complete.
Leader Hose
Leader Hose
Suction Source in Center of Pool Suction Source in Corner of Pool
MAXIMUM FLOW
MINIMUM FLOW
Double
Hose
Clip
Hose “Loop” in Pool
Flow Gauge
(Shown between
“Min” and “Max”
markings)
Leader Hose
1st Connector
Hose
(To Suction)
Waterline
Use Flow Gauge to Check Water Flow
1. Submerge the entire length of hose to expunge all air.
2. Insert the Flow Gauge into the end of the Leader Hose.
3. Attach one end of the Double Hose Clip to the Leader Hose and the other end to the rst
section of hose at the vacuum source. This will form a loop in the pool as shown below.
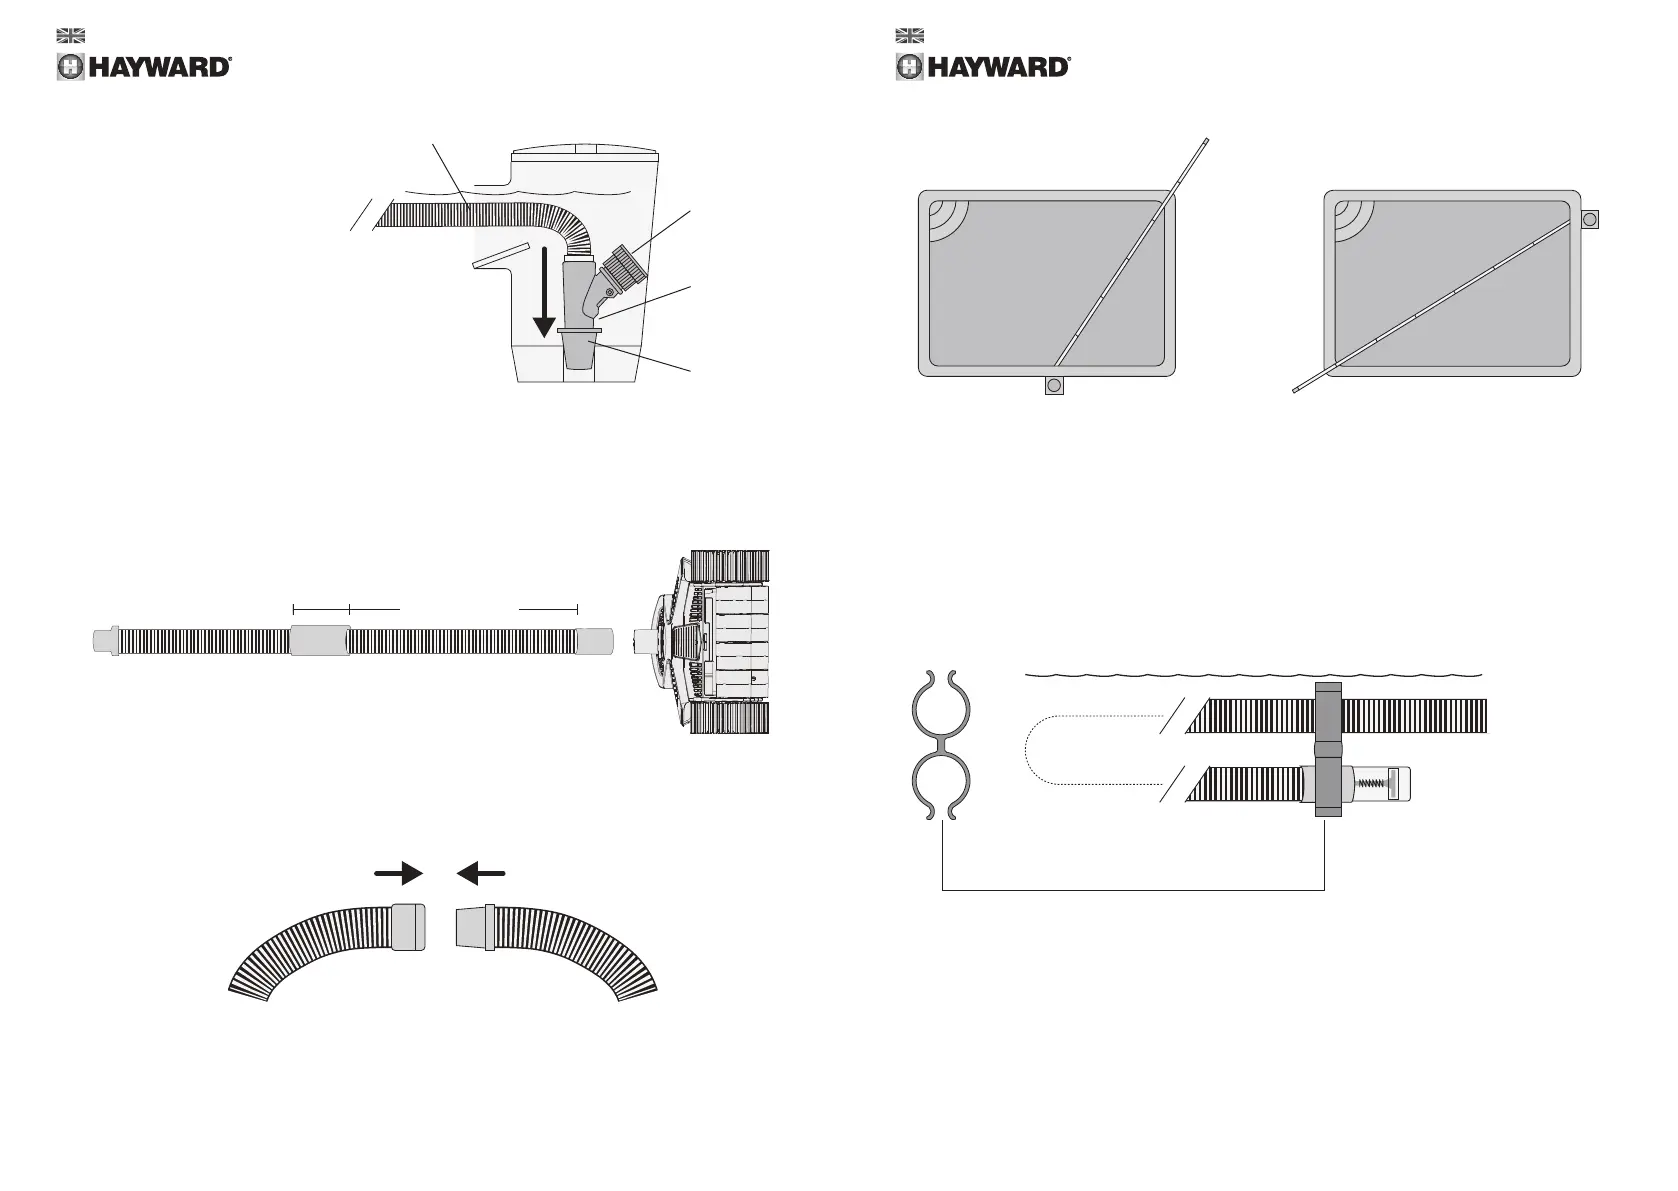
Skimmer Only Connection:
If your pool does not have a dedicat-
ed suction port, install one section of
hose into the skimmer together with
the Flow Regulator Valve, as shown.
If necessary, use the Hose Cone
Adapter to provide a proper seal.
NOTE: the Regulator Cap is not used
in this installation.
Connecting the Hoses
1. Attach the Float to the Leader Hose (the single section of hose that will connect to the
cleaner). The Float should be placed 50-60cm (20-24”) from the cuff. Do not connect
cleaner at this time.
2. From the rst section of hose at the suction source, connect together as many hose
sections as needed to reach the farthest point of the pool and then add the Leader Hose.
Refer to the diagram below and the top of page 6.
Float Do not connect
cleaner at this time
Suction End
LEADER HOSE
Hose Connection
Skimmer
Flow
Regulator
Valve
Hose Cone
Adapter
1st Section
of Connector
Hose
Flow
Regulator
Knob
50-60cm (20 - 24”)