7
CA80
PREPARING THE SG INSTALLATION
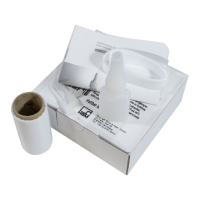
u Shorten the lead (see Fig. 5.1a and Fig. 5.1b) and fix the solder terminal in position
with adhesive tape.
a) b)
Covering foil of
the measuring
grid carrier
Heat-resistant
adhesive tape
Lead
Solder terminalMeasuring
grid
Carrier foil of the
measuring grid carrier
Fig. 5.1 Shorten the lead and connect to the SG
u Attach another piece of adhesive tape on top of the SG so that it overlaps on both
sides.
u Place the SG on the measuring point and carefully align it. Now use the tweezers to
press down firmly on one end of the adhesive strip, as far as the SG.
u Gently pull the adhesive tape on the opposite side of the SG up a little creating a hinge
to lift up the SG without changing its position.
Any excess adhesive can escape via the sides of the SG that are not covered with an
adhesive strip (Fig. 5.2).
Adhesive tape for folding
the SG back
(heat resistant adhesive
tape)
Leave approx. 1 mm free along the edges (no adhesive tape)
Fig. 5.2 Fixing the adhesive tape
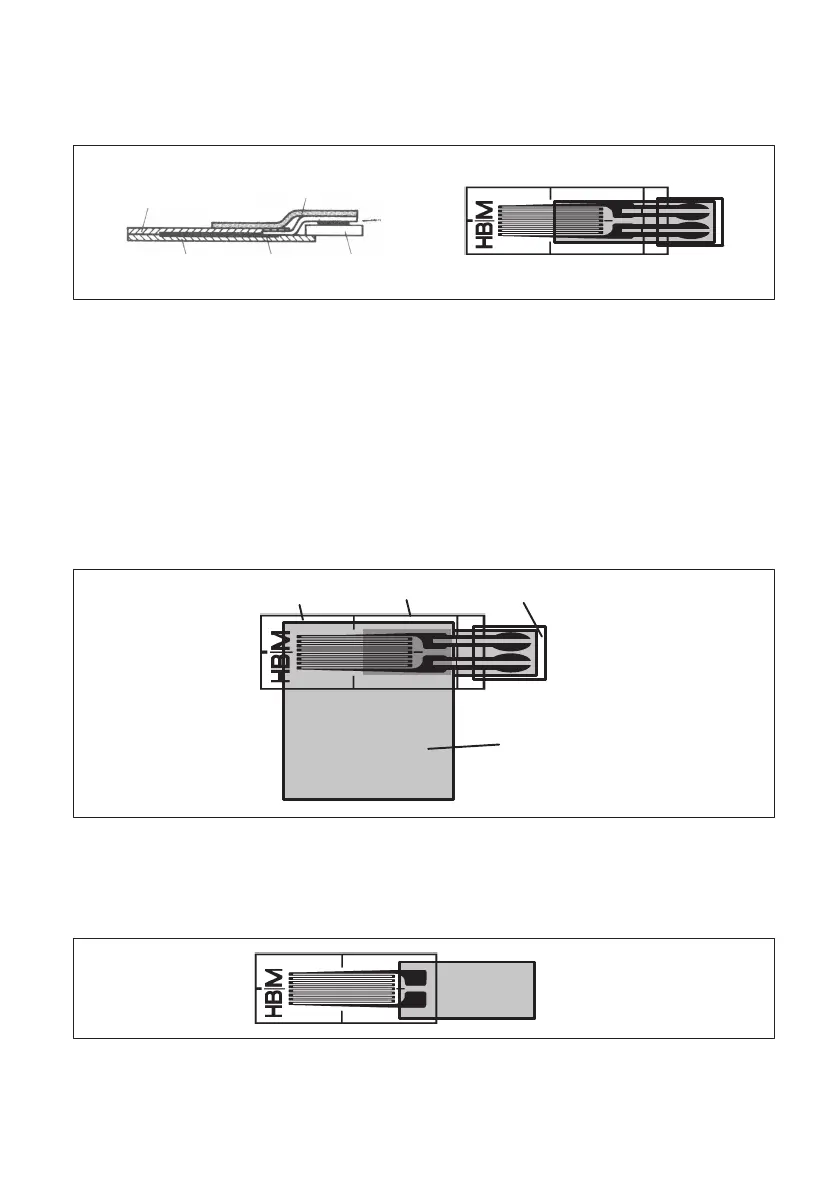
u In SG without leads, create a hinge-like connection as shown in Fig. 5.3 (without
additional solder terminals).
Fig. 5.3 Hinge-like connection for SG without lead