161939
5
Vedpak 228_Version 1_01.2020
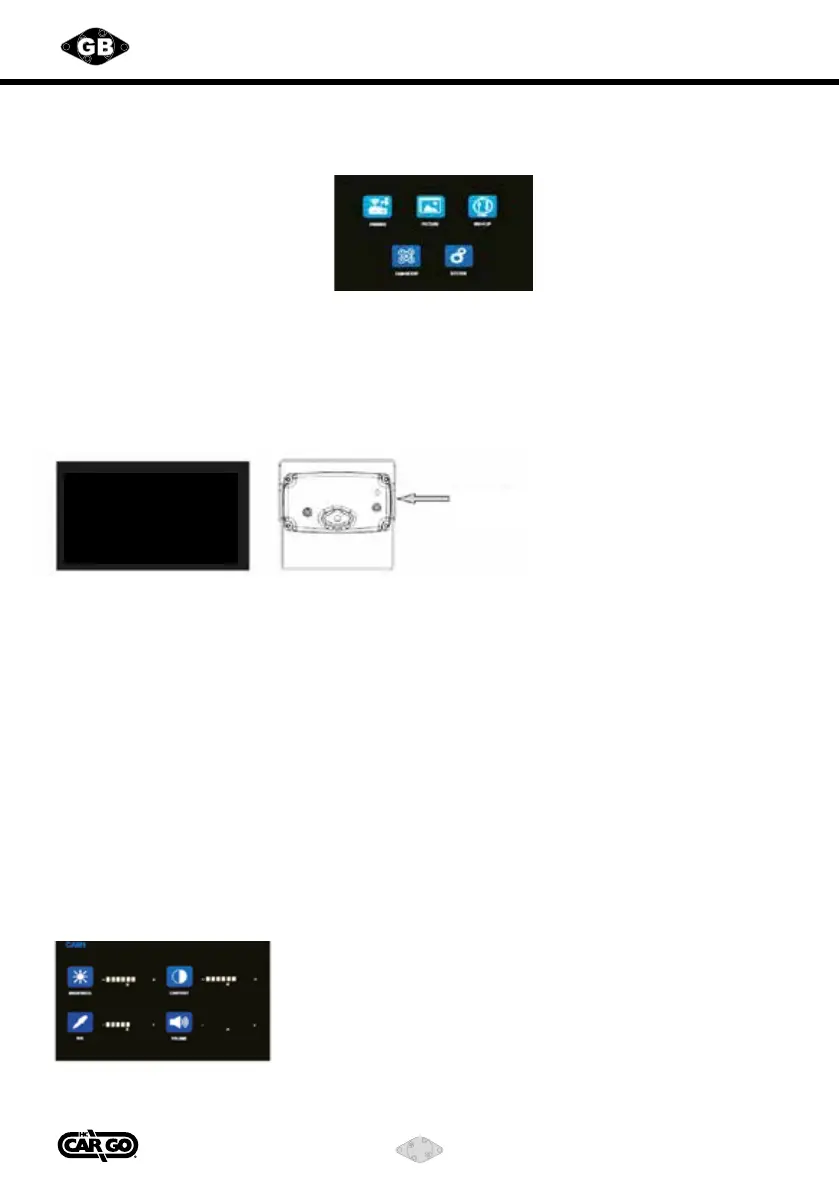
Operation of OSD Menu
Please use the menu under the circumstances of single image view.
Press “M” button for settings.
1. PAIRING
2. PICTURE SETUP
3. MIR-FLIP
4. CAMERA SETUP
5. SYSTEM
Note:
1. Pairing
selecting pairing function which will improve pairing speed.
Pairing Process:
1. First select channel (CAM 1 / CAM2) via “S” button, then press “M” for the menu
and then select pairing function by pressing “S” button.
2. The countdown for pairing - “pairing start 50s” sign will be shown on the screen.
Please connect and start the camera at the same time.
3. The camera will pair with monitor automatically within about 5-10 seconds after startup.
Image will appear on screen if pairing succeeds.
4. If pairing fails, the sign “no signal” will be shown on screen.
Please follow the instructions and pair again.
5. If pairing still does not succeed, please use a needle or other sharp objects to stab the reset
button at the back of camera(see above picture on the right), then wait for a few seconds while to
see if pairing succeeds.
2. Picture setup
Press “+” and “-” to select picture options, then press “S” button
When the icon selected is in red color, you can make your
adjustment by pressing “+” and “-”.
Press “M” to return to previous menu, press again to return to
main menu.
Pairing start
50s
reset button