Do you have a question about the Healthrider H10x Bike and is the answer not in the manual?
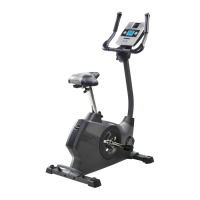
| Display Type | LCD |
|---|---|
| Flywheel Weight | 9 kg |
| Weight Capacity | 125 kg |
| Resistance Type | Magnetic |
| Display Metrics | Calories, Distance, Heart Rate, Resistance, RPM, Speed, Time |
| Dimensions | 105 x 53 x 132 cm |
| Weight | 32 kg |
| Warranty | 1 year |
Attach the rear stabilizer to the frame using specific screws.
Secure the front stabilizer to the frame with screws.
Connect the upper and lower wires for the upright assembly.
Slide the upright onto the frame and secure with screws.
Mount the seat onto the seat carriage using locknuts.
Insert and secure the seat post using the adjustment knob.
Mount the water bottle holder to the upright.
Connect handlebars to the upright and secure with bolts and locknuts.
Insert D batteries into the console for operation.
Connect console wires to the upright and pulse wires.
Secure the handlebar cover to the upright with screws.
Tighten pedals clockwise/counter-clockwise into the crank arms.
Inspect and ensure all parts are tightened and functioning correctly.
Loosen knob, slide post, and secure seat post in desired position.
Loosen knob, move seat forward/backward, tighten knob.
Adjust straps to desired position and secure onto pedal tabs.
Turn leveling feet to ensure the bike is stable and level.
Press a button or pedal to activate the console.
Choose manual mode by pressing workout buttons until a track appears.
Pedal and use resistance buttons to increase or decrease difficulty.
Observe time, calories, resistance, distance, and track indicators.
Press a button or pedal to activate the console.
Press Select Week button to choose the program week.
Press Select Day button to choose the program day.
Press Start and begin pedaling to begin the programmed workout.
Press a button or pedal to activate the console.
Press workout buttons repeatedly to choose a preset program.
Begin pedaling to initiate the selected preset workout.
Inspect, tighten parts, clean the bike with damp cloth and mild soap.
Addresses console issues like low batteries or heart rate monitor problems.
Steps to adjust the reed switch for correct console feedback.
Guide to setting exercise intensity based on heart rate for fat burning and aerobic goals.
Recommendations for warming up, training zone exercise, and cooling down.
Advice on how often to exercise for optimal fitness maintenance.
Stretch hamstrings, back of knees, and back by bending forward.
Stretch hamstrings, lower back, and groin by reaching for toes.
Stretch calves, achilles tendons, and ankles by leaning forward.
Stretch quadriceps and hip muscles by pulling heel to buttocks.
Stretch quadriceps and hip muscles by pulling feet towards groin.