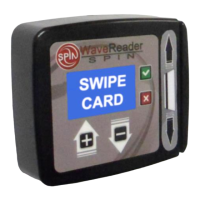
WaveReader to WaveController
Linking/Deleting Instructions
Proprietary Notice: This document and the information contained herein is the property of Heartland Payment Systems. This document is provided for
customer information and evaluation purposes only, and does not represent any transfer of intellectual property to the customer. No part of the document
can be reproduced or distributed to third parties without the express written permission of Heartland Payment Systems.
3.0 Entering Configuration Mode
Upon Power-Up the WaveController will display a Startup Screen. Typically, the WaveController will be at the
Status Screen as its Home Screen.
3.1 Startup Screen
WaveRider Sys
2.0b 05-24-11
W00003
PN:2425 LC:155
This screen will show up at Power-Up and will change to the Status
Screen once an IP Address is obtained.
It will display the Software Revision/Revision Date, the
WaveController ID Name, Zigbee PAN, and Location ID.
If the WaveController is already ON and has been communicating, this
screen will not be seen. It will be at the Status Screen.
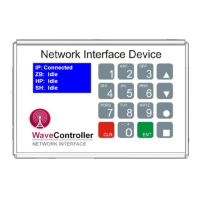
3.2 Status Screen (Home)
IP: Connected
XB: Idle
HP: Idle
SH: Idle
The Status Screen is the Home Screen. It displays the following
communication traffic:
IP - Connected if has a Valid IP Address
XB – Zigbee Message Traffic
HP – Heartland Exchange Traffic
SH – Heartland Status Host Traffic
Press the Button to enter the PIN Screen