EasyManua.ls Logo

Heath Zenith SL-6133 User Manual

Heath Zenith SL-6133
20 pages
To Next Page IconTo Next Page
Page #1 background imageLoading...
Page #1 background image
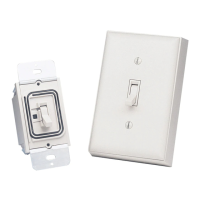
Wireless Add-on Switch
Model SL-6133
Your wireless add-on switch includes:
•1 transmitter wall switch unit
•1 receiver wall switch unit
•2 wire connectors
•2 #8 x 2" wood screws
Installation
1. Select a wall switch location that controls a light or overhead incandescent light.
Keep the following points in mind while selecting a location:
Never install two receiver units within 3 feet (0.9 m) of each other or it could
reduce the operating range.
The total lighting load must not exceed 500 watts (incandescent only).
The receiver must be located within the range of the transmitter (up to 100
feet [30 m]) in the room or hallway that they are installed so they will operate
properly.
Make sure that large metal objects are not located between the transmitter and
receiver since it could interfere with the signals.
2. Turn off the power to the light switch circuit before you proceed. Do this
at your circuit breaker or fuse box.
You'll need to buy a 9-volt alkaline battery for the wireless switch. In typical
use, this battery will last one year.
Multiple channels (A thru E) are available so that you can operate several
systems at different locations in your home. If you purchase more than one
system, make sure you select different operating channels, or they will inter-
act with each other.
If you purchase a different switch plate to match your decor, make sure it is not a
metal plate. Metal wall plates will reduce the operating range.
© 2003 DESA Specialty Products™ 595-4918-05
IMPORTANT: Use only as a second switch to remotely control a light. Do
not use if more than one switch exists.
Questions and Answers:

Heath Zenith SL-6133 Specifications

General IconGeneral
BrandHeath Zenith
ModelSL-6133
CategorySwitch
LanguageEnglish

Summary

Installation Guide

Select Wall Switch Location

Details key considerations for choosing a suitable wall switch location for installation, including range and interference.

Turn Off Power

Instructs users to disconnect power at the circuit breaker or fuse box before proceeding with installation.

Remove Existing Switch Plate

Guides removal of the old switch plate and disconnection of wires, advising consultation for extra wires.

Connect Receiver Wires

Details connecting the receiver wires to the removed switch wires using provided connectors.

Check Wire Connections

Emphasizes verifying secure wire connections, ensuring no bare wires are exposed.

Position and Mount Receiver

Instructs on positioning the receiver in the wall box and securing it with screws, pushing excess wiring.

Restore Power

Directs users to restore power to the light switch circuit at the breaker or fuse box.

Test Receiver Operation

Guides testing the receiver's master switch and toggle switch to verify light control functionality.

Install Transmitter Battery

Details installing the 9-volt battery into the transmitter's compartment after removing the cover.

Verify Transmitter Operation

Explains how to verify transmitter operation by switching it on/off and troubleshooting range issues.

Adjust Receiver Antenna

Provides instructions for unwinding and routing the receiver's antenna to optimize signal range.

Mount Transmitter

Instructs on mounting the transmitter to the desired location using the provided wood screws.

Mount Switch Plates

Guides mounting the transmitter's switch plate and the receiver's switch plate to complete installation.

Troubleshooting and Specifications

Technical Service Information

Provides contact information and required details for technical support and troubleshooting assistance.

Product Specifications

Lists key technical details including lighting load limits, voltage, range, and battery type.

Regulatory and Warranty Information

Limited Warranty Details

Details the terms and conditions of the five-year limited warranty, including coverage and exclusions.

Related product manuals