PRODUCT INFO Heatit Z-Wave
FEATURES
•
Floor sensor
•
Built in room sensor
•
External room sensor
•
Temperature limiter
•
Power regulator
•
Z-Wave Plus chip, 500 series
•
Weekly program via gateway
•
Setback mode via
gateway or pilot wire
•
LED-diode
•
Can be used in connection
with different NTC-sensors
•
Lock mode/child lock
•
Calibration
•
8 associations
TECHNICAL DATA
Protocol Z-Wave, 868,4 MHz
Rated voltage 230V 50/60Hz
Max load 3600W (resistive load)
750W self-limiting heating cable
Max current 16A
Power consumption 1,5W
Min/max installation temp. -20°C - 40°C
Min/max operating temp. 5°C - 40°C
Temperature intervals Floor sensor 5°C - 40°C
External room sensor 5°C - 40°C
Hysteresis 0,3°C - 3,0°C (default 0,5°C)
Switch Single-pole switch
Sensor values 0°C 29,1 kOhm
10°C 18,6 kOhm
15°C 15,1 kOhm
20°C 12,2 kOhm
25°C 10,0 kOhm
IP Class IP 21
Approvals CE
Z-Wave Plus
EN 60730-1, EN 60730-2-9
EMC 2014/30/EU, RoHS 2011/65/EU
LVD 2014/35/EU
The thermostat is designed for electrical heating.
STARTUP
AFTER CONNECTING THE POWER TO THE THERMOSTAT FOR THE
FIRST TIME, ALL PARAMETERS WILL HAVE DEFAULT SETTINGS.
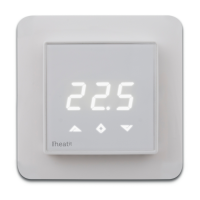
CONTROL
The thermostat is controlled by three touch sensitive capacitive
buttons.
You only need to touch lightly to activate the buttons.
1: Left (Up)
2: Center (Confirm)
3: Right (Down)
INCLUSION/EXCLUSION
To include the thermostat to your home automation gateway,
press Center (confirm) for 10 seconds.
The display will show OFF. Press Right (down) 4 times till you
see Con in the display. Now start add device in your home
automation software. Start inclusion mode by pressing Center
(confirm) for approximately 2 seconds. The inclusion/exclusion
icon will appear in the display. Confirmation will show Inc/EcL
in the display. If inclusion fails, Err (error) will appear.
Leave programming mode by choosing ESC in menu.
Your thermostat is ready for use with default settings.
PROGRAMMING YOUR THERMOSTAT
To activate the programming mode, press Center (confirm)
for 10 seconds. Now the display will show OFF.
Now you are in programming mode. To scroll up and down
in the menu use button 1 and 3 (left and right) to navigate.
To enter submenu press Center (confirm). Always confirm
your setting by pressing Center (confirm) for 2 seconds.
Menu:
OFF Turns the thermostat off.
Sensors:
1. A Choice of sensors
Depending on your choice of sensors, the menu will change.
2. SEn Select the right Ohm value for your external/floor
sensor.
NTC type (10, 12, 15, 22, 33 or 47kΩ). Default 10kΩ.
3. CAE Calibration for external sensor.
CAF Calibration for floor sensor.
CAR Calibration for room sensor.
4. br1 Brightness of display can be adjusted in this menu.
5. Con Activation of inclusion/exclusion mode.
6. diF Hysteresis.
7. ALo Setting lowest allowed temperature (limitation).
(Airsensor)
AHI Setting highest allowed temperature (limitation).
(Airsensor)
FLO Setting lowest allowed temperature (limitation).
(Floor sensor)
FHI Setting highest allowed temperature (limitation).
(Floor sensor)
PLo Setting lowest allowed power regulator mode.
8. HEA Switch between heating and cooling function.
ESC Escape – exit programming menu.
ART. NO. PRODUCT COLOR Z-WAVE
FREQUENCY
54 304 99
Heatit Z-Wave thermostat 3600W 16A White RAL 9003 EU 868,4MHz
54 304 46 Plastic kit for Heatit (front and frame) Black RAL 9011
54 301 07 Floor sensor Ø 4mm 3 meters NTC 10 kΩ
54 301 08
Floor sensor Ø 3mm 6 meters NTC 10 kΩ
54 301 27
External enclosed sensor IP 20/54
54 304 97
Cable for software update on thermostat
 Loading...