EasyManua.ls Logo

Heatit Z-WAVE - User Manual

Heatit Z-WAVE
4 pages
Print Icon
To Next Page IconTo Next Page
Loading...
Ver 2019-A
IMPORTANT
PLEASE READ THIS BEFORE INSTALLATION
This thermostat is tested and certified by Pepper One Gmbh
according to the requirements put forward by the Z-Wave
Alliance. This is a Z-wave Plus product with the 500 series chip.
If the product does not work with your gateway, then the
gateway manufacturer has not made an integration or
implemented such a thermostat with their gateway. We do not
give any guarantee towards integration.
PRINCIPLES FOR REGULATION
The Heatit Z-Wave is designed for controlling electrical heating
cables and electrical radiators/convectors. The thermostat
has built in temperature sensors and has 3 algorithms for
temperature compensation.
After you have set the temperature, the thermostat will use
a hysteresis to regulate the temperature. The hysteresis is
adjustable.
TEMPERATURE SHOWN IN DISPLAY
The temperature shown in the display is the actual temperature
for floor sensor and the external room sensor. You are able to
calibrate the sensor values.
When using the built in room sensor, the temperature shown
is the set point. When using the built in sensor, the thermostat
can seem somewhat inaccurate. This is due to heat generation
inside the thermostat, draft and other external influences.
If the thermostat is to be used with waterbased heating systems,
you have to use an external sensor.
Z-WAVE THERMOSTAT – SETUP
This manual describes the most essential functions and
technical specifications of the thermostat.
These instructions help the user to control the thermostat, and
the electrician to install and setup the thermostat.
INSTALLATION
Installation must be done by a qualified electrical installer in
accordance with the National Building codes. Before installation,
disconnect any power to the thermostat’s mains. During
installation of the thermostat, power to the thermostat must be
disconnected AT ALL TIMES!
Use e.g. a small slotted screwdriver. Start by carefully removing
the front cover by pushing the release springs. The front cover
and the frame can now be removed.
Now connect the wires to the thermostat’s terminals:
Use 1,5mm² or 2,5mm² according to load.
HEATING (N) Heating cable connection (Neutral)
N Power connection (Neutral) 230V
L Power connection (Live) 230V
HEATING (L) Heating cable connection (Live)
PILOT 230V pilot signal (ECO temp)
FLOOR SENSOR NTC type (10, 12, 15, 22, 33 or 47kΩ).
Default 10kΩ.
EXTERNAL SENSOR NTC type (10, 12, 15, 22, 33 or 47kΩ).
Default 10kΩ.
Next, position the thermostat and fasten it onto the wall’s
mounting box using 2-4 screws. Position the frame, then position
and carefully press the front cover until it snaps in place. Check that
the front cover has snapped in place properly on both left and right
side. The front cover should now be firmly fixed on all sides.
NOTE! Top cover has to be installed when the thermostat is
connected to mains. The thermostat is not SELV product.
All voltage parts are considered as 230VAC.
Release spring
1: Left 3: Right2: Center
HEATIT
Z-WAVE
Firmware 1.8
01.07.2019
Installers manual
51,1mm
15,6mm
21,3mm
49,5mm
TF 021
49,5mm
Question and Answer IconNeed help?

Do you have a question about the Heatit Z-WAVE and is the answer not in the manual?

Summary

Important Product Information

Important Pre-Installation Notes

Critical information and certification details for the Heatit Z-Wave thermostat.

Regulation Principles

Explains the regulation principles and hysteresis for the thermostat.

Display Temperature Explanation

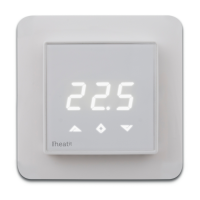
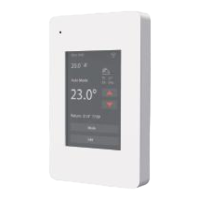
Details what the display shows and factors affecting temperature readings.

Z-Wave Thermostat Setup Overview

Outlines the scope of the manual for installation and user control.

Product Information and Features

Product Features

Lists key features of the Heatit Z-Wave thermostat, including sensors and connectivity.

Technical Specifications

Details technical data such as protocol, voltage, load, and IP class.

Thermostat Operation and Setup

Startup and Default Settings

Describes initial startup and default parameter settings.

Control Interface

Explains how to control the thermostat using its touch-sensitive buttons.

Inclusion and Exclusion Process

Guides on how to add or remove the thermostat from a home automation gateway.

Programming Menus

Details how to access and navigate the thermostat's programming menus.

Detailed Configuration Options

Sensor Selection and Configuration

Guides on choosing and setting up external/floor sensors and their Ohm values.

Temperature Calibration

Instructions for adjusting displayed temperature values for accuracy.

Display Brightness Adjustment

How to adjust the brightness level of the thermostat's display.

Inclusion;Exclusion Mode Activation

Steps to activate inclusion or exclusion mode for Z-Wave pairing.

Hysteresis Setting

Allows adjustment of the hysteresis from 0.3°C to 3.0°C for temperature regulation.

Temperature Limit Settings

Configures minimum and maximum temperature limits for floor and air sensors.

Heating;Cooling Mode Selection

Enables selection between heating or cooling functions for the thermostat.

Standby and Main Screen Behavior

Explains how the display behaves in standby and after button presses.

Display On;Off Functionality

Instructions for activating or deactivating the thermostat display.

Child Lock Activation

Enables or disables the child lock feature to prevent unintended changes.

Factory Reset Procedure

Details how to perform a complete factory reset of the thermostat.

Advanced Settings and Error Codes

Comfort and Economy Mode

Explains the CO and ECO modes for different temperature setpoints and usage.

Command Classes for Z-Wave

Lists command classes required for schedule and week program control.

Command Class Configuration

Details parameter numbers and byte sizes for Z-Wave configuration.

Error Code Reference

Lists and explains common error codes displayed by the thermostat.

Heatit Z-WAVE Specifications

General IconGeneral
Product colorBlack
Memory functionNo
Smart thermostat-
Units of measurement°C
Temperature setpoint range5 - 40 °C
International Protection (IP) codeIP21
Power sourceAC
Operating voltage230 V
Maximum switching current16 A
Maximum switching capacity3600 W
Temperature control range0 - 25 °C

Related product manuals