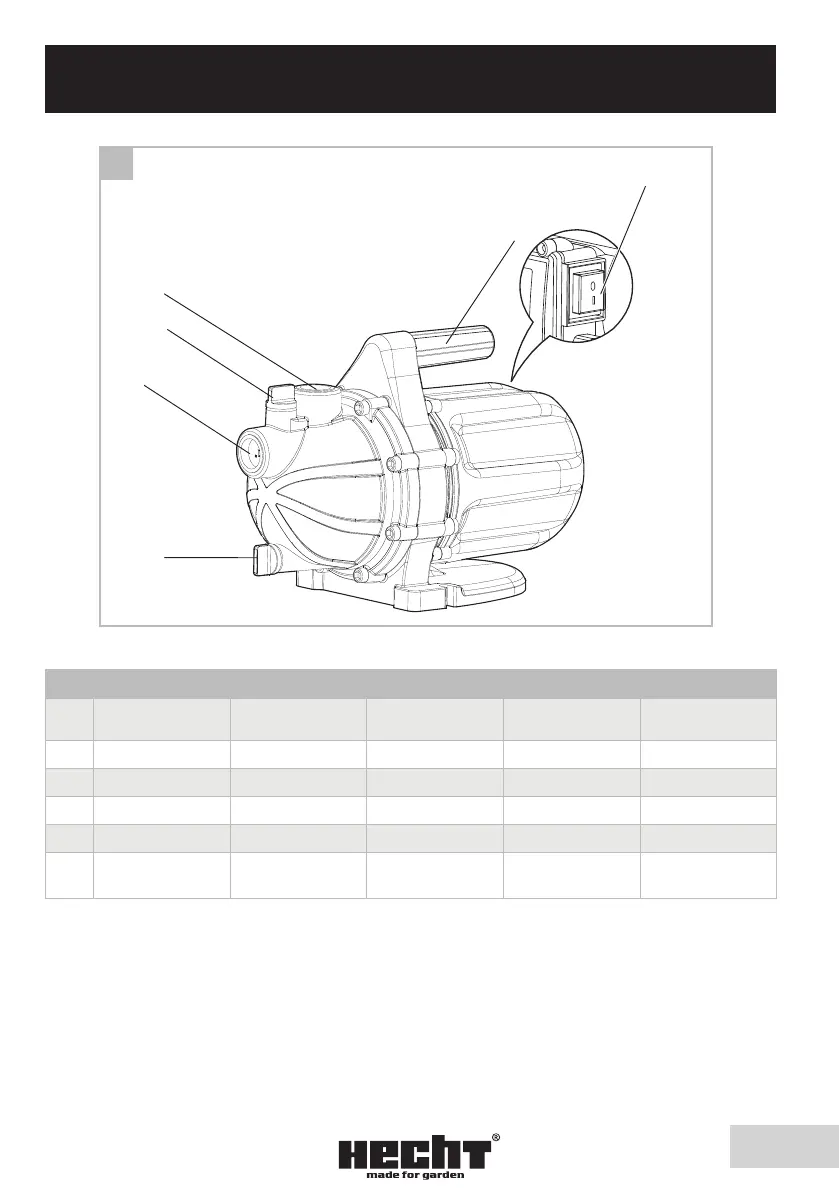
Your device at a glance
4
GB
Device-specific safety instructions
• Do not subject the device to rain. Do not use the device in wet surroundings.
• Do not use the device in areas where there is danger of explosion or in the vicinity of com-
bustible liquids or gases!
• Do not aim the water jet directly toward the device or other electrical components! Mortal dan-
ger due to electric shock!
• Lay the extension cord in such a way that it cannot get into the liquid being conveyed.
• Do not install or turn on the device if there are people or
animals in the conveying medium
(e. g. swimming pool) or making contact with the conveying medium.
• Do not leave the device unsupervised. Pull the mains plug during periods of extended
absence.
• As a general rule, repairs are only to be carried out by an electrician. If repairs are performed
improperly, there is danger of liqu
id getting into the electronic components of the device.
• Symbols affixed to your tools may not be removed or covered. Information on the device that
is no longer legible must be replaced immediately.
Your device at a glance
1. Intake
2. Water drain plug
3.
4. Handle
5. On-Off switch (back side)
What is included
• Instructions for use
• Irrigation unit
• Funnel to fill the pump
Unpacking and commissioning
Installing the unit
– Fix the unit (8) using the coupling nut (9) and tighten by hand. Ensure that the seal is positi-
oned correctly!
– Turn the unit to the required position and tighten the coupling nut (9).
Read and observe the operating instructions before commissioning.