HCIIJCNHRIN
DR. JOHANNES HEIDENHAIN GmbH
D-8225
Traunreut 'Tel. (08669) 31-O
Kundendienst
SERVICE MANUAL TNC 151/X5
Page 43
Section 3.2
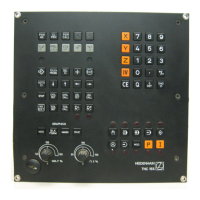
Exchanging the Keypad Board:
.Remove the 6 cross-head fixing screws from the frontplate.
.Tilt the frontplate outwards.
.Remove connectors J13 (feedrate-override potentiometer) and
J14 (spindle-override potentiometer) from the Connector
Board.
.Remove the ribbon cable connector PlO from the Keypad Board.
.Remove the 7 cross-head fixing screws which secure the
Key-
pad Board to the frontplate.
.Pull off the Keypad connectors, Pl to P8 respectively P9 for
the TNC 155 from the Keypad Board.
.Remove the Keypad Board.
When rebuilding the assembly, ensure that the keypad connec-
tars are firmly engaged in their respective sockets, and that
the LEDs project through the corresponding bored holes in the
keypad housing.
 Loading...