The first time you assemble The Cave, you need to
connect the frame, the inner tent and the outer tent
together.
You only need to do this once. From that point on
you can pack everything together as it is into the
tent bag. Next time, you just unpack it and pump it
up in one go as the tent erects itself.
FIRST
ASSEMBLY
THE FIRST ASSEMBLY PROCEEDS AS FOLLOWS:
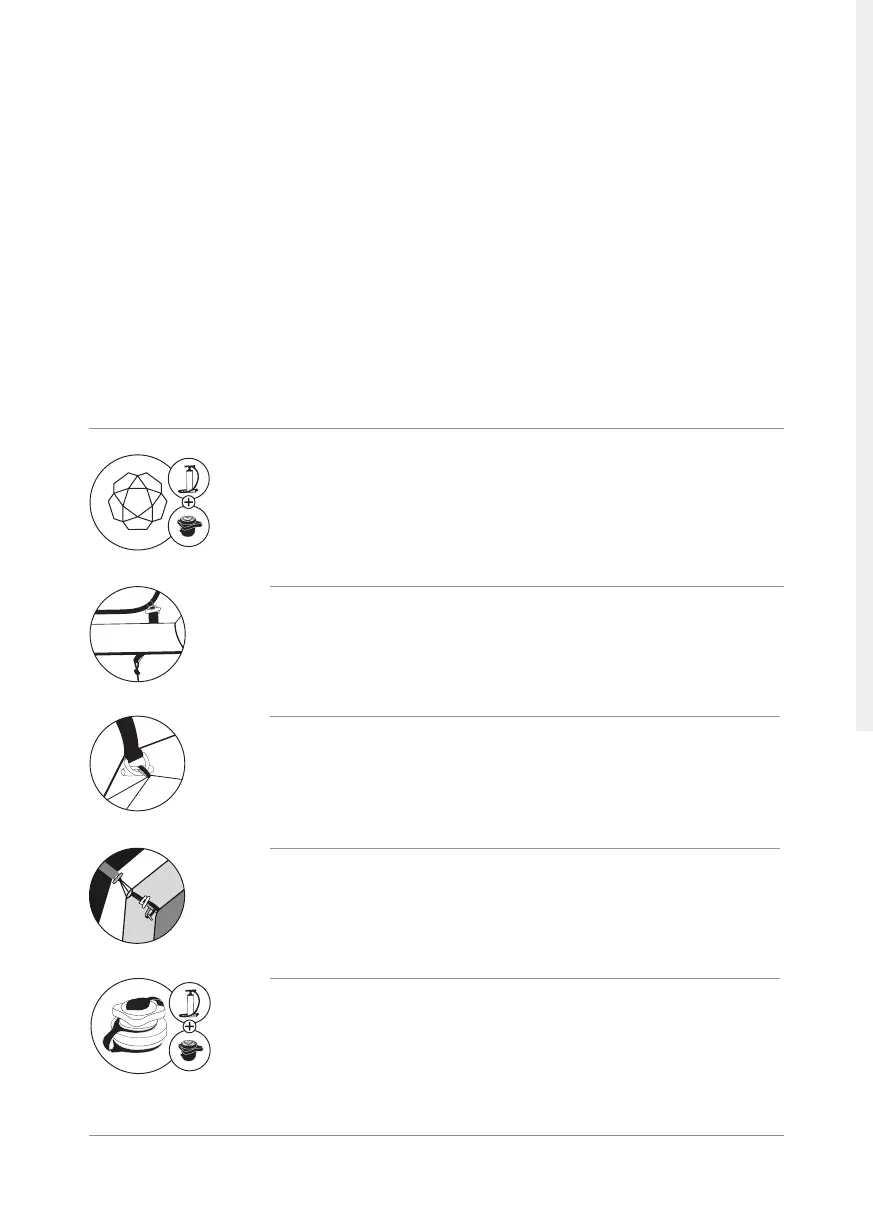
01 SPREAD THE INFLATABLE DIAMOND GRID
(or the blow-up airframe) evenly across the ground. When doing so, ensure the indivi-
dual struts are not twisted. Now use the pump to partially inflate the frame. To do this,
simply connect the pump via the adapter to one of the five valves. The pump adapter is
stored in the small accessories pouch.
NOW YOU CAN COUPLE THE INNER TENT TO THE GRID.
To do this, spread out the inner tent and position the inner tent entrance. Now connect
the toggles of the inner tent bottom to the black D-rings on the frame struts. Simply
push through and twist. That‘s it.
03 NOW INSTALL THE OUTER TENT
Now spread out the outer tent and hang the outer tent on the airframe. To do this, se-
cure the toggles to the D-rings.
04 FINALLY CONNECT THE INNER TENT ROOF WITH THE OUTER TENT
Finally, the inner tent is suspended inside the outer tent. The small toggles are used to
do this. Connect them to the O-rings provided for them on the inside of the outer tent.
The inner tent also can be used on its own (without the outer tent). Therefore secure it
directly to the air frame.
05 NOW PUMP UP THE FRAME
You can now pump up the IDG until the struts are properly filled with air. Everything else
will happen by itself.