• Re-secure the cover using the nine screws (Diag. 2, pos. a).
3.4 Assembling the shearing plant
Pay attention to sufficient fastening of the shearing plant.
3.4.1 Assembly height of the wall mounting
Fix the wall mounting in such a way that a gap of approximately 10 to 25 mm remains bet-
ween the end of the rigid drive downtube (or flexible drive) and the working area (Diag. 4, pos.
c). In doing so take into consideration the type of application cited below.
If the plant is to be operated with the rigid drive downtube or flexible drive,
the shearing plant is assembled in accordance with Diag. 4, pos. b. If the plant is to be
operated with a flexible drive then it can also be suspended on a rope (Diag. 3).
3.4.2 Assembling the rigid drive downtube or flexible drive
• Start up the motor (see Chapter 3.5).
• Press the lock button, which is located at the flexible drive’s upper coupling, by hand
(Diag. 6, pos. d) .
• Now push the flexible drive coupling into the shearing plant’s coupling sleeve and then
position this by means of slight pressure upwards until the lock button in the bore (Diag. 6,
pos. e) engages.
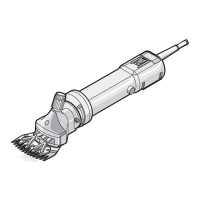
3.5 Switching the shearing plant on / off
Important:
Make sure that the ventilation holes are always clear (Diag. 6, pos. a + b). The shearing plant
must never be switched on when it is lying on flat ground as the cooling air flow would be
interrupted and the motor could burn out (Diag. 6, pos. b).
Connecting the shearing plant to the power supply, the motor is not yet engaged. The shea-
ring plant is switched on and off respectively via the cord / lever (Diag. 6, pos. c). The drive
is switched on by means of one downward pull, and is switched off again by repeating this
operation.
Should the power supply be interrupted whilst the drive is running, for safety reasons the
motor switches off automatically, which means that the unit must be switched on again via the
cord / lever when the power supply is re-established.
Diag. 3, 4
Diag. 6
Diag. 6