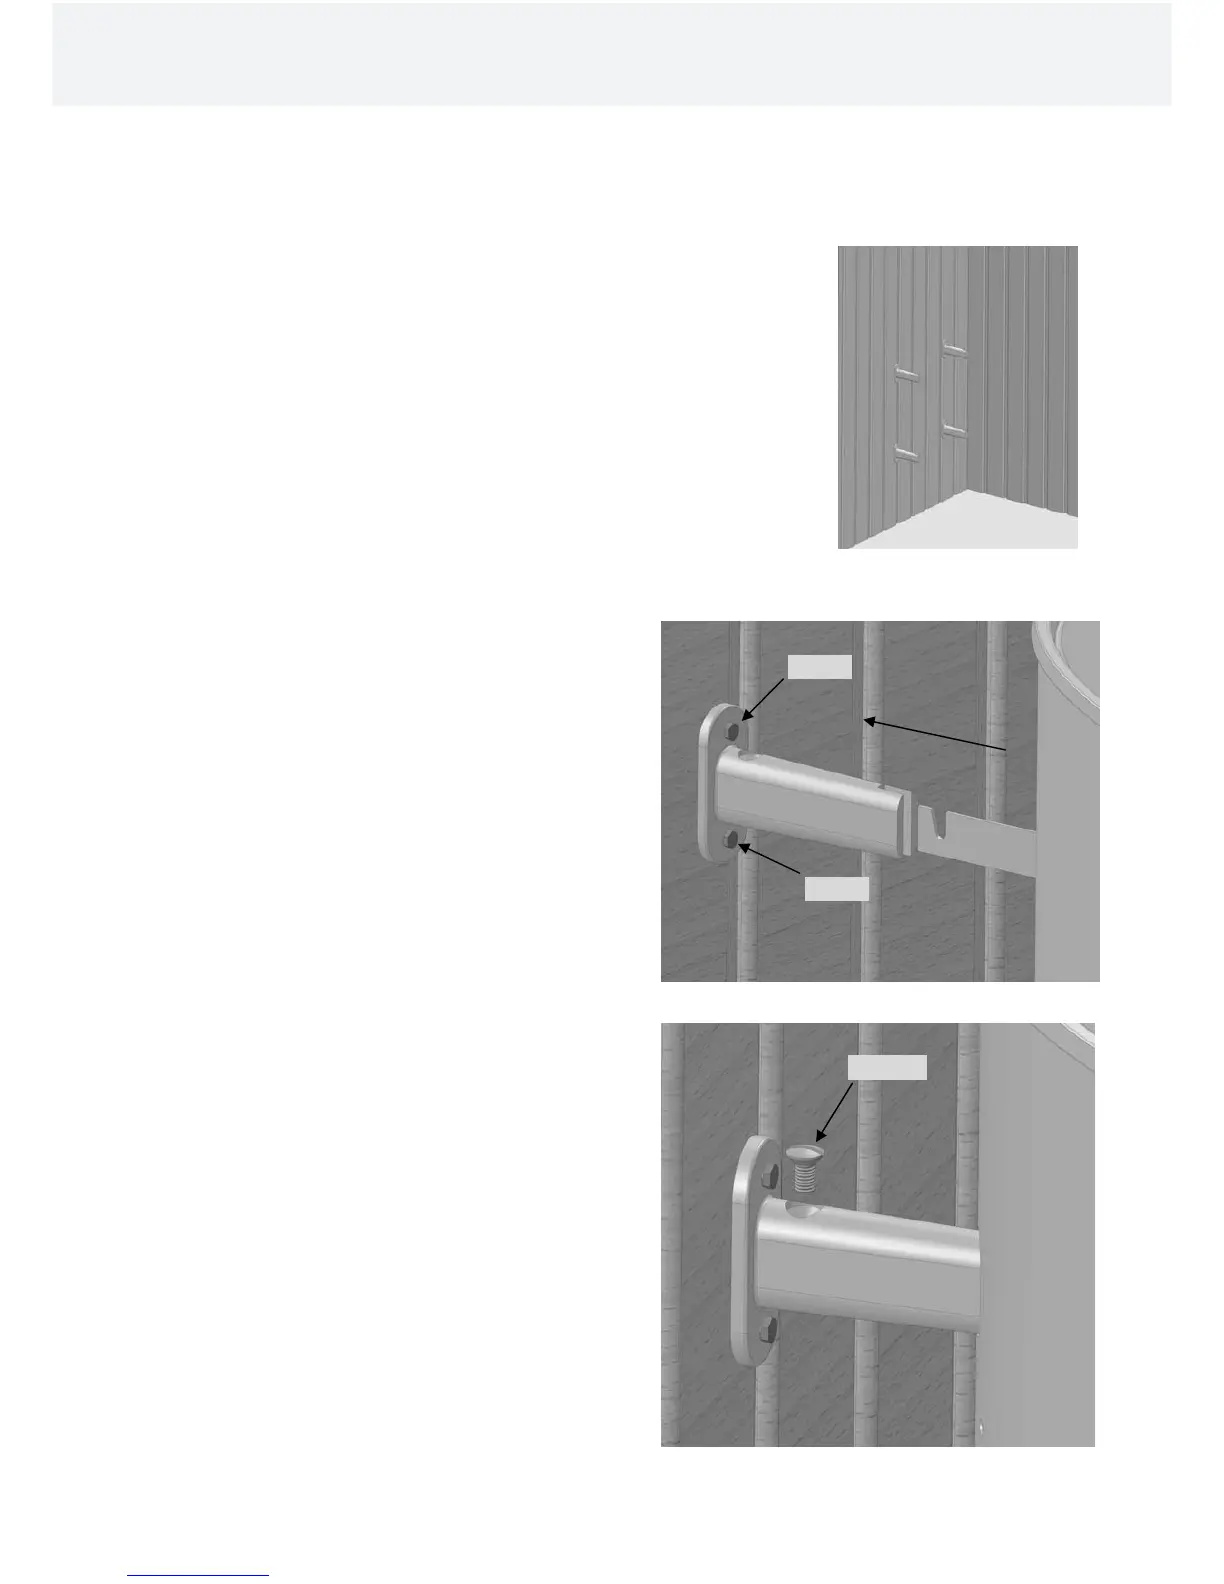
3.2 Installation steps
1. Secure the wall mounts in the wall with the accompanying screws (6 x 40 and 6 x 16).
Note the heater’s minimum clearance. If the sauna heater is going to be fitted with legs
you don't need to attach the bottom brackets.
The top wall mounts should be installed so that the holes in the heater’s locking screws
are upwards. The bottom wall mounts can be turned so that the holes are downward as
no locking screws will be screwed into them.
2. Then install the sauna heater so that the upper supporting
iron is touching the groove in the wall mount and move the
heater backwards as far as it goes (towards the wall).
It might be necessary to slightly loosen the wall mount's
screws so that it is easier to locate the supporting iron on
the wall brackets.
3. If you loosened the wall mounts' screws in the previous
point, you must tighten them again.
Then place the locking screws in the holes in the upper wall
mounts and fully tighten them.
Ensure that the heater has been locked in place by trying to
move it forwards and backwards.
Installation and User Manual FONDA
7
6 x 40
6 x 16
M5 x 12
 Loading...