PRIMAAX
®
EX / PRIMAAX
®
for Volvo Vehicles
Component Replacement 30 17730-254
ASSEMBLY
1. Inspect the mounting surfaces and lower air spring mounting bracket for any damage, re-
place if necessary.
FAILURE TO PRESS THE AIR SPRING AGAINST THE UNDERSIDE OF THE FRAME WHILE TIGHTENING
THE UPPER AIR SPRING BRACKET CAN RESULT IN COMPONENT DAMAGE AND PERSONAL INJURY
OR PROPERTY DAMAGE.
2. Hold the air spring tight against the frame flange and tighten the upper air spring mounting
fastener per original equipment manufacturer’s specifications.
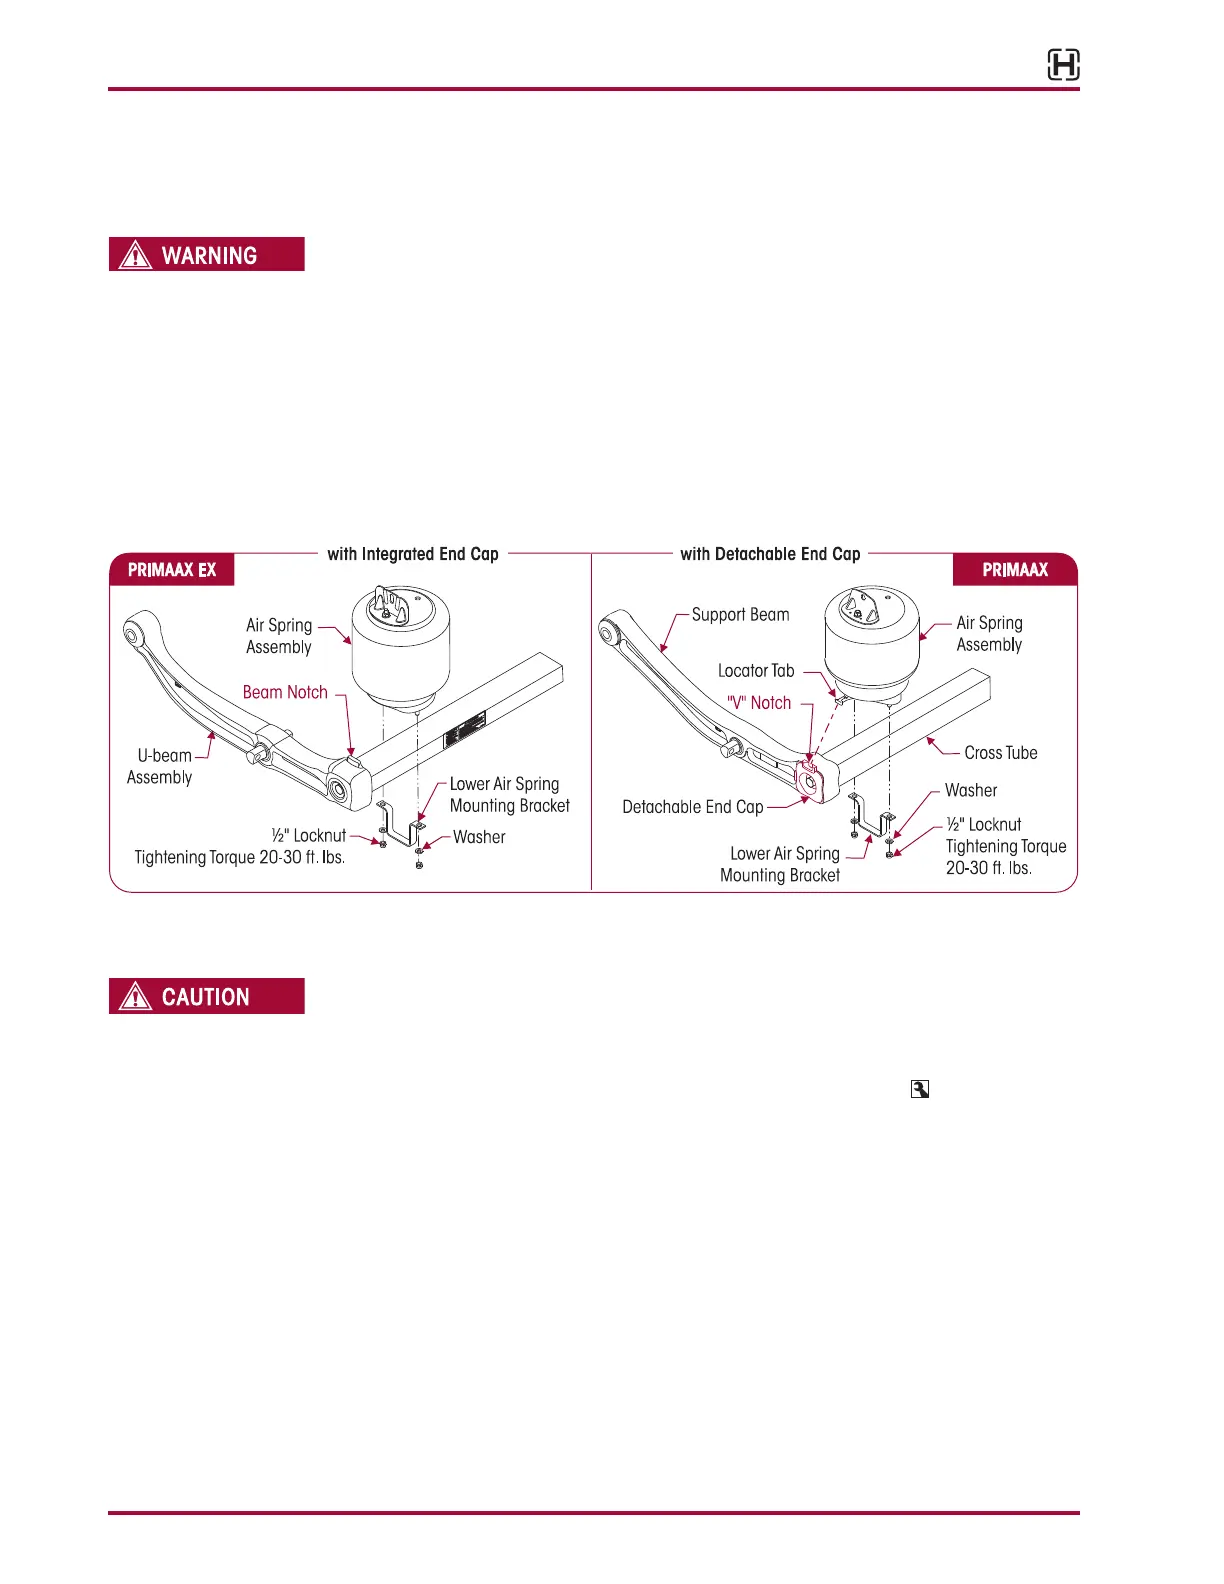
3. Install the air spring between the frame and cross tube.
a. PRIMAAX EX — Ensure the slot in the bottom of the air spring engages the “beam
notch” on the top of the beam, see Figure 8-1.
b. PRIMAAX — Ensure the “V” notch in the end cap engages the locator tab on the air
spring, see Figure 8-1.
FIGURE 8-1
4. Install the lower air spring mounting bracket around the cross tube, engaging the mounting
studs on the air spring.
IF THE AIR SPRING IS BEING REMOVED, IT IS MANDATORY TO LUBRICATE THE LOWER AIR SPRING
FASTENERS WITH PENETRATING OIL AND REMOVE WITH HAND TOOLS TO PREVENT DAMAGE TO THE
LOWER AIR SPRING MOUNTING STUD. FAILURE TO DO SO CAN CAUSE COMPONENT DAMAGE AND
VOID WARRANTY.
5. Using hand tools install the lower mounting fasteners and tighten to 20-30 foot pounds
torque.
6. Connect the air line to the air spring.
7. See additional Air Spring Cautions and Warnings in the Important Safety Notice Section of
this publication prior to deflating or inflating the air system.
8. Connect the leveling valve link rod(s) to the height control valve arm(s) to inflate the
suspension.
9. Remove the frame supports.
10. Verify proper ride height adjustment, (see vehicle manufacturer’s specification for proper
ride height adjustment).
11. Remove the wheel chocks.