PRIMAAX
®
EX / PRIMAAX
®
for Volvo Vehicles
17730-254 35 Component Replacement
FIGURE 8-8 FIGURE 8-9
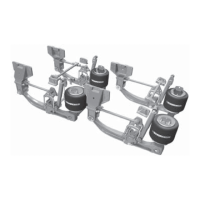
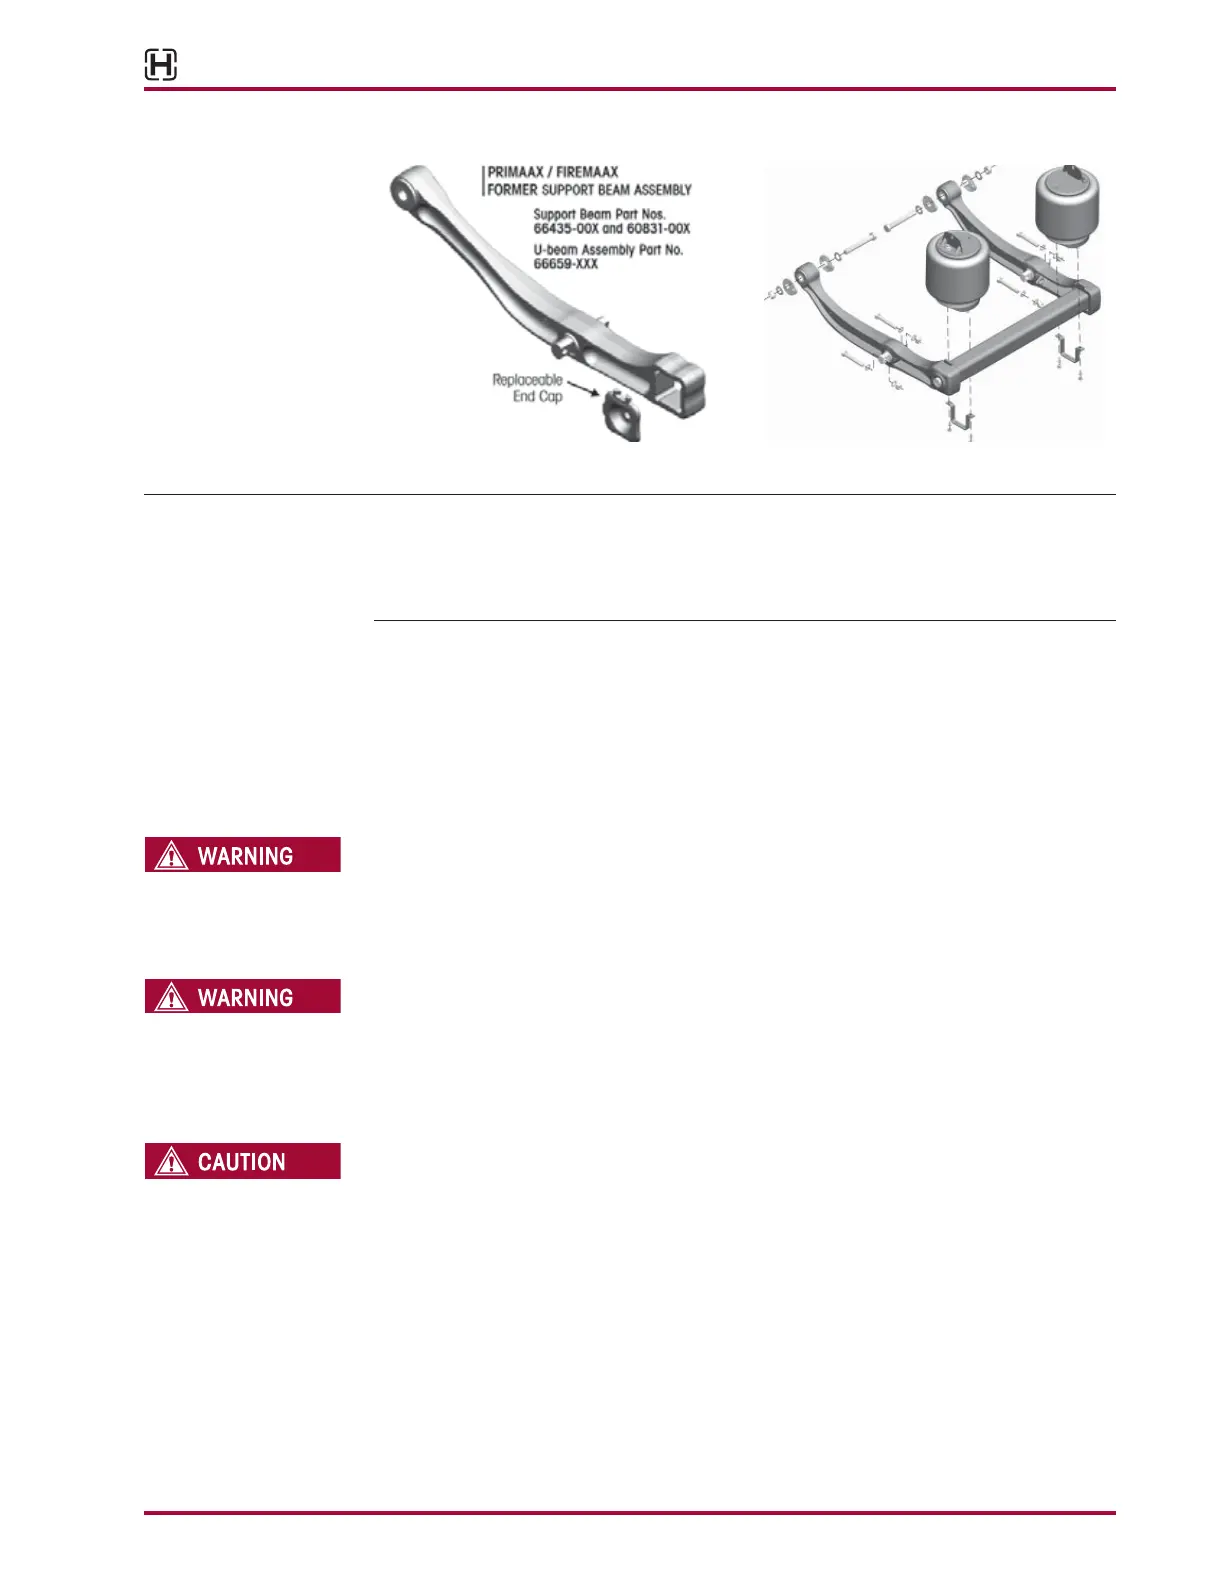
U-BEAM ASSEMBLY
IMPORTANT NOTICE As of April 2010, Hendrickson introduced new U-beam assembly enhancements for PRIMAAXEX
suspensions to be equipped on new production vehicles and for aftermarket U-beam assembly
kits. The new enhancements to the U-beam assembly result in a maintenance-free integrated
end cap connection. See SEU-0229 for PRIMAAX support beam/cross tube assembly conversion
to the new U-beam assembly enhancement and refer to Parts List Section of this publication.
DISASSEMBLY
1. Chock the front wheels.
2. Support the frame at ride height.
3. Raise and support the axle being serviced. Remove the wheels.
4. Disconnect the height control valve linkage assembly from the height control valve arm(s)
(see vehicle manufacturers instructions).
PRIOR TO AND DURING DEFLATION AND INFLATION OF THE AIR SUSPENSION SYSTEM, ENSURE THAT ALL
PERSONNEL AND EQUIPMENT ARE CLEAR FROM UNDER THE VEHICLE AND AROUND THE SERVICE AREA,
FAILURE TO DO SO CAN CAUSE SERIOUS PERSONAL INJURY, DEATH, OR PROPERTY DAMAGE.
5. See additional Air Spring Cautions and Warnings in the Important Safety Notice Section of
this publication prior to deflating or inflating the air system.
SOME VEHICLE APPLICATIONS, SUCH AS VEHICLES EQUIPPED WITH OUTRIGGERS, RETAIN SOME
PRESSURE IN THE AIR SPRINGS AT ALL TIMES. PRIOR TO PERFORMING ANY MAINTENANCE, SERVICE,
OR REPAIR OF THE SUSPENSION, VERIFY EACH AIR SPRING IS COMPLETELY DEFLATED. FAILURE TO
DO SO COULD RESULT IN SERIOUS PROPERTY DAMAGE AND/OR SEVERE PERSONAL INJURY.
6. Lower the leveling valve arm(s) to exhaust the air in the air springs and deflate the rear
suspension.
IF THE AIR SPRING IS BEING REMOVED, IT IS MANDATORY TO LUBRICATE THE LOWER AIR SPRING
FASTENERS WITH PENETRATING OIL AND REMOVE WITH HAND TOOLS TO PREVENT DAMAGE TO THE
LOWER AIR SPRING MOUNTING STUD. FAILURE TO DO SO CAN CAUSE COMPONENT DAMAGE AND
VOID WARRANTY.
7. Lubricate the lower mounting fasteners of the air springs with penetrating oil. This will help
prevent the air spring mounting studs from breaking during the removal process.
8. Remove the lower mounting fasteners from the air springs using HAND TOOLS only.
9. Remove both the lower air spring mounting brackets to disconnect both air springs from
the cross tube, see Figure 8-10.