PRIMAAX
®
EX / PRIMAAX
®
for Volvo Vehicles
Component Replacement 46 17730-254
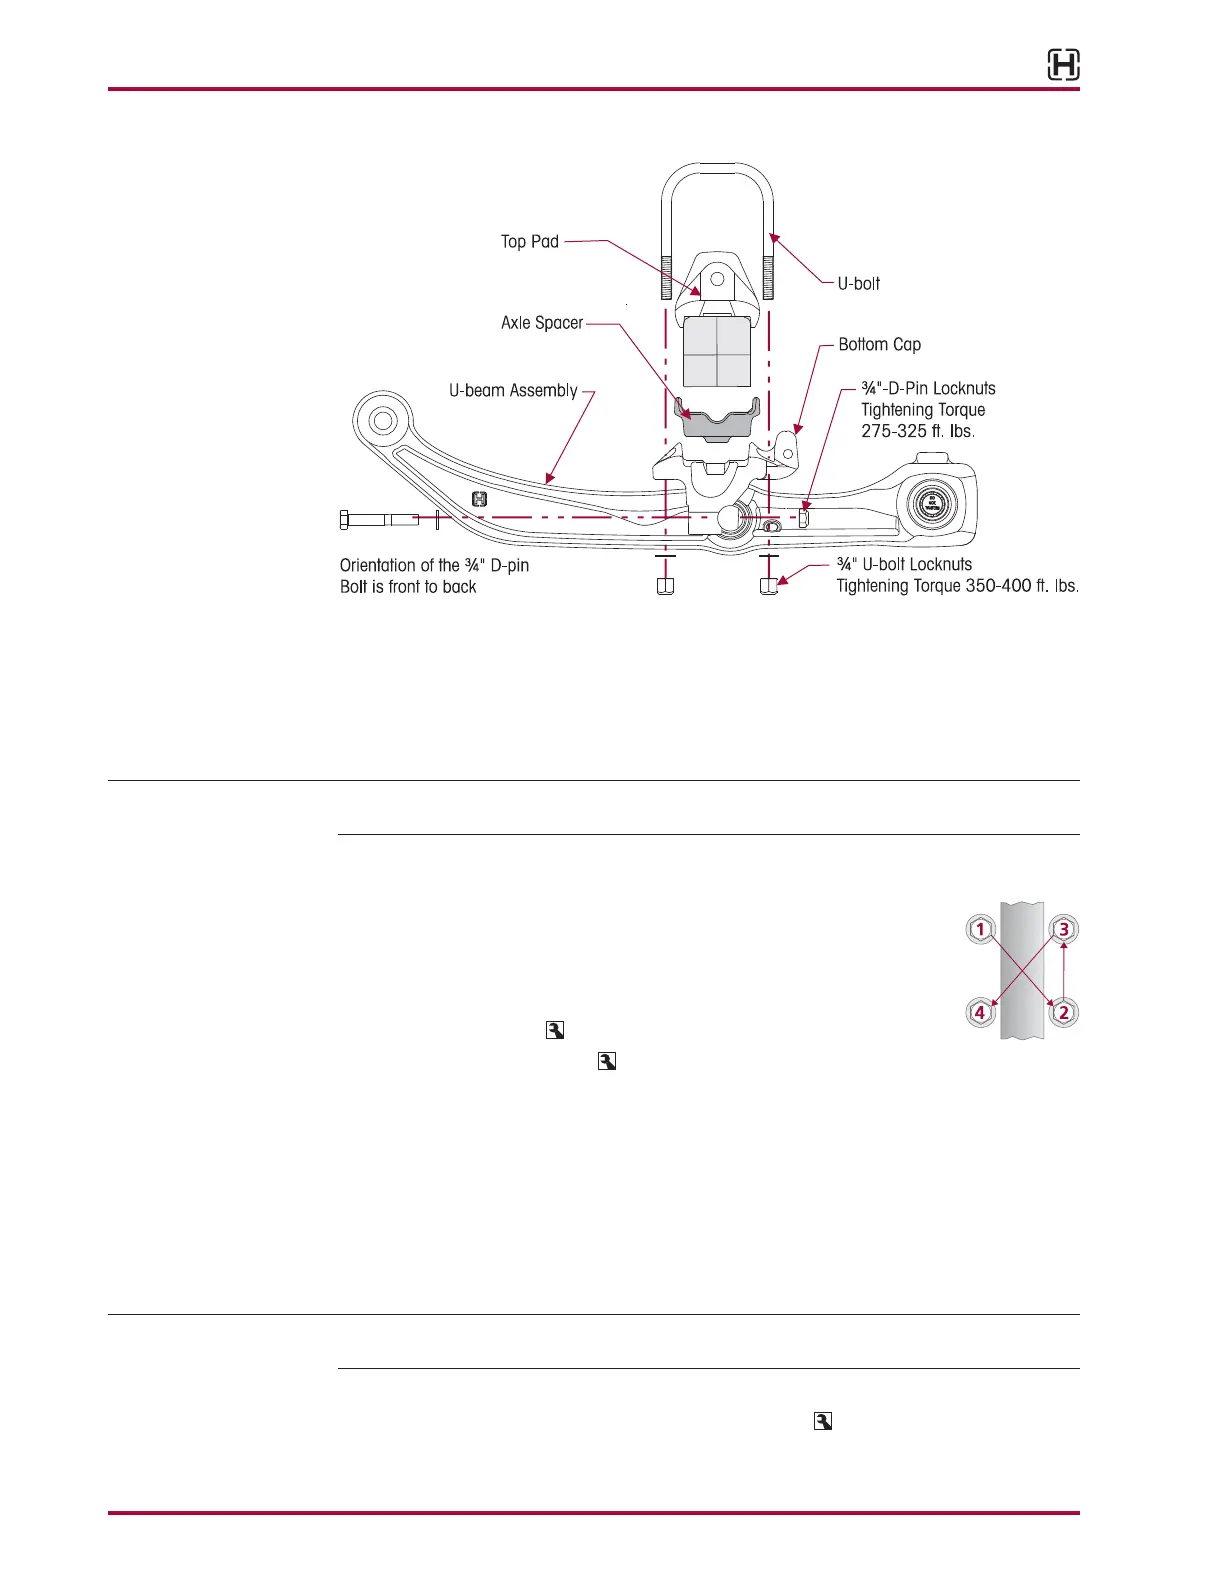
FIGURE 8-30
ASSEMBLY
1. Install the top pad on the top of the axle engaging the dowel pin. Care should be taken to
ensure the thicker ear of the top pad is mounted to the inboard side of the suspension, see
Figure 8-29.
2. Install new U-bolts, washers, and locknuts.
NOTE Current Hendrickson U-bolt locknuts for the PRIMAAXEX / PRIMAAX suspension are ¾"-16 UNF
Grade C and are phosphate and oil coated.
3. Verify that the U-bolts are seated properly in the channels of the top pad.
FIGURE 8-31
4. Tighten the U-bolt locknuts evenly in 50 foot pounds increments in the
proper pattern to achieve uniform bolt tension, see Figure 8-31.
5. Rap the top of the U-bolts with a dead blow mallet, and retighten to the
proper torque. DO NOT exceed specified torque on U-bolt locknuts. Tight-
en the ¾" locknuts to
350-400 foot pounds torque.
6. Tighten the ¾" D-pin bolts to
275-325 foot pounds torque, if loosened or removed during
disassembly, see Figure 8-30.
7. Remove the support from the support beam assembly.
8. Install the through bolt on the longitudinal torque rod, DO NOT tighten at this time
9. See additional Air Spring Cautions and Warnings in the Important Safety Notice Section of
this publication prior to deflating or inflating the air system.
10. Connect the leveling valve link rod(s) to the height control valve arm(s) to Inflate the
suspension.
11. Remove the frame stands.
NOTE It is mandatory to have the vehicle at proper ride height prior to tightening the
7
/
8
" top pad
through bolt locknut to torque specifications.
12. Ensure the vehicle is at proper ride height.
13. Tighten the longitudinal torque rod through fasteners to
525-575 foot pounds torque.
14. Remove the wheel chocks.