PRIMAAX
®
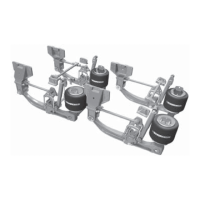
EX / PRIMAAX
®
for Volvo Vehicles
Component Replacement 52 17730-254
NOTE Use a new support beam QUIK-ALIGN Bolt Kit (see Parts List Section of this publication) for
any axle alignment or disassembly of the QUIK-ALIGN connection. This ensures that the proper
clamp load is applied to the connections, so that the joints will not slip in service.
3. Install the new QUIK-ALIGN collars with the eccentric collar on the outboard side of the ve-
hicle, see Figure 8-37, and the new mounting hardware that attach the support beam to the
frame hanger. Verify that the nose of each QUIK-ALIGN collar is installed correctly into pivot
bushing sleeve, and the flanged side is flat against the frame hanger face within the align-
ment guides. Snug QUIK-ALIGN locknuts to
100 foot pounds torque.
4. Install the torque rod mounting fasteners and reinstall any shims that were removed during
disassembly. Tighten fasteners as per vehicle manufacturer’s specifications.
5. See additional Air Spring Cautions and Warnings in the Important Safety Notice Section of
this publication prior to deflating or inflating the air system.
6. Connect the leveling valve link rod(s) to the height control valve arm(s) to Inflate the
suspension.
7. Remove the support from the support beam assembly.
8. Verify that the axle is in proper alignment. See Alignment & Adjustments Section of this
publication.
NOTE It is mandatory to have the vehicle at proper ride height prior to tightening the 1.0" QUIK-ALIGN
locknuts to torque specifications.
9. After the correct alignment of the axle is verified tighten the 1" QUIK-ALIGN locknuts to
525-575 foot pounds torque.
10. Verify the correct pinion angle on the axle per original equipment manufacturers
specifications. Adjust as necessary per the Alignment & Adjustments Section of this
publication.
11. Remove the chocks from the front wheels.